How to Import Outlook Data File to Office 365?
Office 365 stands out the best when it comes to professional email service and Outlook is one of the most widely used email client applications with approximately 400 million users worldwide. But there is a problem with the Outlook data file that you can’t open it other than Outlook. Whereas Office 365 stores its data on the cloud and can be opened anytime. Therefore, many users have asked this query “How to import Outlook data file to Office 365?” on various forums and that’s why we are going to cover the easiest and simplest approaches in this blog. Go through this article to know more.
How do I Import Outlook data into Outlook 365?
Lots of users use Outlook applications to manage their day-to-day personal tasks. At times, they use Outlook data file(.pst) as a backup copy which contains all emails, contacts, calendars, etc. However, this creates a challenge for users who don’t have Outlook to access Outlook data file due to its compatibility. That’s why, many users are searching for a method to import Outlook data file to Office 365 which is a web-based email service.
Also, Office 365 is the best email service if users are looking to open Outlook data file in Office 365.
Methods to Import Outlook Data File to Office 365
The following article has discussed two useful approaches to import Outlook data file to Office 365 account. Let’s take a look at them one by one;
How to Open Outlook Data File in Office 365?
After various research, we have found a manual solution that users can use to add Outlook data file to Office 365 account. This is an extremely easy-to-implement approach but you must have an Outlook application.
Follow the simple steps to import Outlook data file to Office 365;
First of all, you have to configure Office 365 account with Outlook. Then you can import Outlook data file to Office 365 directly.
Steps to Add Office 365 to Outlook
- Open Outlook and go to the File tab.
- Tap on the “Account settings” and choose “Account settings”.
- Enter the Office 365 email address and click Connect.
- Provide the Office 365 account password and tap Connect.
Now, Outlook will test all the entered details and let you confirm that your Office 365 account has been successfully added.
Steps to Import Outlook Data File to Office 365
- Run the Outlook email client and click the File tab.
- Tap Import & Export and choose the Import/Export option.
- Choose import from another program or a file.
- Select Outlook data file and click Next.
- Browse the PST file and click Next.
- Choose the required folders of the Office 365 account and click Finish.
Done!! In this way, you can manually import Outlook pst file to Office 365 account.
However, while using this method, we have encountered various challenges that users must be aware of to avoid any kind of issues.
- Lengthy process and need to follow 2 major steps.
- Requires Outlook installation to use this method.
- Doesn’t offer selective email folder selection.
- May not be useful if import export is greyed out in Outlook.
To overcome the above limitations of the manual solution, the below method is recommended by the experts.
How to Move Outlook Data File to Office 365?
Advik Outlook PST Converter is the best technique to directly import Outlook data file to Office 365 with attachments. The application contains an intuitive and simple GUI that is equipped with a friendly environment. With this tool, you can open PST file in Office 365 while maintaining the complete folder hierarchy. Also, you will get a “Batch Mode” feature to load multiple Outlook data files in a single attempt. Overall, it is the best utility to upload Outlook data file (.pst) to Office 365 without Outlook.
Moreover, the tool also migrate data from PST to Gmail, Yahoo Mail, Zoho Mail, AOL Mail, iCloud, Outlook.com, etc. The best part of this tool is that the whole process can also be tested using the FREE download version.


Steps to Import Outlook Data File to Office 365 are as follows;
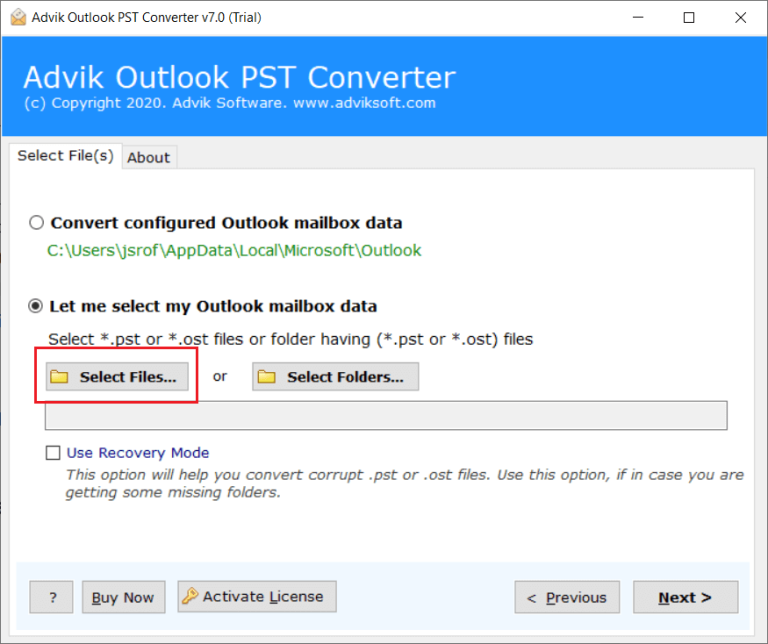
- Run Advik PST Converter and click Add Files.
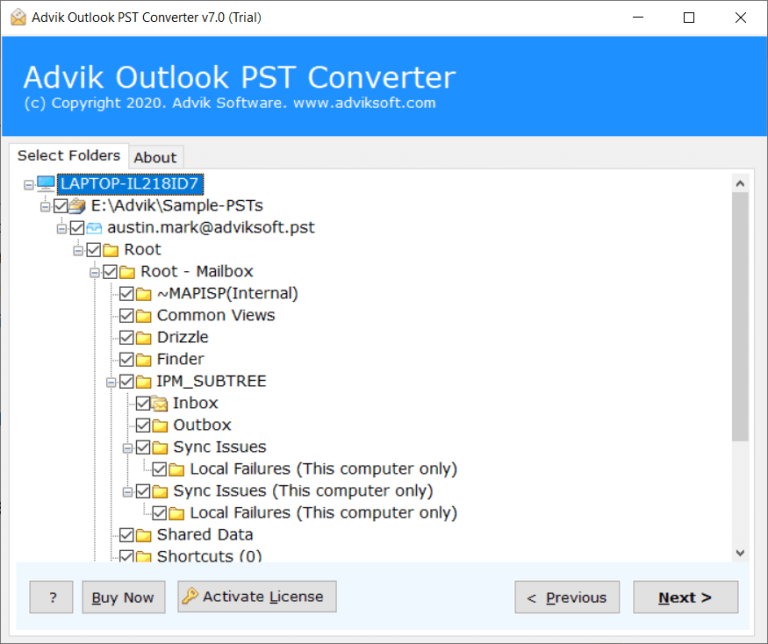
- Select the required email folders from the list.
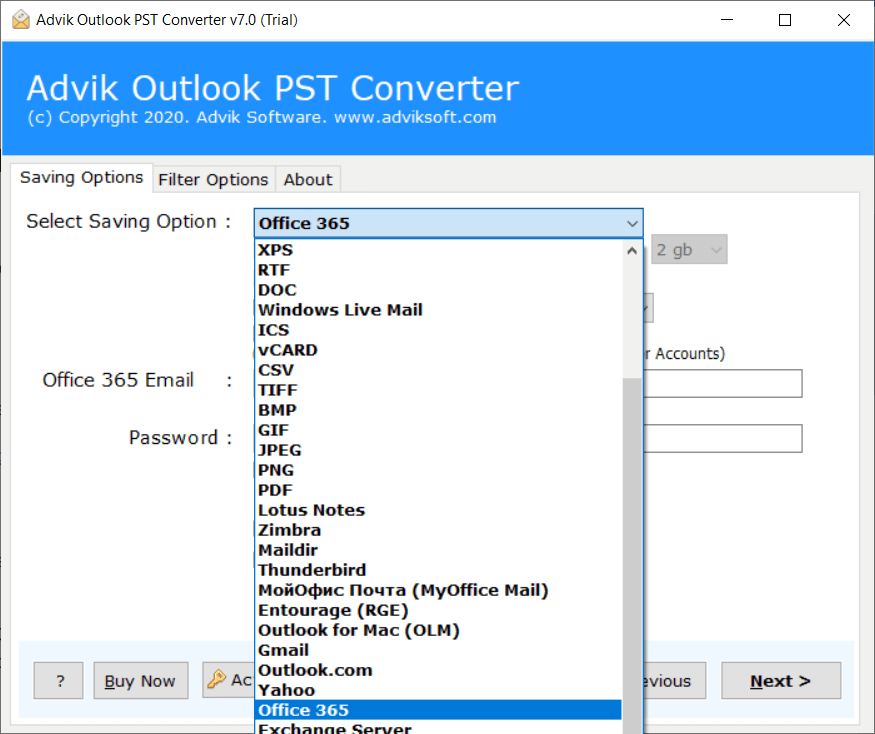
- Choose Office 365 as a saving option.
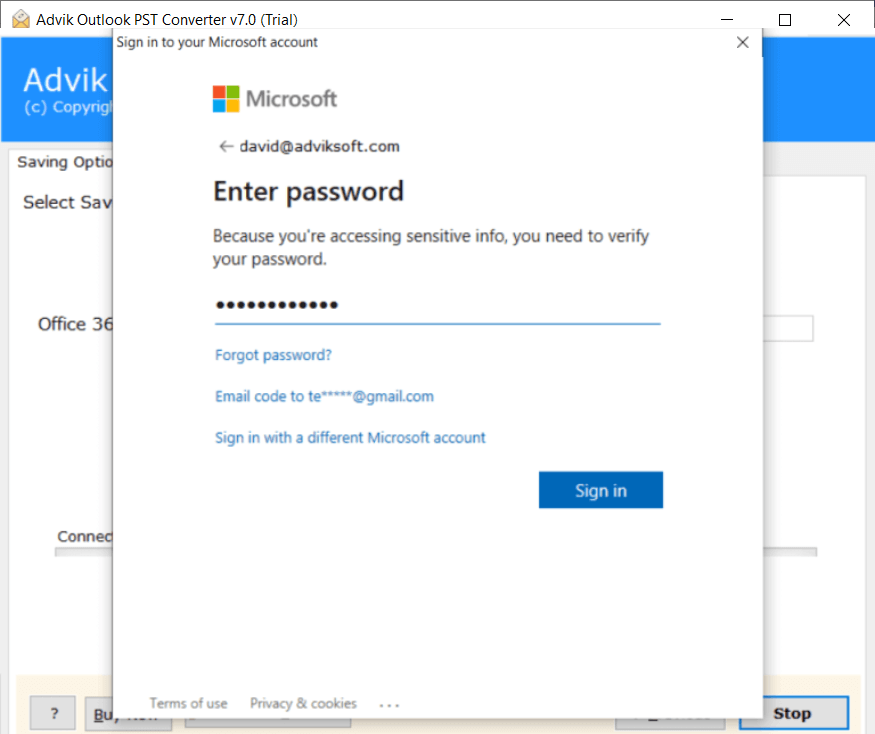
- Enter Office 365 email account credentials.
- Finally, press the Convert button to start.

Done!! The tool will display the Live email migration report. Login to your Office 365 account and check all of the imported Outlook data files there.
Watch How to Import Outlook Data File to Office 365
Reliable Features of Advik PST to Office 365 Migration Tool
- Supports Direct Migration: The tool only requires Outlook data files and your Office 365 account credentials and the rest of the steps will be done by the software itself. As the tool is automated it performs the required steps in a specified manner.
- 30+ Saving Options: Apart from migrating Outlook data file to Office 365, the tool also offers other options to export Outlook data file; such as that you can convert PST to PDF, EML, MSG, DOC, HTML, MBOX, and many others.
- Batch Import Outlook PST File: The utility allows users to upload multiple Outlook data file to Office 365 account in a single attempt. With dual options to upload PST to Office 365, it’s easy to access an unlimited number of files without any issues.
- Easay-to-Use Interface: The GUI of the tool is very easy and simple to use. The interface of the application is designed to keep technical and non-technical users so that anyone can access it easily. By just navigating a few easy clicks, users can effortlessly complete the whole task.
- Windows Compatibility: The application can be extensively used on any version of Windows OS. It includes Windows 11, Windows 10, Windows 8, Windows 8.1, Windows 7, Windows XP, Windows Vista etc.
Final Words
In this blog, we have gone through the two easy and simple approaches will smoothly migrate Outlook PST file to Office 365 account. Both the methods are useful in their own place but if you want to quickly import Outlook data file to Office 365 and also error-free then the automated approach is the most recommended solution. Also, any one can use this tool without any technical skilss.
Related Articles