How to Import PST to Office 365 Account? Top 3 Ways
Jenny Lowrence | November 15th, 2024 | Email Migration, Office 365
Summary: If you’re looking to import PST file to Office 365, you’ve come to the right place. This guide will walk you through the entire process of importing PST files to Office 365 email account. Whether you’re dealing with a single file or large volumes of data, we’ll cover methods to make this transition smooth and straightforward. Let’s go through this article without any further delay.
Importing PST files to Office 365 ensures all emails, contacts, and calendar items are accessible from anywhere. Also, users get leverage of Office 365’s advanced security and collaboration features. This centralizes your data to manage and secure easily. Thus, there could be other reasons that force users to switch to Office 365 depending upon the user’s specific needs.
Now are going to learn how to upload PST file in Office 365 archive folder safely. Below are a few workable solutions discussed. Follow this detailed guide to simplify the process and avoid common issues.
Methods to Migrate PST to Outlook 365 Webmail
- Manual Method via Outlook: Add Office 365 account, and import PST using the Import/Export wizard.
- Network Upload Method: Use Azure Storage Explorer and AzCopy tool, upload and map files.
- Automated Tool: Use AdvikSoftware for a easy & bulk import process.
Go through each one of them and choose the best solution that fits your needs and requirements.
How to Import PST to Office 365 Manually Free?
- Click on File and choose Add Account.
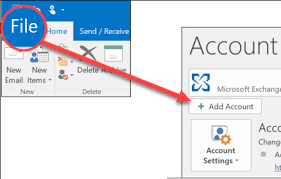
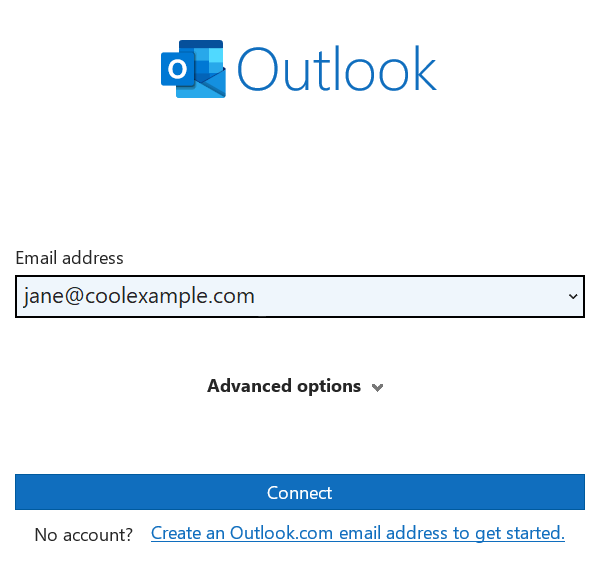
- Enter your Office 365 webmail account and click Connect.
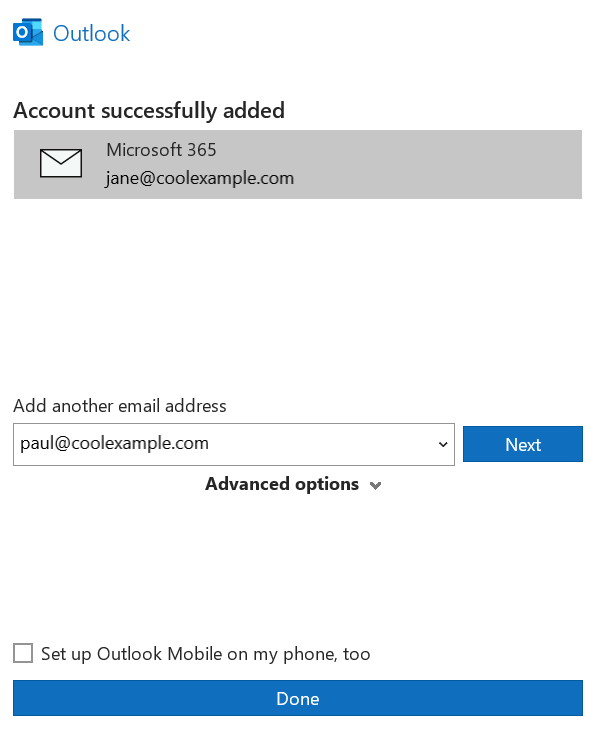
- Type in the password for your Microsoft 365 account and click Sign In.

- Follow the instructions to set up your account and click OK when you’re done.
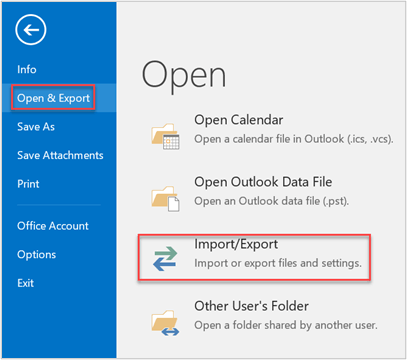
- Again, open Outlook on your computer and go to File.

- Click Import/Export to open the Import and Export Wizard.
- Choose Import from another program or file and click Next.
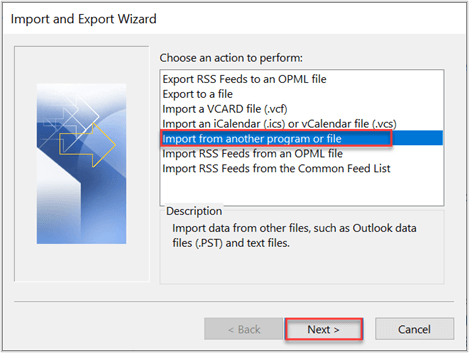
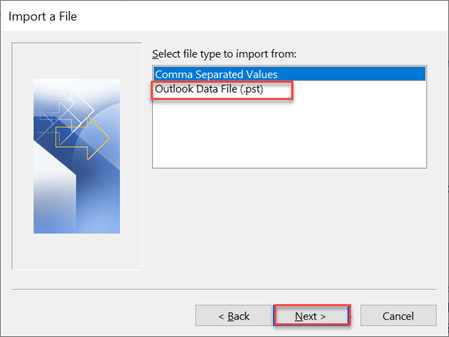
- Select Outlook Data File (.pst) and click Next.
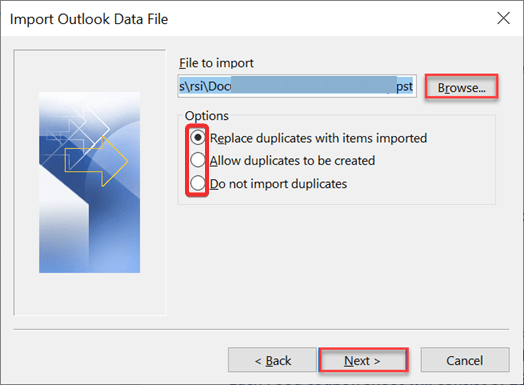
- Click browse to find the PST file select options; click Open.
- Choose the folders of PST files and click Finish.
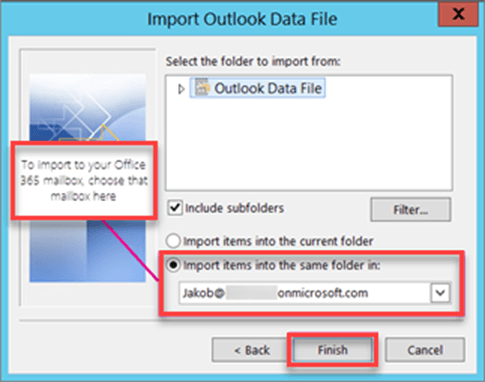
Finished!! You just need to follow these simple steps to import Outlook data file to Office 365 webmail account directly.
Drawbacks
- Outlook is a paid email client application that will charge a subscription fee.
- Requite to have IMAP server settings knowledge to set up Office 365 account in Outlook.
How to Import PST File to Office 365 Webmail?
This method is offered by Microsoft itself to help administrators open PST file in Office 365 account. However, the whole method is lengthy and complex that’s why we have divided it into 4 major steps to ease the whole process.
Before proceeding with this method, you have to be assigned the Mailbox Import Export role in Exchange Online to create import jobs.
Step 1. Create a SAS URL
The SAS URL is used to temporarily store PST files in Azure Blob Storage before importing them into Office 365.
- Log in to your Office 365 account and navigate to the Compliance Center.
- Go to Data Lifecycle Management under Microsoft Purview.
- In the Overview section of Data Lifecycle Management, select Import.
- Click +New Import Job and provide a name for the job.
- Choose the option to Upload your data, then click Next.
- Select Show network upload SAS URL to generate the SAS URL.
- Copy the SAS URL for use in the next steps.
Step 2. Download and Use the Azure AzCopy Tool
Azure AzCopy is a command-line tool used to upload PST files to Azure Blob Storage.
- Visit the official Microsoft website and download AzCopy based on your system’s specifications.
- Unzip the downloaded ZIP file to extract the executable.
- Open the command prompt and navigate to the AzCopy executable file location using the cd command:
cd <Path-to-AzCopy> - Use the following command to upload PST files to Azure Blob Storage:
azcopy.exe copy “<Local-PST-File-Path>” “<SAS-URL>” –recursive=true - Replace <Local-PST-File-Path> with the location of your PST files and <SAS-URL> with the generated SAS URL.
- Once the upload is complete, go back to the Compliance Center and select I’m done uploading to proceed.
Step 3. Generate and Upload the Mapping File
The mapping file specifies which PST files should be imported into which mailboxes in Office 365.
- Download the PST import mapping file template from Microsoft’s official link.
- Open the template in Microsoft Excel.
- Fill in the required details, such as:
Workload: Use “Exchange”.
FilePath: The path of the PST file in Azure Blob Storage.
Mailbox: The target Office 365 mailbox email address.
IsArchive: TRUE for archive mailboxes or FALSE for primary mailboxes. - Go to File > Save As and select the format CSV UTF-8 (Comma Delimited).
- Return to the Compliance Center in Office 365.
- Upload the CSV file in the Import Data section by selecting Upload File.
- Validate the mapping file by clicking Validate. If the validation is successful, click Next.
Step 4. Filter and Submit the Import Job
You can filter the data to be imported or import everything based on your preferences.
- In the Import Data window, select the uploaded PST files.
- Choose to import filtered data or import everything.
- Click Submit to initiate the import process.
- You’ll see a message indicating the size of the PST file being imported.
- Wait for the PST analysis to complete. The process may take a few hours depending on the file size.
- Once done, you’ll receive a success notification.
Limitations of Using Network Upload Method;
- The Network Upload Method is a complex and time-consuming process with multiple steps.
- It requires technical knowledge to manage each stage.
- There’s a 20 GB limit for importing PST files into Microsoft 365.
- Using PowerShell for importing PST files can be tricky and may cause data corruption.
- The process is not instant, so patience is needed to complete the import into an Office 365 shared mailbox.
Therefore, to overcome the challenges of the manual solutions we have described the best way to import PST to Office 365 Webmail. It is the best-recommended approach that seamlessly solves all the problems faced by manual methods and provides an instant way to complete the process.
How to Import PST file to Office 365 Online Securely?
Download and install the Advik PST Converter in your local system. This software is specially designed to transfer PST to Office 365 email account. It will directly export PST emails into Outlook Online with attachments. Thus, no data loss will take place. The software will maintain folder hierarchy and email attributes in the same format.
Click below to download this software for free.
Note: The freeware or trial edition will migrate 25 emails for free.
Steps to Transfer PST to Office 365 Webmail
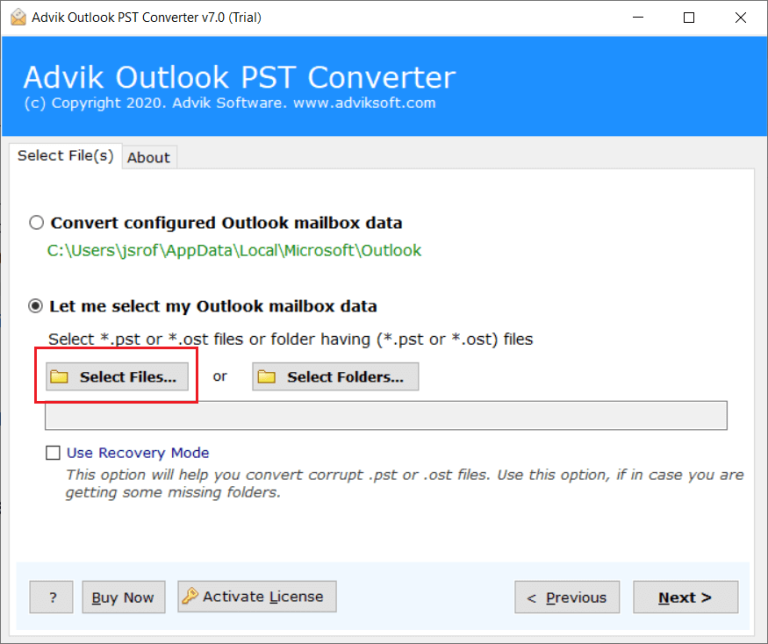
1. Run PST to Office 365 Tool and click Select Files to add PST file.
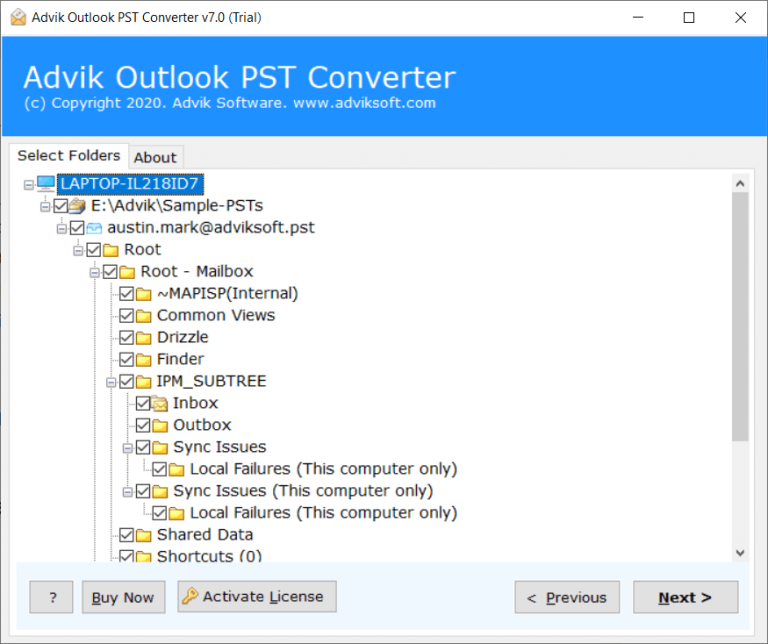
2. Select PST file mailbox folders and click Next.
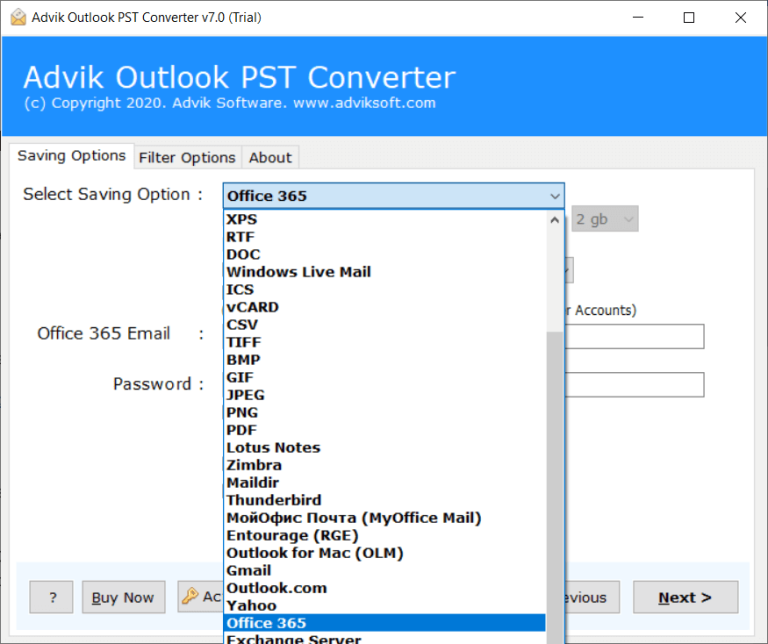
3. Select Office 365 as a saving option from the list.
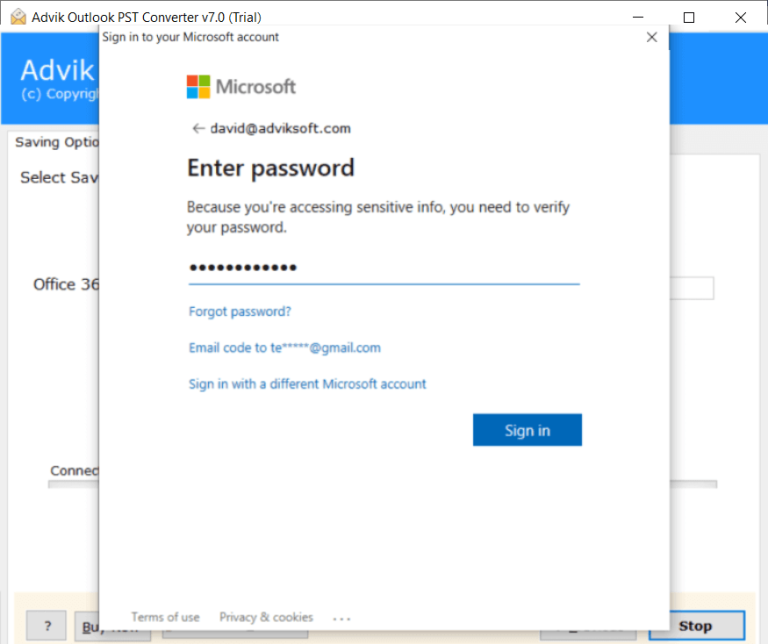
4. Enter your Microsoft 365 account credentials in the respective field.
5. Press the Convert button to initiate the process.
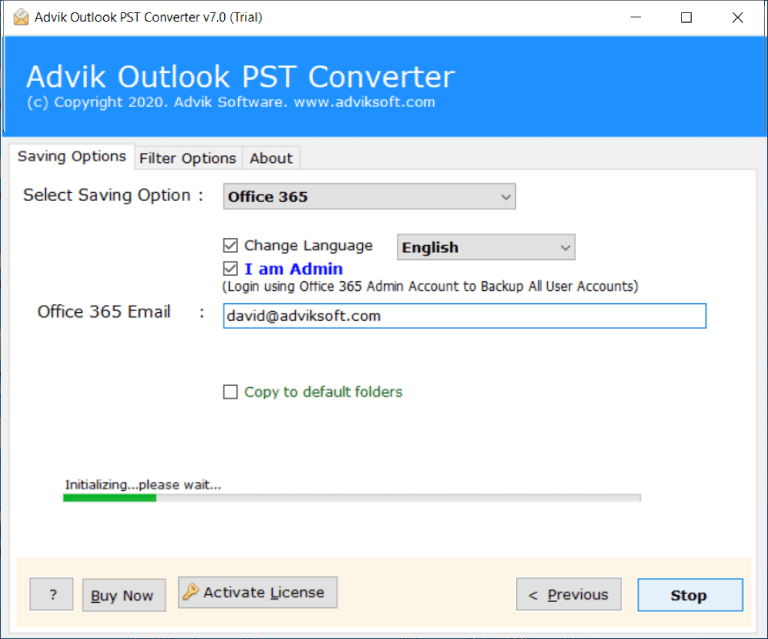
Done!! The software will start transferring emails from PST into Office 365 automatically. Once done, open your Office 365 Webmail account and find your emails in the AdvikSoft Label folder.
Watch How to Upload PST File to Office 365
In addition, the software does more than that. Below are the additional benefits you will get from this software.
- Fully Automated and user-friendly software.
- Requires only your Hotmail login details (email and password).
- Imports PST files to Office 365 with complete mailbox folder items.
- No size or quantity limits based on your license.
- Lets you select specific folders for the import process.
- Automatically adds PST files or lets you browse and add from any location.
- Offers advanced filters to transfer PST emails to O365 selectively.
- It works well with all versions of MS Outlook and Windows OS.
Comparison Table: Manual vs. Automated Methods
| Aspect | Manual Method | Automated Solution |
|---|---|---|
| Ease of Use | Requires technical knowledge | User-friendly with step-by-step guidance |
| Time Required | Time-consuming | Faster, especially for large PST files |
| Accuracy | Prone to errors | High accuracy with professional tools |
| Data Integrity | Possible data loss or corruption | Maintains data integrity |
| Batch Processing | Limited | Supports multiple PST files |
Final Words
Thus, the blog with 3 different solutions to attach PST file to Outlook 365 comes to an end. We hope that we were able to provide you with the best approaches to import Outlook PST to Office 365 account. You can use any of these methods as per your needs and convenience. However, two of them are a bit lengthy and require some technical assistance. Hence, it is advised to choose only if you have the proper knowledge to avoid data loss.
Frequently Asked Questions (FAQs)
Q1. Can I upload PST to Office 365 without Outlook?
Ans. Yes, you don’t need to use Outlook or any external application to import PST to Office 365 account. The software is a standalone utility that doesn’t require the assistance of any other.
Q2. Is it possible to Import PST Contacts along with Emails to Office 365. ?
Ans. Of course, this tool allows you to import PST contacts to Office 365 account in just a few simple steps.
Q3. I have multiple PST files to import into Office 365, Can I do this with this tool?
Ans. Yes, the program offers dual ways to the best way to import PST to Office 365 in batch.
Q4. Is it possible to transfer only specific emails and exempt the unwanted emails?
Ans. Yes, the software has an Advance Filter option. You can apply email filters according to your requirements.
Q5. What are the limitations of PST migration in Office 365?
Ans. You can upload and import PST files up to 20 GB. Moreover, you need lots of permission to complete the import process.

