How to Import PST to Shared Mailbox Office 365 Account?
Are you struggling to import PST to Shared Mailbox Office 365 account? Don’t panic, you’re not alone. Many users face issues in migrating emails from PST file to Shared Mailbox. This blog explains three simple ways to complete the importing process. By the end of this guide, you’ll have a clear understanding of how to import PST file to Shared Mailbox in Office 365 easily.
Microsoft Office 365 provides shared mailboxes that allow multiple users to access and manage emails collectively. However, importing a PST file into a shared mailbox is not as straightforward as importing it into a user or admin mailbox. Unlike a regular mailbox, a shared mailbox doesn’t have direct login access, which makes the import process different.
Let’s understand this issue in more detail, then we will proceed toward understanding the methods.
Challenges of Importing PST into Shared Mailbox
Importing a PST file into a shared mailbox is not the same as importing it into an admin or user mailbox because:
- No Direct Login Access: A shared mailbox does not have a password, so you cannot log in directly like an admin mailbox.
- Permissions Required: You must assign full access to a user before they can import data into the shared mailbox.
- Outlook Limitations: While Outlook allows importing PST files into regular mailboxes, it does not provide a built-in way to import directly into a shared mailbox.
- Office 365 Import Service Considerations: While Microsoft provides a PST Import Service, mapping a shared mailbox during the process requires additional configurations.
Due to these limitations, importing a PST into a shared mailbox requires a different approach, which we will discuss below.
How to Import PST File to Office 365 Shared Mailbox via Outlook?
Follow the below steps to upload PST to Shared Mailbox Office 365.
- Launch Microsoft Outlook on your PC.
- Add or Configure your Office 365 email account.
- Ensure that you have the necessary permissions to import PST files to the shared mailbox.
- Click on the “File” tab in the Outlook ribbon.
- Select “Open & Export” from the left-hand menu.
- Choose “Import/Export” from the options.
- In the Import and Export Wizard, select “Import from another program or file” and click “Next.”
- Choose “Outlook Data File (.pst)” and click “Next.”
- Click on the “Browse” button and locate the PST file you want to import.
- Make sure to select the shared mailbox as the destination for the imported data.
- Click “Finish” to start the import process.
- Outlook will display the progress of the import operation.
- Once the import is complete, you can access the imported data within the shared mailbox.
Limitations and Drawbacks
- Steps may vary depending on the version of Outlook
- Need the necessary permissions to import PST files to the shared mailbox.
- Outlook may have limitations on the size of the PST file that can be imported.
- Won’t work if import export option is greyed out in Outlook
How to Import PST to Shared Mailbox Office 365 Powershell?
To import PST to shared mailbox using PowerShell, you can make use of the New-MailboxImportRequest cmdlet. Here’s an example of how you can accomplish this:
# Import the Exchange PowerShell module
Import-Module ExchangeOnlineManagement

# Connect to your Exchange Online organization
Connect-ExchangeOnline -UserPrincipalName <YourUPN> -ShowProgress $true

# Set the shared mailbox name and the path to the PST file
$sharedMailbox = "shared-mailbox@example.com"
$pstFilePath = "C:\Path\to\your\PST\file.pst"

# Create a new mailbox import request
New-MailboxImportRequest -Mailbox $sharedMailbox -FilePath $pstFilePath -TargetRootFolder "Inbox" -Name "PST Import" -BadItemLimit 10

# Monitor the progress of the import request
Get-MailboxImportRequest | where {$_.Name -eq "PST Import"} | Get-MailboxImportRequestStatistics

# Wait for the import request to complete
while ((Get-MailboxImportRequest -Mailbox $sharedMailbox -IncludeReport).Status -like "Queued" -or (Get-MailboxImportRequest -Mailbox $sharedMailbox -IncludeReport).Status -like "InProgress") {
Write-Host "Waiting for import to complete..."
Start-Sleep -Seconds 30
}

# Get the final import request status
Get-MailboxImportRequest | where {$_.Name -eq "PST Import"} | Get-MailboxImportRequestStatistics
Make sure you have the Exchange Online PowerShell module installed before running this script. You can install it using the following command:
Install-Module -Name ExchangeOnlineManagement
Replace <YourUPN> with your User Principal Name (e.g., your email address) and update the $sharedMailbox variable with the email address of the shared mailbox you want to import the PST file into. Set the $pstFilePath variable to the path of the PST file you want to import.
The script creates a new mailbox import request, monitors its progress, waits for the import to complete, and then retrieves the final import request status.
Note: You will need the necessary permissions to import PST files to Office 365 account with shared mailbox.
How to Migrate PST to Shared Mailbox Office 365 Automatically?
Download, install, and run the Advik PST Converter on your PC. This software can help you transfer emails from PST file into shared mailbox in Microsoft 365 email account directly. Also, you can import PST to Shared mailbox Office 365 in bulk. During importing, it will maintain the folder and sub-folder hierarchy. You can choose selective emails based on various filters, such as to, from, cc, bcc, attachments, etc.
Now, click on the FREE download button and check its working procedure.

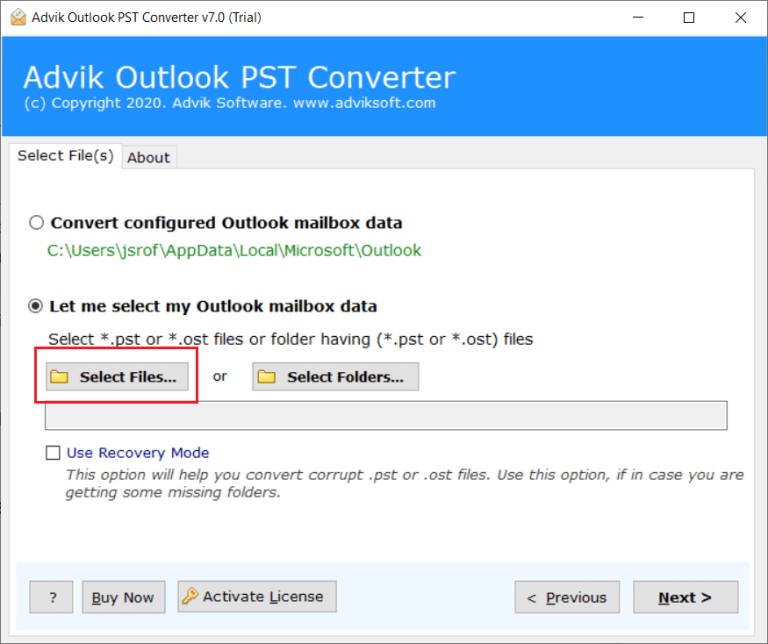
Steps to Import PST File to Shared Mailbox Office 365
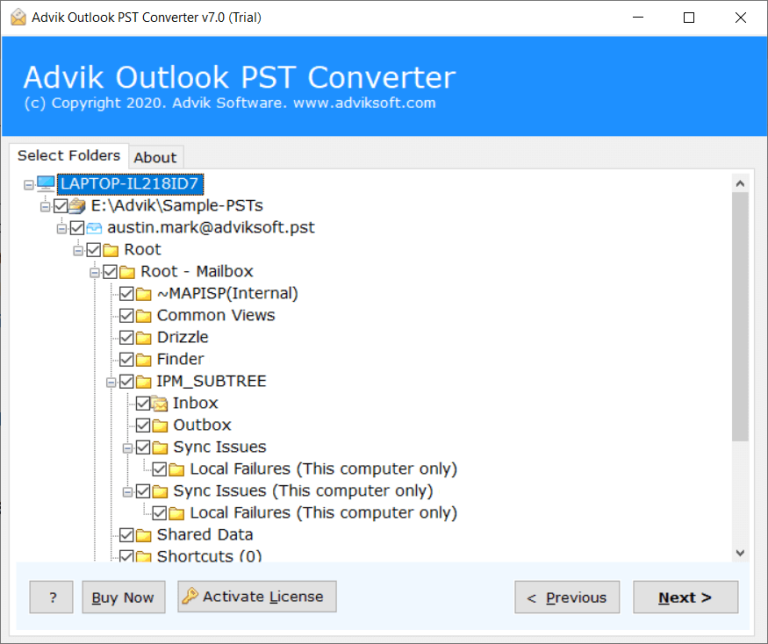
Step 1. Run the software and add the PST file.
Step 2. Select email folders from PST file and click Next button.
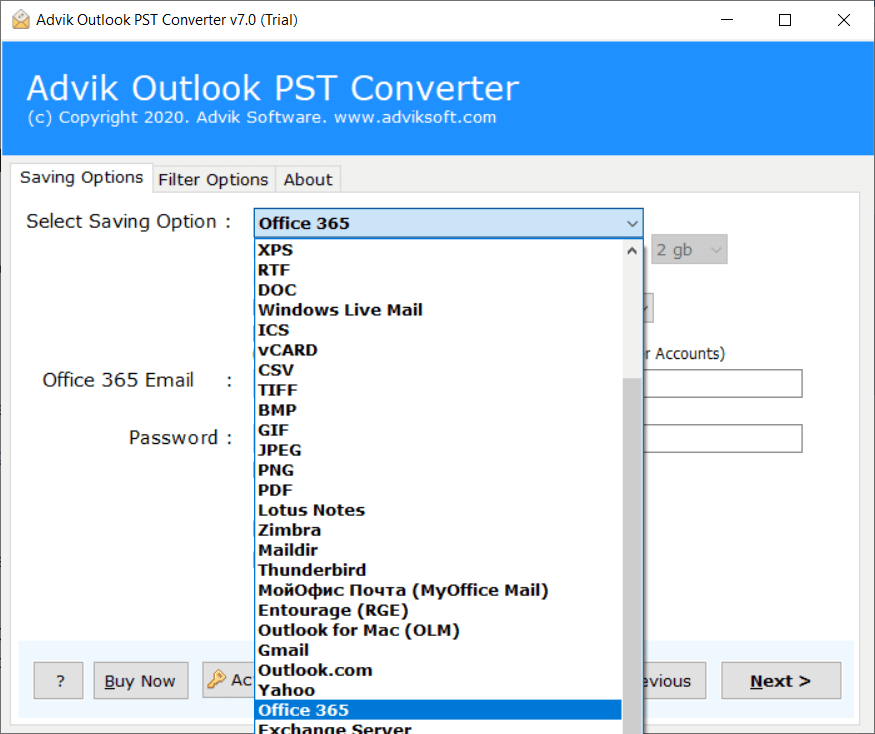
Step 3. Now choose Office 365 as a saving option.
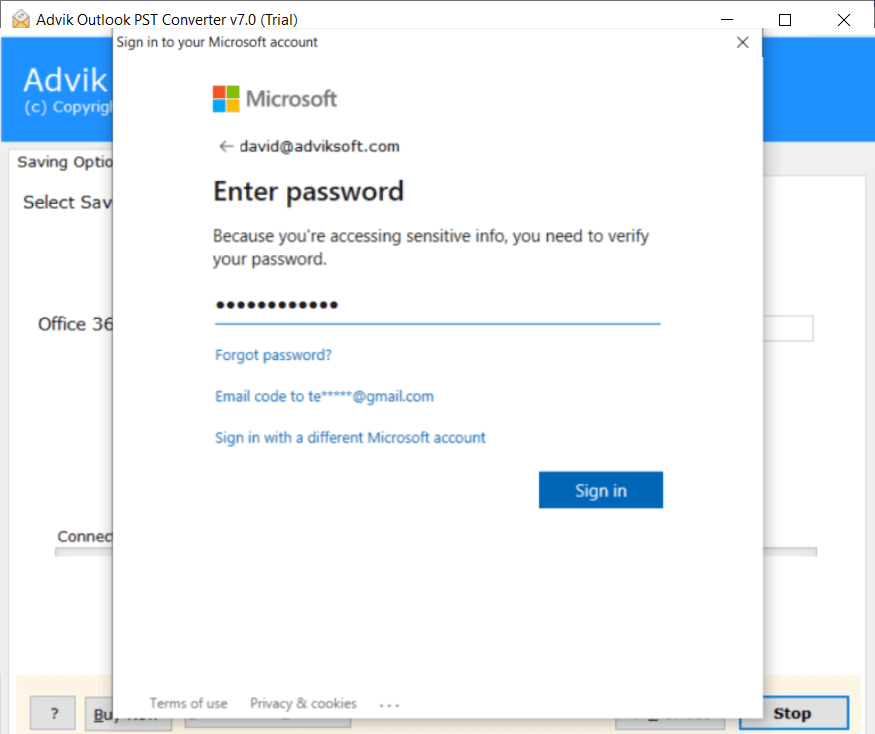
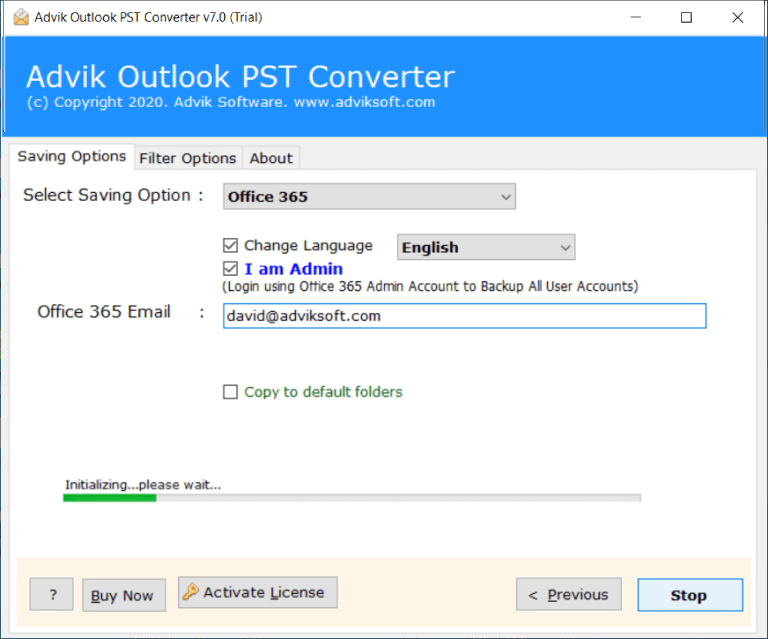
Step 4. Enter Office 365 email account credentials & click sign in.
The software will transfer emails from PST file to shared mailbox account in a few simple steps.
Done! The software will move emails from Outlook PST into Shared Mailbox with attachments.
Watch How to Upload PST to Shared Mailbox Office 365
Benefits of Using Automated Solution Over Manual Methods
With this tool, there are various outstanding features –
- Allow to import PST file to Shared mailbox Office 365 in bulk.
- Advanced filters to transfer selective emails.
- Option to import PST to Exchange Online Mailbox as well.
- Import corrupted or password-protected PST file to Office 365 shared mailbox.
- Supports PST file from all Outlook email client versions.
- Provides a date-range filter to transfer only selected PST file to shared mailbox account.
- Maintains file structure and folder hierarchy during the PST to Shared mailbox import process.
- Transfer PST file to shared mailbox with complete email folder and all attachments.
Conclusion
In the end, there are various methods to import PST to shared mailbox Office 365. We had discussed the PowerShell method along with Outlook and third-party tool. Now you can decide which of the given solutions will be helpful for you to complete the import process.
Frequently Asked Questions
Q 1. Does this software allow users to import emails to a user’s Office 365 account?
Ans. Yes, you can easily import PST files to a user’s Office 365 account. If you have an admin account, enable the “I Am Admin” option.
Q 2. Can I import PST to Office 365 shared mailbox in bulk?
Ans. Yes, the software provides dual ways to load PST file and folders that you can use to import multiple PST files in a single attempt.
Q 3. Is it possible to upload specific folders from my PST file to shared mailbox Office 365?
Ans. Yes, using the mentioned automated software in this article you can do so. The email filter feature will let you choose email selectively based on specific date ranges, to, from, cc, bcc, etc.
Q 4. Can I try a trial version before buying it?
Ans. Yes! Adviksoft offers a FREE demo version that you can use to import 25 emails from each PST folder to shared mailbox account.
Q 5. Is There a Size Limit for PST Files Imported into a Shared Mailbox?
Ans. Yes, there is a size limit when importing PST files into a shared mailbox in Office 365. The maximum mailbox size depends on your Office 365 plan. By default, shared mailboxes have a 50 GB storage limit, but this can be increased to 100 GB with an Exchange Online Plan 2 license. However, with the help of automated software, you can easily upload PST files of any size without any issues, as long as there is enough space in your shared mailbox account.
Related Articles