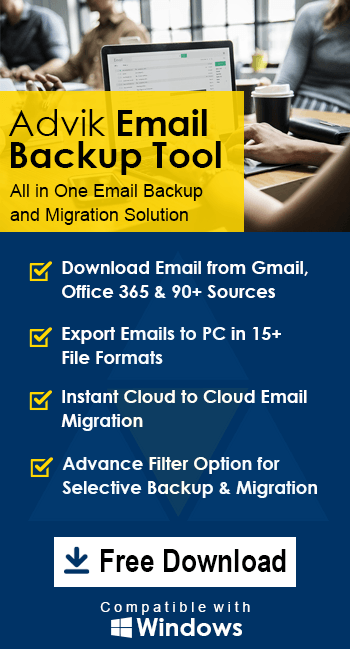
How to Add Westnet Email to Outlook Application?
Jackson Strong | June 6th, 2023 | Data Backup
Summary: Want to export emails from Westnet to PST? Looking for an effective and trouble-free utility to add Westnet email to Outlook on Windows OS? No worries anymore! Go through this article that is specially designed to help you quickly import Westnet emails in Outlook with attachments in just a matter of seconds.
But, at first, let us understand Westnet and Outlook in brief and then we will proceed to a solution.
Overview of Wesnet and Outlook;
Westnet is a telecommunications company that offers a range of services including Broadband, Satellite Broadband, Dial-up, Telephony, and Web Hosting. It provides the direct accessibility of emails without installing additional email client application.
Outlook on the other hand is an email client application that is programmed by Microsoft that’s why it is the first choice of every email user. Apart from sending and receiving emails it has several other benefits that help users to communicate effectively. The biggest advantage of using Outlook is that you can access not only Westnet email but also many other email services at the same time. You will also get some amazing features like you can access calendars, contacts, tasks, notes along with emails. That’s why Westnet to Outlook migration is in demand these days.
Read Also: How to Backup cPanel Emails?
How to Add Westnet Email to Outlook Application? – Manual Solution
To add a Westnet email account to the Outlook application manually, follow these steps:
- Open the Outlook application on your computer.
- Click on the “File” tab located at the top-left corner of the Outlook window.
- In the File menu, select “Add Account” depending on your Outlook version.
- Now, in the new tab, enter your Westnet email address, and click on the Advance options to configure manually.
- Then, select IMAP or POP as per your email account settings.
- Now, in the IMAP account settings tab, enter the details of your Westnet email account as shown below; For incoming mail; IMAP server- Port No-993, and for Outgoing mail; SMTP server- Port No-465. And, choose the encryption method as SSL/TLS in both, and don’t forget to check the box against required login using secure password authentication (SPA) and then click on the Next button.
- After that, enter your Westnet email password in the respective field and click on the Connect button.
Now, Outlook will test the account settings and verify the connection with the Westnet email server.
Once the test is successful, click on the “Done” button.
Your Westnet email account is now added to the Outlook application, and you can start sending and receiving emails.
Read Also: How to Backup Gmail Emails With Attachments?
Limitations of the Manual Approach
- This solution seems simple but you need to have some basic knowledge to implement this process.
- Manually adding Westnet emails to Outlook takes a long time in the configuration process.
- Also, any wrong step in this process may lead to huge data loss in the syncing process.
How to Export Westnet Email to PST File?
Advik Email Backup Wizard is a solution that will help users directly add and access Wesnet emails in Outlook. The application is easy to use, cost-effective, and secure to export Wesnet emails to PST file format. It also allows users to backup Wesnet emails in more than 30+ saving options including EML, MSG, PDF, MBOX, HTML, PST, DOC, HTML, CSV, ICS, MHT, etc. With just a few direct clicks and applying the necessary options will help users to achieve the required task in a given time.
It also allows users to perform email migration processes from any email service to another email account such as that you can also import Gmail to Yahoo Mail, and export Wesnet to Outlook.com, Office 365, Zoho Mail, Zimbra Webmail, Rackspace, Yandex Mail, etc. Moreover, users with technical and non-technical skills can handle the tool effortlessly without any assistance.
However, one can take the help of this utility to check the working procedure and functioning of the tool for FREE without any issues;


Follow the Steps to Convert Westnet Emails to PST file:
Step 1. Install and run Advik Email Backup Wizard in your Windows system.
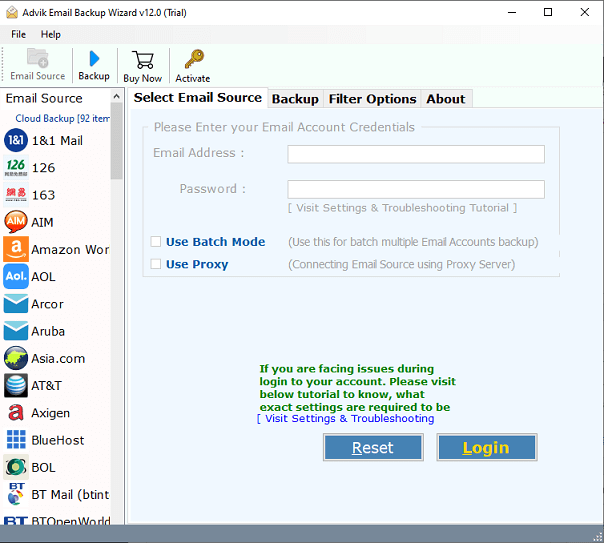
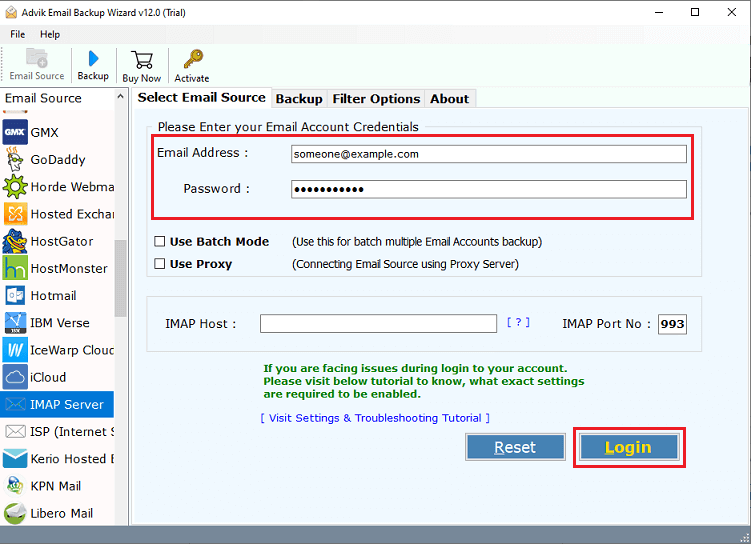
Step 2. Now, choose IMAP as an email source from the list and enter its credentials in the required fields. Then, tap on the Login button.
Step 3. Thereafter, this tool will start connecting with your Westnet email account and its mailbox will start listing on the left side.
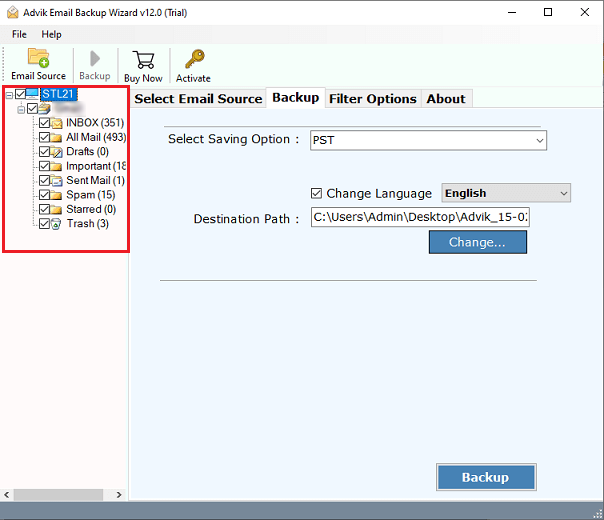
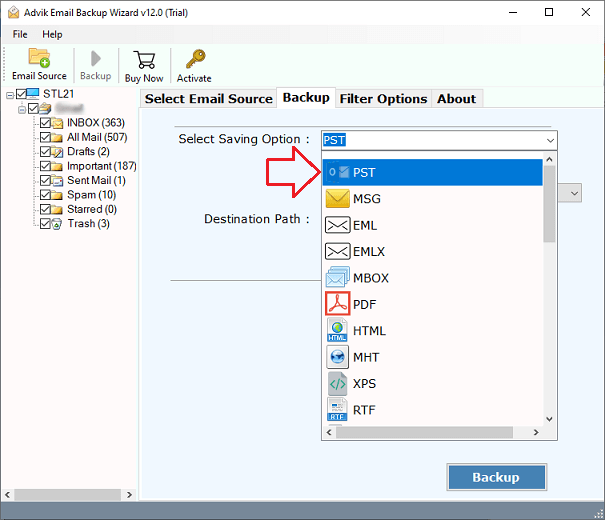
Step 4. Navigate to saving options and choose PST as the file format from the drop-down list.
Step 5. After that, choose the destination path to save the resultant data file and click on the Backup button to start the procedure in just a few seconds.
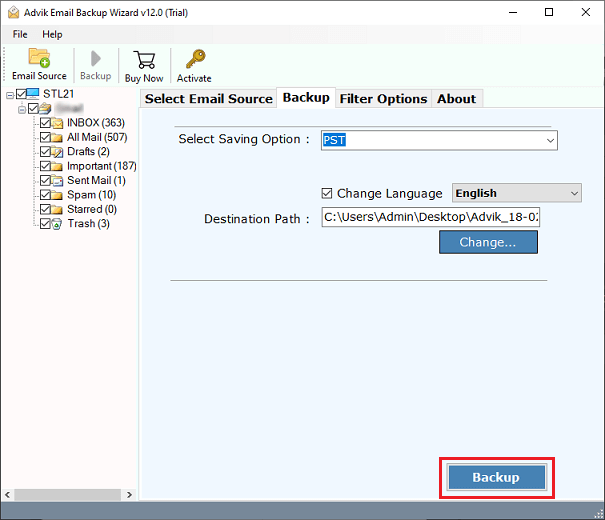
Done!! This tool will redirect you to the location you have chosen to save the PST file.
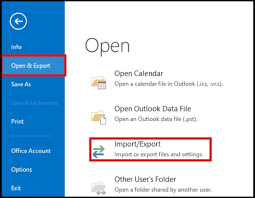
After that Open the Outlook application on your system and use Import and Export Wizard to open Wesnet emails which are converted into PST file in Outlook easily.
Why Advik Email Backup Wizard is Beneficial?
There are several advantages of choosing this automated software which is explained below;
Direct Migration: The software provides a seamless and accurate migration process for transferring Westnet emails to Outlook. By selecting the Westnet option, entering the required credentials, and clicking Login, users can easily choose the desired destination for their Westnet emails. After clicking the Start Backup button, the tool will initiate the transfer process, ensuring all Westnet emails are securely moved to the chosen saving type.
Selective Import of Westnet Emails: The utility incorporates a Filters section, enabling users to selectively import Westnet emails to Outlook, including attachments. This feature allows users to apply filters based on specific criteria such as date, month, email address, subject, and more, ensuring only the desired Westnet emails are transferred to Outlook.
Simplified and User-Friendly Interface: The application is designed with a user-friendly interface, making it accessible and easy to use for both professionals and non-professionals alike. With just a few simple steps, users can effortlessly navigate the software and complete the required tasks without extensive effort.
Multiple Saving Options: Along with its other features, the tool provides multiple saving options for Westnet emails. Users can choose from a range of saving types based on their preferences, including PST, EML, PDF, MSG, DOC, HTML, MHT, MBOX, CSV, etc.
Windows Compatibility: The tool offers two versions that are compatible with Windows operating systems, giving users the flexibility to choose the appropriate version for their platform. Additionally, the software supports all previous and latest versions of Windows, ensuring broad compatibility across various operating systems.
Read More: How to Backup Rackspace Emails to Computer?
Final Words
The complete write-up here discussed two easy ways to add westnet emails to Outlook. Also, the manual approach is undoubtedly easy to use to access Westnet emails in Outlook but may require a lot of time and patience to complete your task. On the other hand, the automated approach is a quick solution that can easily add and export westnet email to Outlook pst file format in just 5 simple steps. It is such an amazing utility that can be easily managed by the software and implement the required task without encountering any trouble.