Wie importiere ich PST in Office 365? [2026]
Summary: If you want to import a PST file into Office 365, you’ve come to the right place. This guide will walk you through the entire process of importing PST files into an Office 365 email account. Whether you’re working with a single file or large amounts of data, we’ll show you methods to make this transition smooth and straightforward. Let’s get through this article without further delay.
Importing PST files into Office 365 ensures that all emails, contacts, and calendar items are accessible from anywhere. Furthermore, users can leverage Office 365’s advanced security and collaboration features. This allows for centralized, easy management, and secure data. Depending on the user’s specific needs, there may be other reasons that compel them to switch to Office 365.
Now you’ll learn how to securely upload PST files to the Office 365 archive folder. Below are some practical solutions. Follow this detailed guide to simplify the process and avoid common problems.
Methods for importing PST into Office 365
- Manual method via Outlook: Add an Office 365 account and import PST using the Import/Export Wizard.
- Network upload method: Use Azure Storage Explorer and the AzCopy tool to upload and map files.
- Automated tool: Use AdvikSoftware for a simple bulk import process.
Look at each one and choose the best solution that meets your needs and requirements.
How do I manually import a PST file into Office 365?
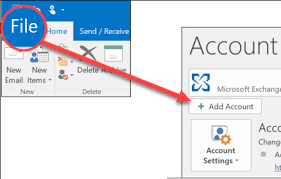
- Click on File and select Add Account.
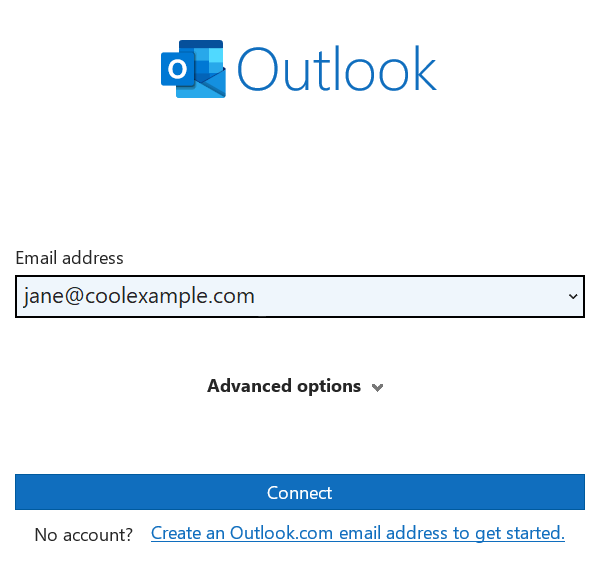
- Enter your Office 365 webmail account details and click „Connect“.
- Geben Sie das Kennwort für Ihr Microsoft 365-Konto ein und klicken Sie auf „Anmelden“.
- Befolgen Sie die Anweisungen zum Einrichten Ihres Kontos und klicken Sie auf „OK“, wenn Sie fertig sind.

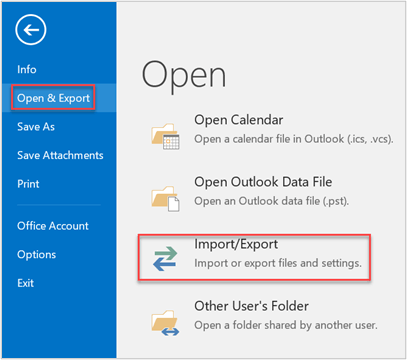
- Öffnen Sie Outlook erneut auf Ihrem Computer und gehen Sie zu Datei.
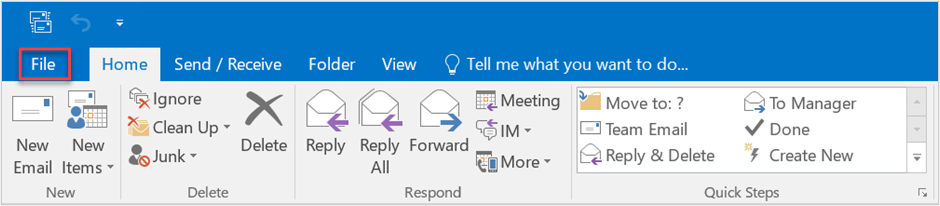
- Klicken Sie auf „Importieren/Exportieren“, um den Import- und Export-Assistenten zu öffnen.
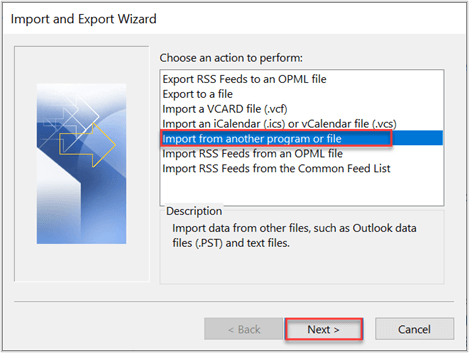
- Wählen Sie „Aus einem anderen Programm oder einer anderen Datei importieren“ und klicken Sie auf „Weiter“.
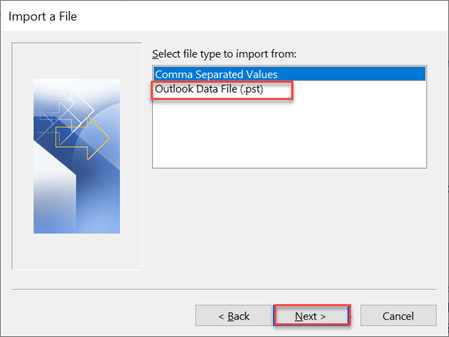
- Wählen Sie „Outlook-Datendatei (.pst)“ und klicken Sie auf „Weiter“.
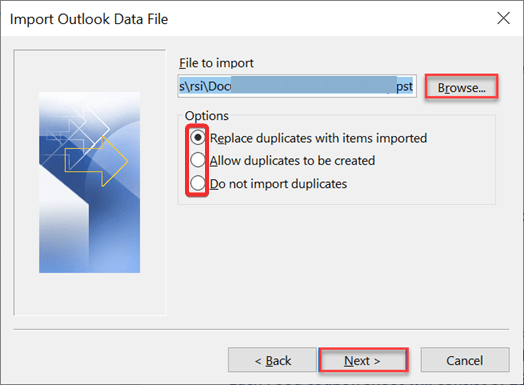
- Klicken Sie auf „Durchsuchen“, um die Optionen zur PST-Dateiauswahl zu finden, und klicken Sie auf „Öffnen“.
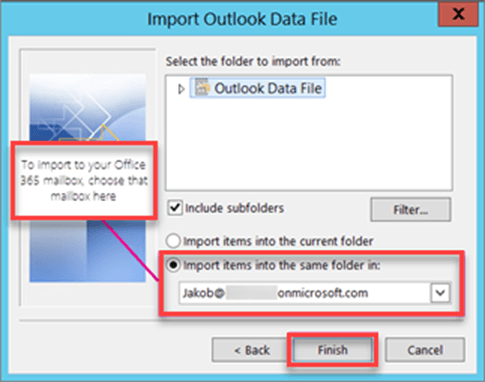
- Wählen Sie die Ordner mit den PST-Dateien und klicken Sie auf „Fertig“.
Fertig!! Sie müssen nur diese einfachen Schritte befolgen, um die Outlook-Datendatei direkt in das Office 365-Webmail-Konto zu importieren.
Nachteile
- Outlook ist eine kostenpflichtige E-Mail-Clientanwendung, für die eine Abonnementgebühr erhoben wird.
- Zum Einrichten eines Office 365-Kontos in Outlook sind Kenntnisse der IMAP-Servereinstellungen erforderlich.
Wie importiere ich eine PST-Datei in Office 365 Webmail?
Diese Methode wird von Microsoft selbst angeboten, um Administratoren beim Öffnen von PST-Dateien in Office 365-Konten zu helfen . Die gesamte Methode ist jedoch langwierig und komplex, weshalb wir sie in 4 Hauptschritte unterteilt haben, um den gesamten Prozess zu vereinfachen.
Bevor Sie mit dieser Methode fortfahren, muss Ihnen in Exchange Online die Rolle „Mailbox Import Export“ zugewiesen werden, um Importaufträge zu erstellen.
Schritt 1. Erstellen einer SAS-URL
Die SAS-URL wird verwendet, um PST-Dateien vorübergehend im Azure Blob Storage zu speichern, bevor sie in Office 365 importiert werden.
- Melden Sie sich bei Ihrem Office 365-Konto an und navigieren Sie zum Compliance Center .
- Gehen Sie unter Microsoft Purview zu Data Lifecycle Management .
- Wählen Sie im Abschnitt „Übersicht“ von Data Lifecycle Management die Option „Importieren“ aus .
- Klicken Sie auf „+Neuer Importauftrag“ und geben Sie einen Namen für den Auftrag ein.
- Wählen Sie die Option zum Hochladen Ihrer Daten und klicken Sie dann auf Weiter .
- Wählen Sie „SAS-URL für Netzwerk-Upload anzeigen“ aus , um die SAS-URL zu generieren.
- Kopieren Sie die SAS-URL zur Verwendung in den nächsten Schritten.
Schritt 2. Herunterladen und Verwenden des Azure AzCopy-Tools
Azure AzCopy ist ein Befehlszeilentool zum Hochladen von PST-Dateien in Azure Blob Storage.
- Besuchen Sie die offizielle Microsoft-Website und laden Sie AzCopy entsprechend den Spezifikationen Ihres Systems herunter.
- Entpacken Sie die heruntergeladene ZIP-Datei, um die ausführbare Datei zu extrahieren.
- Öffnen Sie die Eingabeaufforderung, und navigieren Sie mit dem Befehl „cd“ zum Speicherort der ausführbaren AzCopy-Datei:
cd <Pfad zu AzCopy> - Verwenden Sie den folgenden Befehl, um PST-Dateien in Azure Blob Storage hochzuladen:
azcopy.exe copy “<Local-PST-File-Path>” “<SAS-URL>” –recursive=true - Ersetzen Sie <Local-PST-File-Path> durch den Speicherort Ihrer PST-Dateien und <SAS-URL> durch die generierte SAS-URL.
- Sobald der Upload abgeschlossen ist, kehren Sie zum Compliance Center zurück und wählen Sie „Ich bin mit dem Hochladen fertig“, um fortzufahren.
Schritt 3. Erstellen und Hochladen der Zuordnungsdatei
Die Zuordnungsdatei gibt an, welche PST-Dateien in welche Postfächer in Office 365 importiert werden sollen.
- Laden Sie die Vorlage für die PST-Importzuordnungsdatei über den offiziellen Link von Microsoft herunter.
- Öffnen Sie die Vorlage in Microsoft Excel.
- Geben Sie die erforderlichen Details ein, z. B.:
Workload: Verwenden Sie „Exchange“.
FilePath: Der Pfad der PST-Datei im Azure Blob Storage.
Mailbox: Die E-Mail-Adresse des Zielpostfachs von Office 365.
IsArchive: TRUE für Archivpostfächer oder FALSE für primäre Postfächer. - Gehen Sie zu Datei > Speichern unter und wählen Sie das Format CSV UTF-8 (durch Kommas getrennt).
- Kehren Sie zum Compliance Center in Office 365 zurück.
- Laden Sie die CSV-Datei im Abschnitt „Daten importieren“ hoch, indem Sie „Datei hochladen“ auswählen.
- Klicken Sie auf „Validieren“, um die Zuordnungsdatei zu validieren. Wenn die Validierung erfolgreich ist, klicken Sie auf „Weiter“.
Schritt 4. Filtern und Senden des Importauftrags
Sie können die zu importierenden Daten filtern oder alles entsprechend Ihren Präferenzen importieren.
- Wählen Sie im Fenster „Daten importieren“ die hochgeladenen PST-Dateien aus.
- Wählen Sie, ob Sie gefilterte Daten oder alles importieren möchten.
- Klicken Sie auf „Senden“, um den Importvorgang zu starten.
- Sie sehen eine Meldung mit der Größe der importierten PST-Datei.
- Warten Sie, bis die PST-Analyse abgeschlossen ist. Der Vorgang kann je nach Dateigröße einige Stunden dauern.
- Sobald dies erledigt ist, erhalten Sie eine Erfolgsbenachrichtigung.
Einschränkungen bei der Verwendung der Netzwerk-Upload-Methode;
- Die Netzwerk-Upload-Methode ist ein komplexer und zeitaufwändiger Prozess mit mehreren Schritten.
- Für die Bewältigung der einzelnen Phasen sind technische Kenntnisse erforderlich.
- Für den Import von PST-Dateien in Microsoft 365 gilt ein Limit von 20 GB.
- Die Verwendung von PowerShell zum Importieren von PST-Dateien kann schwierig sein und zu Datenbeschädigungen führen.
- The process is not immediate. Therefore, patience is required to complete the import into a shared Office 365 mailbox.
To overcome the challenges of manual solutions, we have therefore described the best way to import PST files into Office 365 Webmail. This is the most recommended approach, seamlessly resolving all the problems of manual methods and providing an immediate way to complete the process.
How do I safely import a PST file into Office 365 Online?
Download and install the Advik PST Converter on your local system. This software is specifically designed for transferring PST files to Office 365 email accounts. It exports PST emails with attachments directly to Outlook Online, ensuring no data loss. The software maintains the folder hierarchy and email attributes in the same format.
Click below to download this software for free.

Note: With the freeware or trial version, you can migrate 25 emails for free.
Steps to transfer PST to Office 365 Webmail
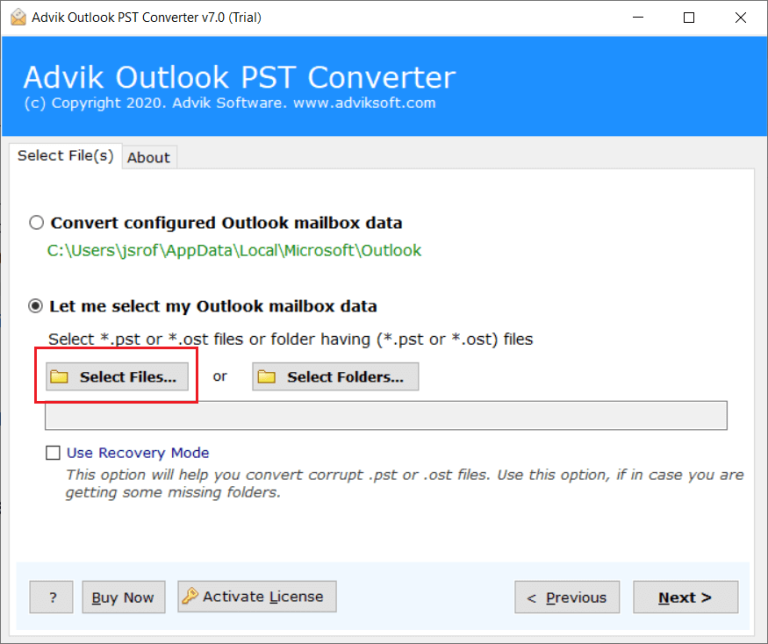
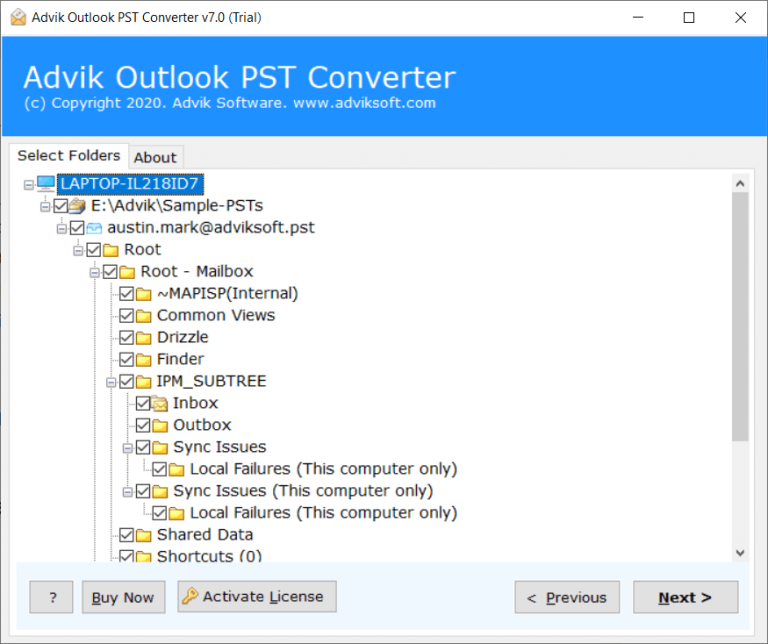
1. Run the PST to Office 365 tool and click „Select files“ to add the PST file.
2. Select the mailbox folder containing PST files and click „Next“.
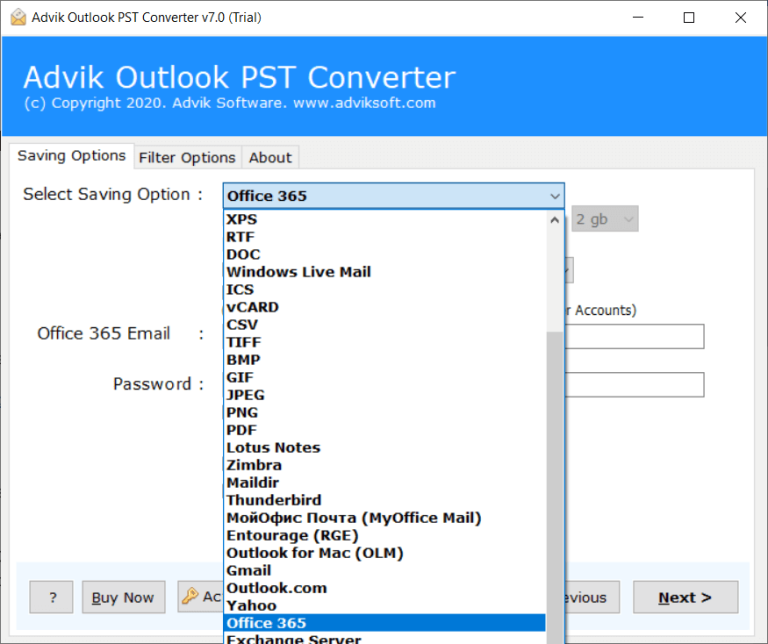
3. Select Office 365 as the storage option from the list.
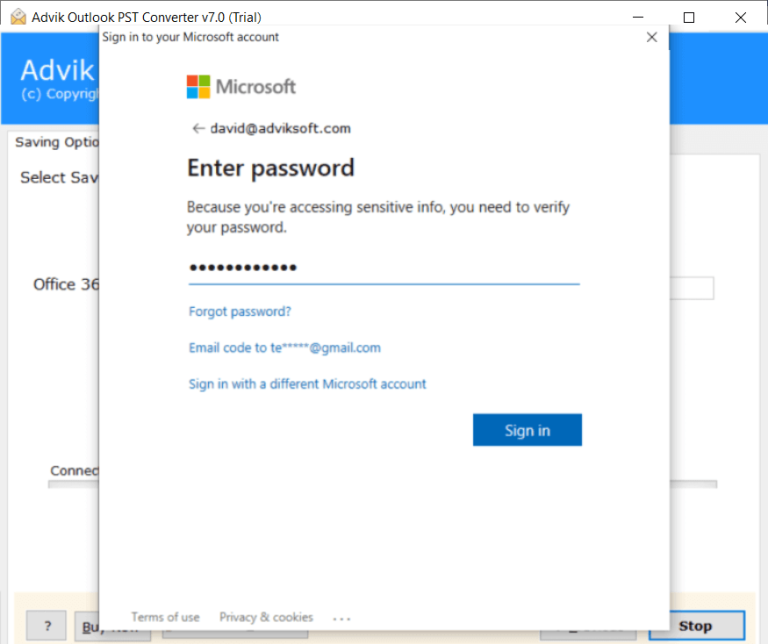
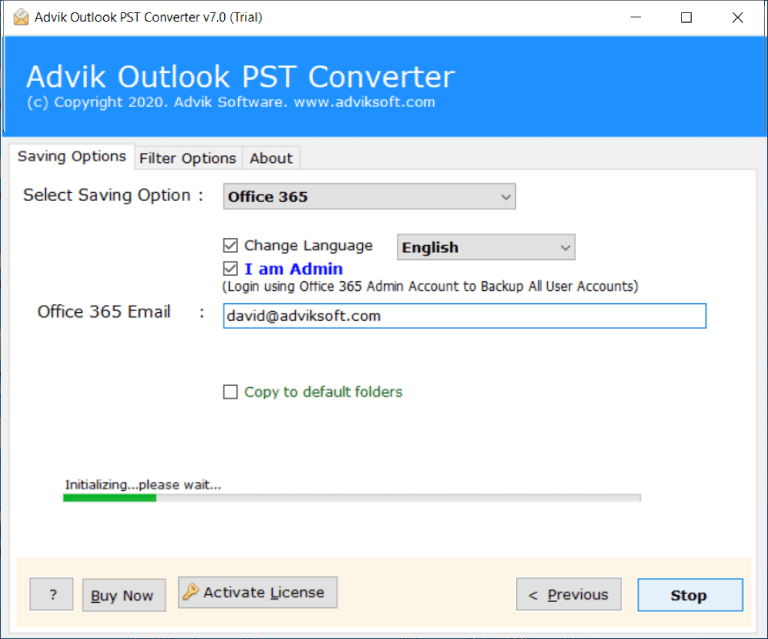
4. Enter your Microsoft 365 account login information in the appropriate field.
5. Click the „Convert“ button to start the process.
Done! The software will automatically begin transferring emails from PST to Office 365. Then, open your Office 365 webmail account and locate your emails in the AdvikSoft Label folder.
See how to upload a PST file to Office 365
Furthermore, the software can do even more. Below you will find the additional benefits this software offers.
- Fully automated and user-friendly software.
- Only requires your Hotmail login details (email and password).
- Imports PST files with complete mailbox folder items into Office 365.
- No size or quantity restrictions based on your license.
- Allows you to select specific folders for the import process.
- Automatically adds PST files or allows you to browse and add from any location.
- Offers advanced filters for selectively transferring PST emails to O365.
- It works well with all versions of MS Outlook and Windows OS.
Comparison table: Manual vs. automated methods
| aspect | Manual | Automated solution |
|---|---|---|
| user-friendliness | Requires technical knowledge | User-friendly with step-by-step instructions |
| Required time | Time-consuming | Faster, especially with large PST files |
| accuracy | Prone to errors | High accuracy with professional tools |
| Data integrity | Potential data loss or damage | Maintains data integrity |
| Batch processing | Limited | Supports multiple PST files |
Closing remarks
This concludes our blog post on three different solutions for attaching PST files to Outlook 365. We hope we’ve provided you with the best approaches for importing Outlook PST files into an Office 365 account. You can use any of these methods depending on your needs and convenience. However, two of them are somewhat time-consuming and require technical support. Therefore, we recommend choosing these methods only if you have the necessary expertise to avoid data loss.
Frequently Asked Questions (FAQs)
Q1. Can I upload PST files to Office 365 without Outlook?
Answer: Yes, you don’t need to use Outlook or any external application to import PST files into an Office 365 account. The software is a standalone utility that doesn’t require any other support.
Q2. Is it possible to import PST contacts along with emails into Office 365?
Answer: Of course, you can use this tool to import PST contacts into an Office 365 account in just a few simple steps.
F3. I need to import several PST files into Office 365. Can I do that with this tool?
Answer: Yes, the program offers two options for optimal batch import of PST into Office 365.
Q4. Is it possible to transmit only specific emails and exclude unwanted emails?
Answer: Yes, the software has an advanced filtering option. You can apply email filters according to your requirements.
F5. What limitations exist for PST migration in Office 365?
Answer: You can upload and import PST files up to 20 GB in size . You will also need numerous permissions to complete the import process.
Related Articles