How to Rename OST file in Outlook?
Jackson Strong | June 24th, 2025 | Data Backup
Do you want to rename OST file in Outlook but are unable to do it? Do not worry, this blog will help you. Here, we will discuss how you can easily change OST file name in Outlook. So, keep reading to accomplish your task without any hassle.
Microsoft Outlook uses an Offline Storage Table (OST) file to store mailbox data from IMAP, Exchange Server. It allows users to access their emails even without an internet connection. Sometimes, users may need to rename an OST file to resolve errors, fix synchronization problems.
Why Do You Need to Rename OST File?
Here are some common reasons for renaming the Outlook OST file.
- Fix Sync Issues: Outlook synchronization problems can often be resolved by renaming OST file.
- Corruption Recovery: A damaged OST file may be unusable, renaming it forces Outlook to create a fresh copy.
- Recreate OST for Performance: An oversized OST file may slow down Outlook. Renaming allows a fresh file to be generated.
- Switch Mail Profile: When changing your Outlook profile then renaming helps avoid confusion.
Let’s start the process without any further delay.
How to Rename OST File in Outlook Manually?
1. First of all, exit MS Outlook.
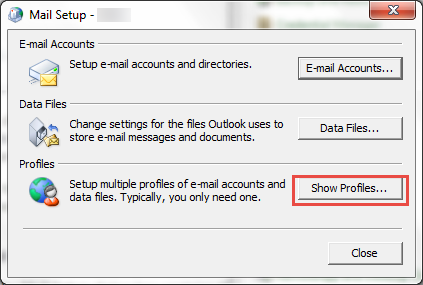
2. Go to Start and then click on Control Panel.
3. Click on Mail and then tap on Show Profiles.
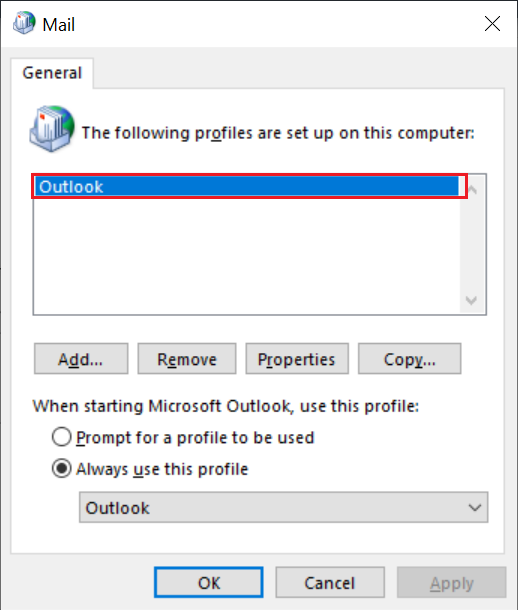
4. Select the Profile name and then click on Properties in Mail window.
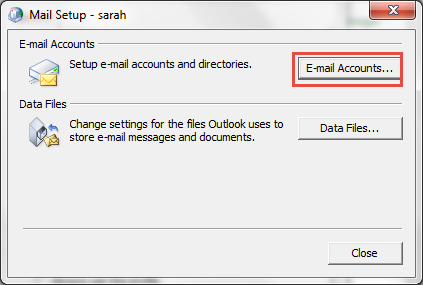
5. Next, click on Email Accounts.
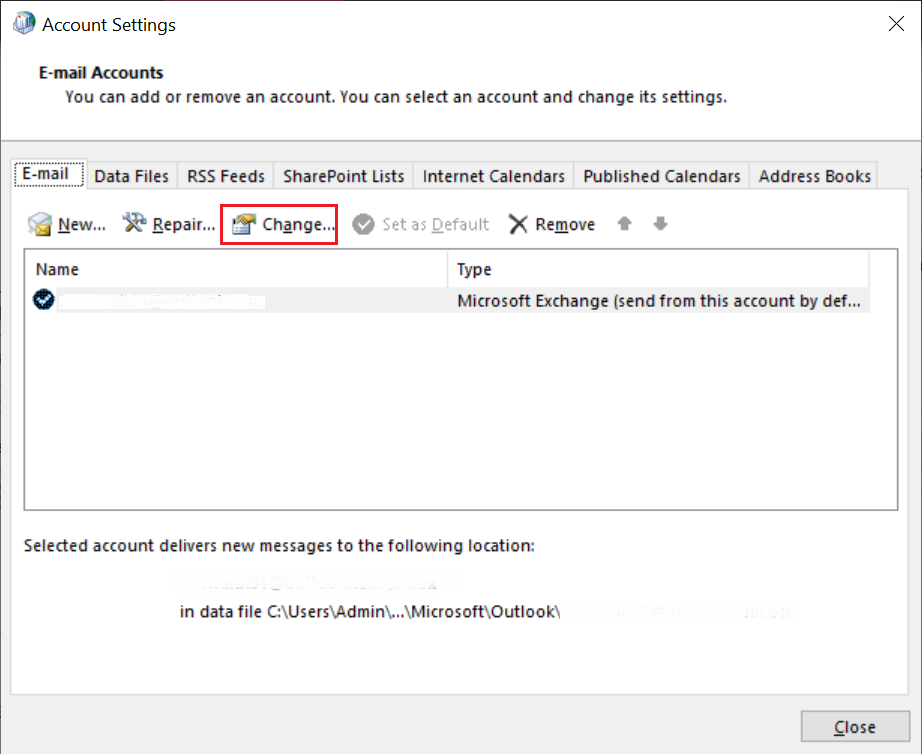
6. Select Exchange Account and click on Change.
7. Enter Server IP address and User Name and then click on More settings.
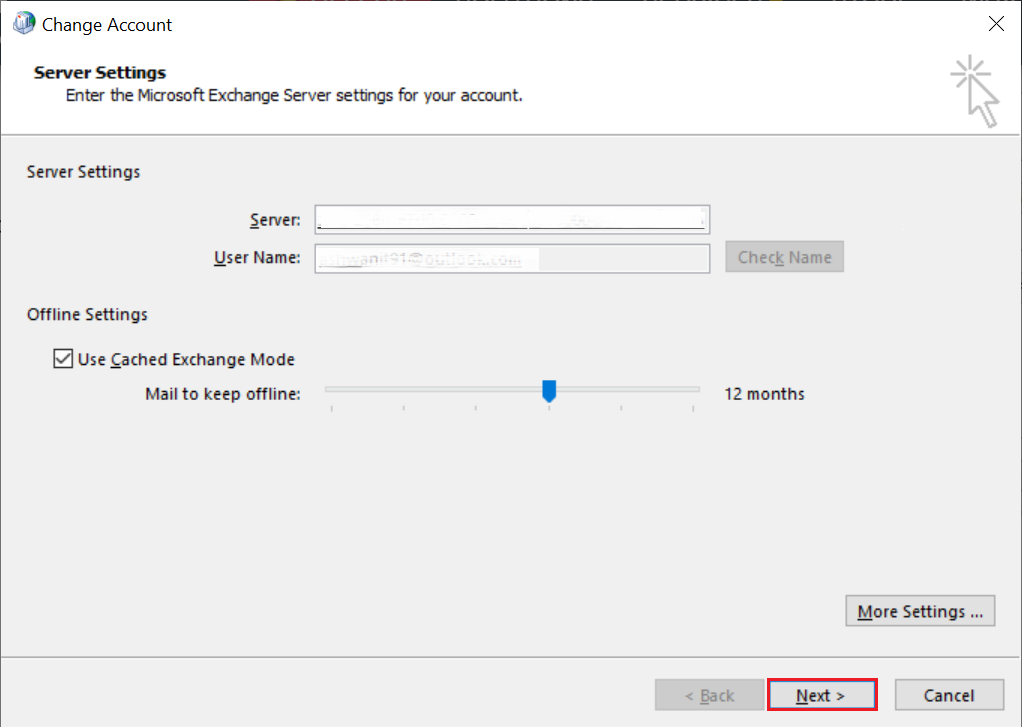
8. Now, click on the Advanced tab, check the box Use Cached Exchange Mode and click on Outlook Data File Settings.

9. After that, click on Disable Offline Use, open a dialog box then tap on Yes.
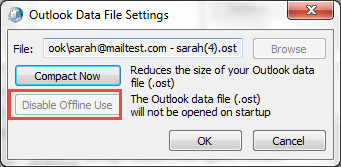
10. Click on Offline Folder File settings again and click on Ok.
11.In Cached Exchange Mode Settings choose the Use Cached Exchange Mode checkbox and click Ok then Next, and then Finish.
12. After that, click Close in Account Settings and Mail Setup dialog box.
Now, restart Outlook, and it will create a new OST file and sync data from the mail server to this new file. However, if your profile is deleted from the mail server, you will encounter an authentication error.
How to Change OST File Name Safely?
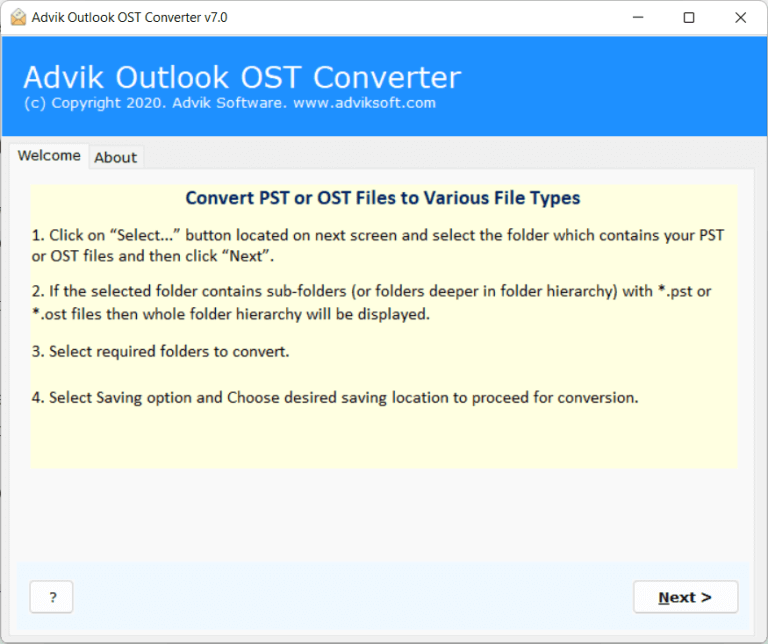
If you are facing issues in the manual approach while renaming the OST file then try the Advik OST to PST Converter Tool. This is a safe and secure solution that can easily rename OST file without any data loss. With this tool, you can convert OST to PST without Outlook. After conversion, you can import the file in any Outlook profile to access its data. It is designed in such a way that any novice user can easily use it without any technical knowledge.
Click on the link below to download it for FREE.

Steps to Rename OST File in Outlook
1. Run the tool on your system.
2. Add OST file and check Use Recovery Mode box.
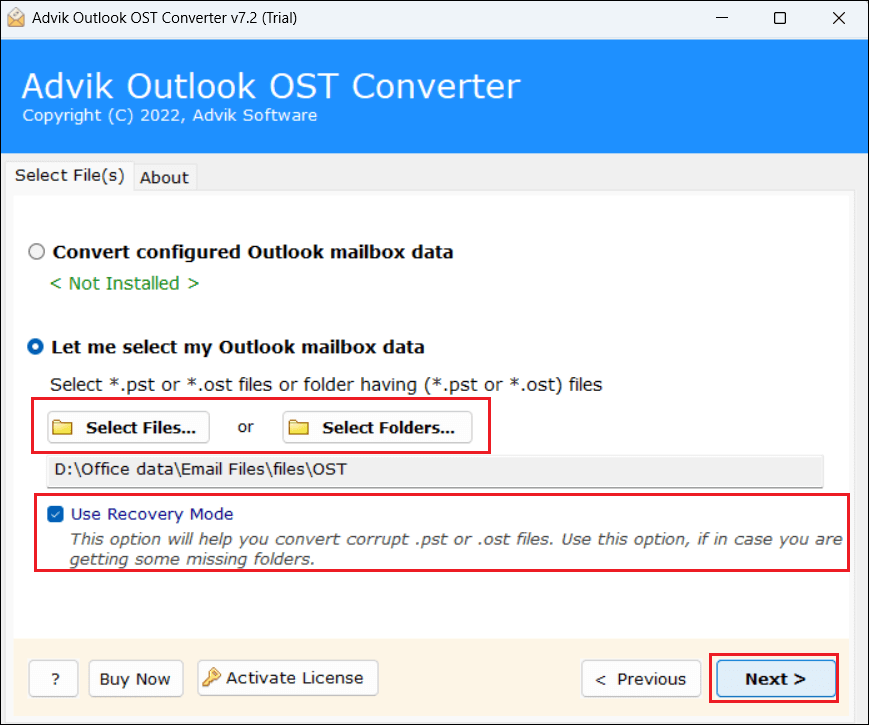
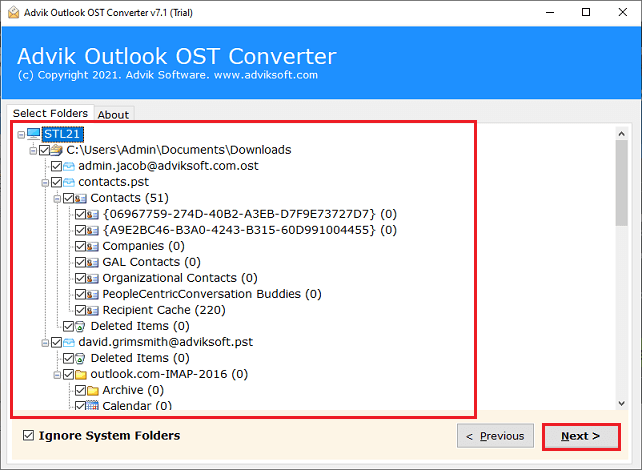
3. Choose mailbox folders and click Next.
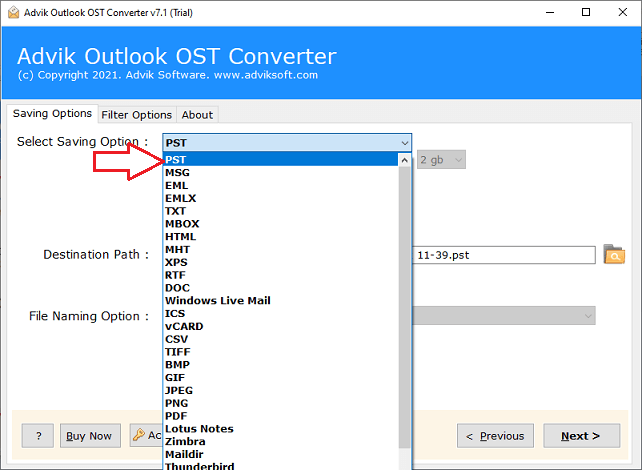
4. Select PST as a saving option.
5. Browse target location and click Convert button.
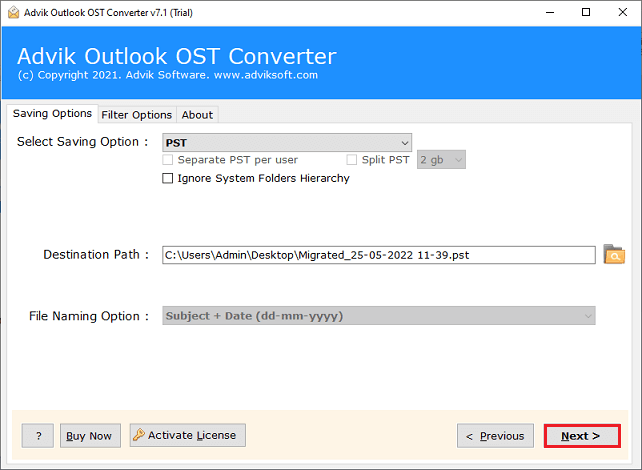
The software will start converting OST to PST format. After that, you can import this file into Outlook with any name.
Conclusion
Renaming OST file can help resolve a wide range of Outlook issues from sync problems to corruption errors. In this post, we have discussed the best proven ways to rename OST file in Outlook. You can easily change OST file name manually, but this is a lengthy and complicated process. So, using a professional tool is a smart choice. You can download the free demo version of the above-suggested tool to check its working functionality.