How to Import OST to Gmail Account [Step-by-Step Guide]
OST file is an offline copy of user mailbox data. It is created when you are connected to Exchange or any IMAP accounts. OST file can be accessed only with the Outlook profile that was used to create it. The user can access their emails offline and the changes you make will be synced when you are back online. Have you ever found yourself in a situation where you want to access your emails after switching to Gmail? In such a case only option is to import PST to Gmail account.
However, migrating data from OST file into Gmail account is a challenging task because Gmail does not support OST files. The process involves several requirements which have different level of complexity. So, you need to follow specific steps to make this possible. This guide is here to simplify the process with 2 simple and effective methods.
Why Users Need to Import OST to Gmail?
- Access your emails anytime from any device.
- Keep a backup of your Outlook data in the cloud.
- Switch from Outlook / Exchange to Google Workspace with ease.
- Protect emails from system crashes and corruption.
Can You Open OST Files in Gmail directly?
No, OST files cannot be directly uploaded to Gmail. This is because OST files are associated with a certain Outlook profile and can only be accessed through Outlook or Exchange. You need to first convert data to a supported format to use them in Gmail.
That’s why users fall back on two basic methods:
Manual Method (Free) – Export OST to PST & then import PST to Gmail using Google GSMMO tool.
Automated Way – Use Advik software to immediately transfer OST emails to Gmail especially when the OST file is orphaned, inaccessible or corrupted.
How to Migrate OST File to Gmail Manually?
If your OST file is still connected to Outlook, you can first convert it into PST and then upload it to Gmail using Google’s GSMMO tool.
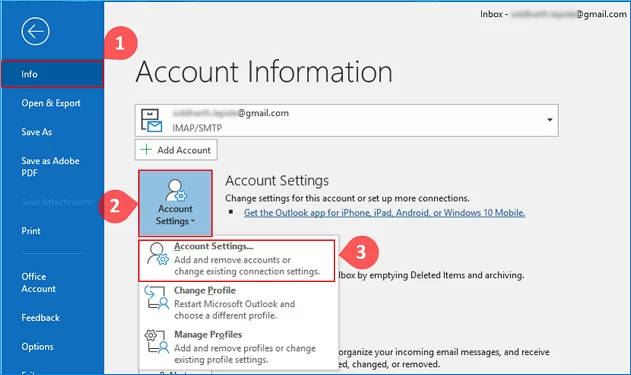
- Run Outlook and click File >> Account Settings>> Account Settings.
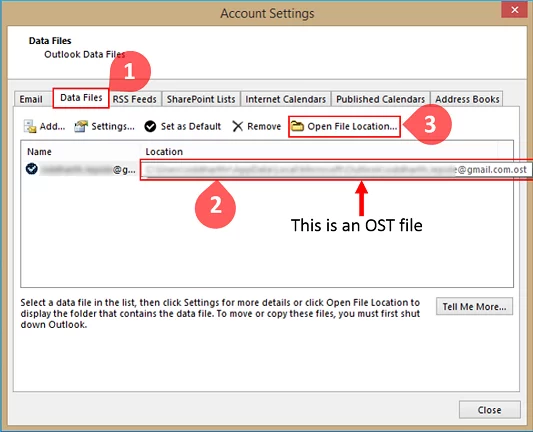
- Next, click on Data Files. Choose OST file and open File Location.
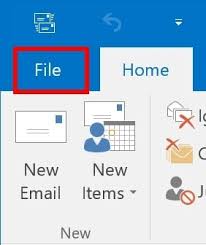
- Once file is located, again go to the File tab.
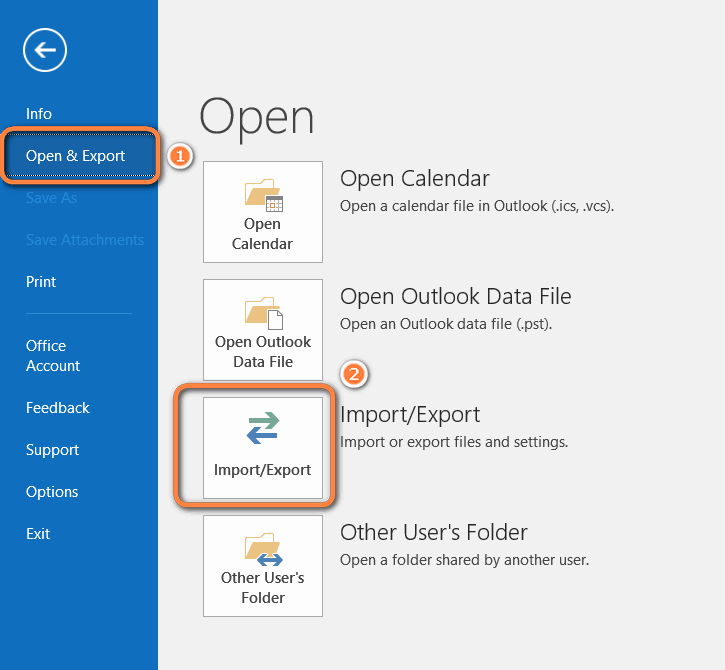
- Click on Open & Export, then select Import/Export.
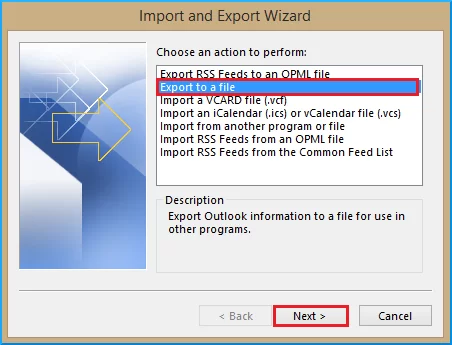
- Choose Export to a file from Import and Export Wizard and click Next.
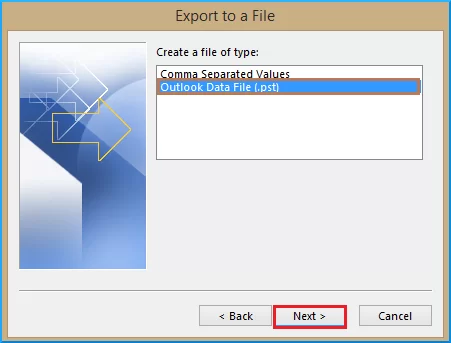
- Select Outlook Data File (.pst) and press Next.
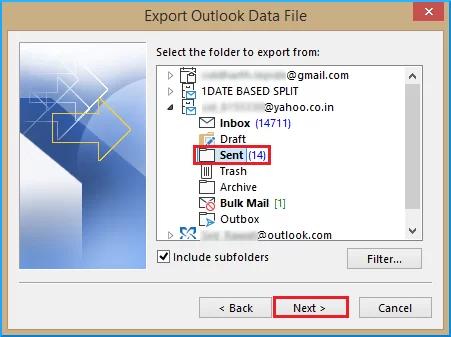
- Choose the mailbox folders to export.
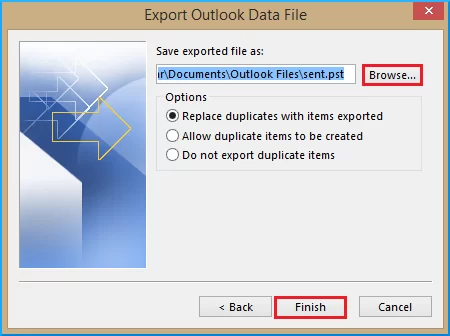
- Choose destination folder to save the PST file and complete the process.
- Now download and install GSMMO (G Suite Migration for Microsoft Outlook) tool
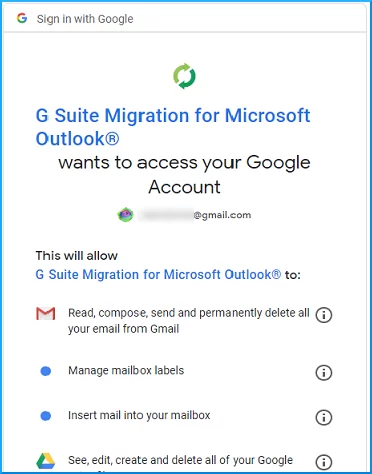
- Next open the software and put your Gmail account login information.

- Grant GSMMO access to your Google account by clicking Allow.
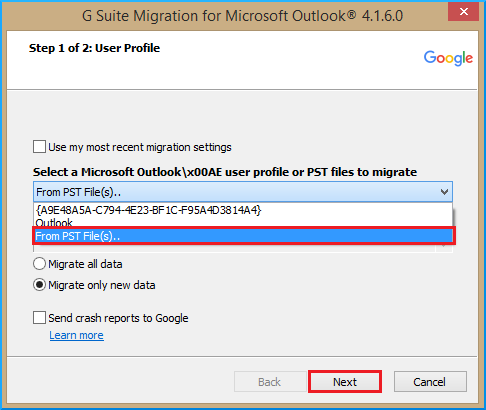
- Choose From the PST file(s) opton.
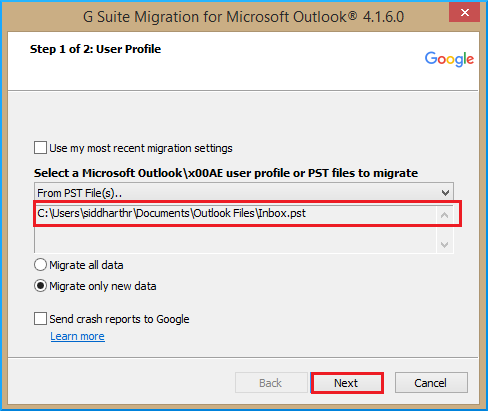
- Browse the PST file for migration and select to migrate all data.
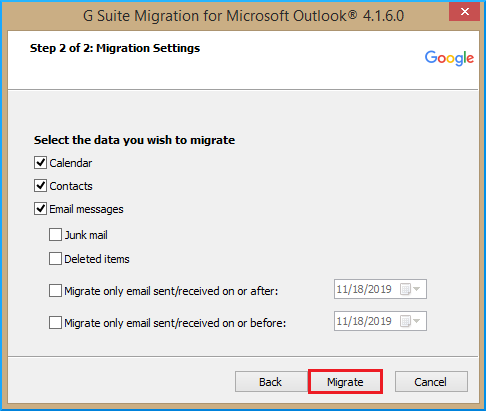
- Then configure migration options and execute it.
When it’s finished, you will be notified that the operation is complete.
Now, you may access your Outlook OST file data to your Google account.

Important Pount
- Requires access to Outlook profile.
- Does not work with orphaned or corrupted OST files.
- Process is time-consuming for large mailboxes.
- Contacts, calendar, or encrypted items may not migrate properly.
How to Import OST to Gmail Without Outlook?
If your OST file is orphaned, inaccessible, or too large, the manual method won’t work. In that situation you need a professional tool like Advik OST Converter to easily import emails from OST file to Gmail in a few simple steps.
What it does:
- Direct Import OST Files into Gmail without Outlook.
- Preserves folder structure, attachments, contacts and calendar.
- Handles damaged, encrypted or orphan OST files.
- Enables selective migration through filters.
- It enables the batch import of several OST files.
You can try free demo version before migrating full data.


Steps to Import OST to Gmail Account
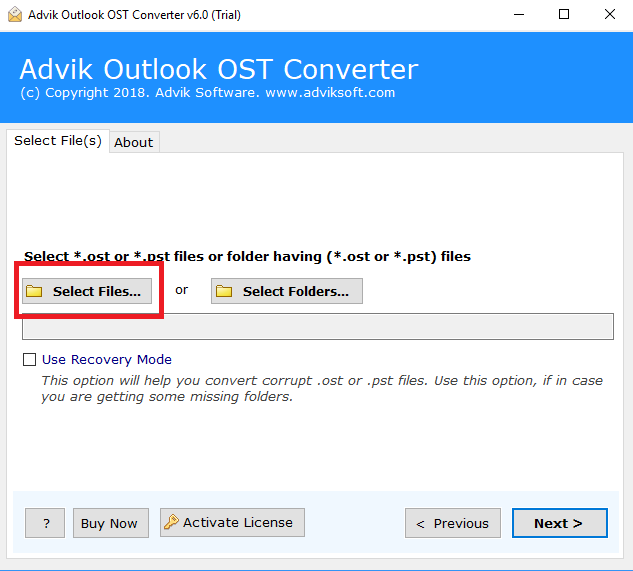
Step 1. Launch the software and add OST files.
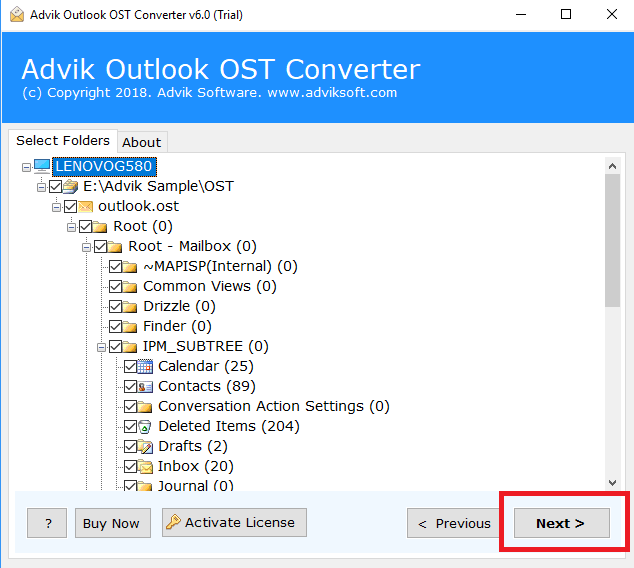
Step 2. Select the email folder to download.
Step 3. Choose Gmail as a saving option from the list.

Step 4. Enter Gmail credentials and click the Next button.
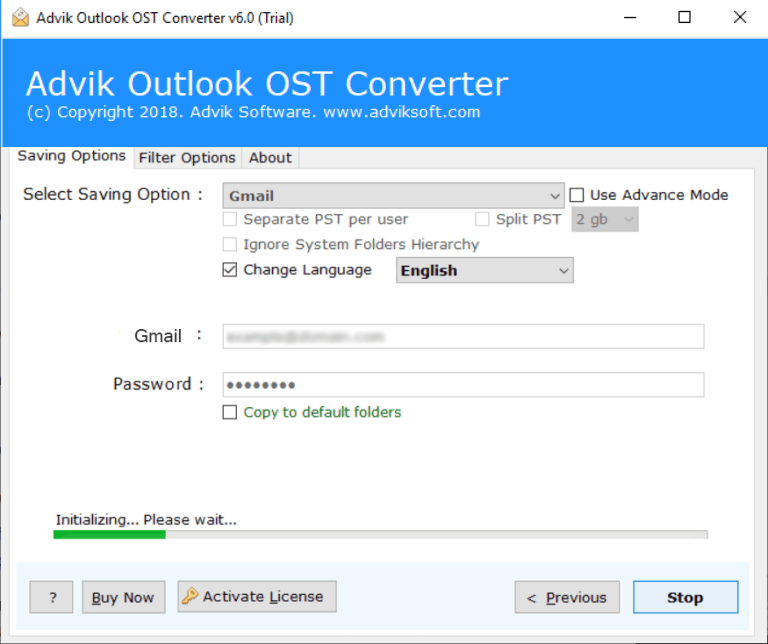
Now, this starts transferring emails from OST file to Gmail account instantly.
Log in to your Gmail account and import all the imported OST mailbox folders into it.
Watch How to Open OST File in Gmail
Why Opt for an Automated Solution Instead of Manual Methods?
- Support all OST Files: The software smartly imports OST files into software created by almost all MS Outlook editions including 2019/2016/2013/2010 and previous versions.
- Preserve Email Properties: The software comes with an effective way to preserve all the key elements of emails such as cc, bcc, date, time, signature, etc.
- Selective Conversion: This tool allows you to easily import OST files directly into Gmail. You can choose specific items from your entire mailbox to transfer. It also allows you to filter data by a specific date range and import only those items to your Gmail account.
- Automatic File Location Detection: This tool automatically locates the files on your system. This is especially handy if you are unclear of the location of the file.
- Transfer OST to Multiple Accounts: This tool doesn’t just import OST files to Gmail but also supports other email services. Such as that you can import OST to Office 365, Yahoo Mail, Zoho Mail, Rackspace, Yandex Mail, Zimbra, and more.
- Batch Import OST Files: If you have multiple OST file(s) that you need to transfer into Gmail. Or want to upload a folder having multiple .ost files. This is possible with this handy tool. It enables you to export dozens of OST files into Gmail in a single attempt.
- Simple Graphical User Interface: No matter if you are a technical or non-technical user, the software is very lightweight and handy. Anyone with no technical experience or background can easily import OST to Gmail with ease.
- Unlimited Outlook Data Transfer: The best part of the software is that there is no limitation. No file size limitation, no maximum daily email transfer limit, no barriers to uploading multiple files, nothing.
Conc;uding Words
In this post, we have discussed two different ways to upload OST file to Gmail account. Both methods allow you to import OST to Gmail. If you still have Outlook access, the manual method works fine for small data. But if your OST file is orphaned, corrupted or too large, an automated tool is the more practical and reliable option.
Frequently Asked Questions
Q1. Can I migrate Outlook 2019 OST file to Gmail using your tool ?
Ans – Yes, it is compatible with Microsoft Outlook 2019, 2016, 2013, 2010, 2007 / Exchange Server 2019, 2016, 2013, 2010, 2007, etc. OST files.
Q2. Is GSMMO free?
Ans. Yes, GSMMO is a free tool provided by Google to import PST files into Gmail.
Q3. Can I import OST to Gmail without Outlook?
Ans. Yes, using an OST to Gmail Migration tool, you can upload it without Outlook.
Q4. Will the folder hierarchy and attachments be preserved?
Ans. Yes, GSMMO and the professional tools will retain folder structure and attachments.
Q5. What happens if my OST file is damaged?
Ans. If this is the case then manual method will not help you and you will require a recovery or migration program.