How to Export All Emails from Office 365 Webmail?
Office 365 webmail is one of the most reliable cloud-based email services for professionals and organizations. However, there are times when users might need to export all emails from Office 365 webmail for various reasons, such as:
- Keep a backup copy of your important messages.
- Move emails to another email service.
- Access your emails offline anytime.
- Archive old emails to free up space.
In this article, we’ll guide you on how to backup email from Office 365 webmail. Here, we will provide three different methods to export all emails from Outlook 365 web. Let’s dive into methods without any further delay!
How to Download All Emails from Outlook 365 Manually?
Office 365 webmail (https://outlook.live.com/) allows users to download complete mailbox locally.
First of all, log in to your Microsoft 365 email account and go to Settings > Privacy and Data > Export Mailbox.

Click on the Export mailbox button. This will start generating a backup of your emails, calendar items, and contacts.
The only limitation is, it takes up to 4 days to export all emails and folders.
How to Export All Emails from Office 365 Webmail via Outlook?
Office 365 webmail itself does not have a direct export option, but you can use Microsoft Outlook desktop to export all your emails.
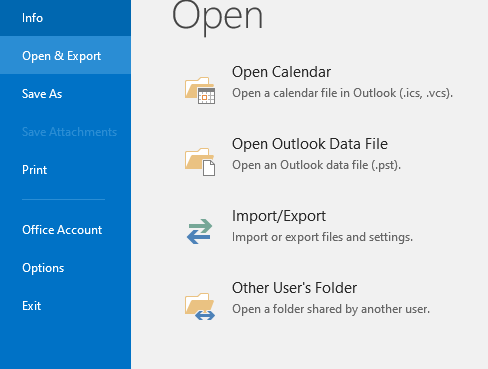
Step 1. Run the Outlook Application and click and choose File >> Open & Export.
Step 2. Now, in this step, select Open & Export >> Import/Export.
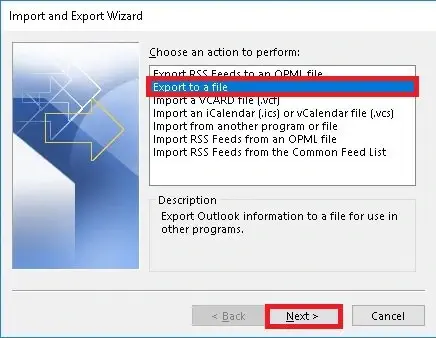
Step 3. In the Import and Export Wizard, choose Export to a file.
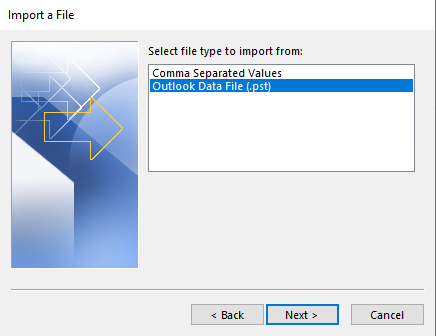
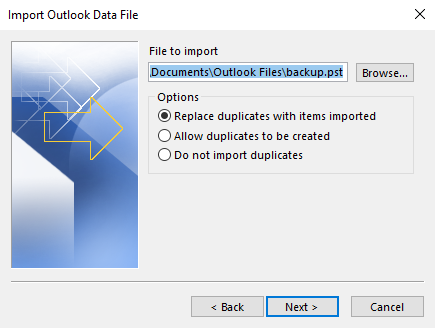
Step 4. Thereafter, choose Outlook Data File(.pst) from the options.
Step 5. Select folders and sub-folders that you want to export from the mailbox folders.
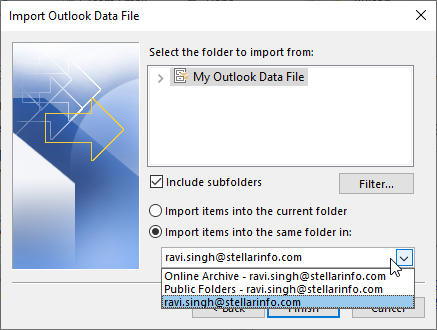
Step 6. Now, choose the location and click Finish.
If you want to export all emails from Office 365 Webmail in a hassle-free way with complete accuracy, you can take the help of a robust, professional tool.
How to Export Multiple Emails from Outlook 365 Web Easily?
From the discussion above, we can conclude that the manual process for exporting Office 365 emails may not be sufficient. Instead, using the Advik Office 365 Backup Tool can make the export process quick and easy. This software offers a quick and easy solution to download all emails from Office 365 directly to your desktop.
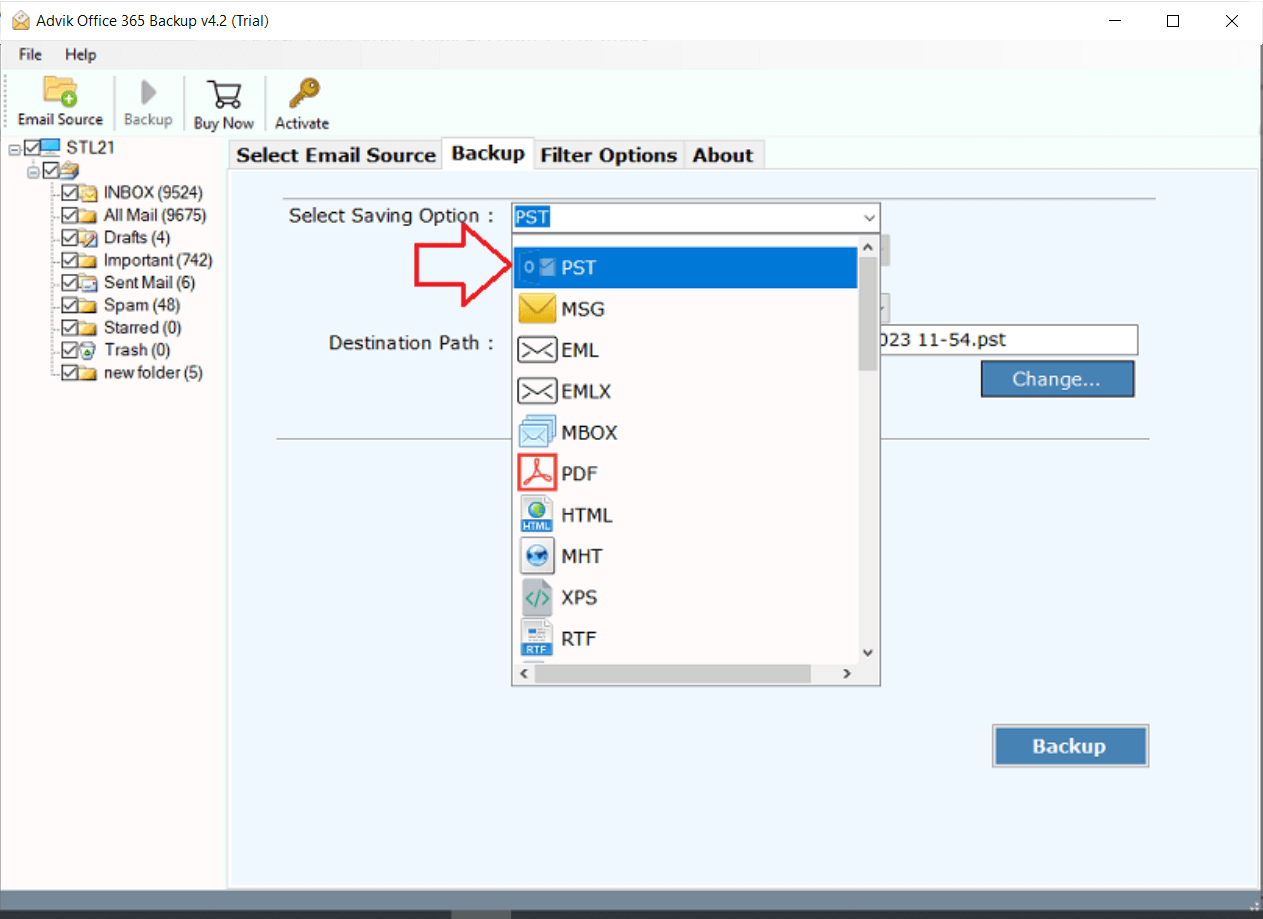
With this tool, you can export entire mailboxes or select specific folders with ease. It supports various file formats, such as PST, EML, MBOX, PDF, and many more, so that you can access your Office 365 emails across different platforms.
So, what are you waiting for? Click on the free download button and check how it works at any cost.


Steps to Export All Emails from Office 365 Webmail
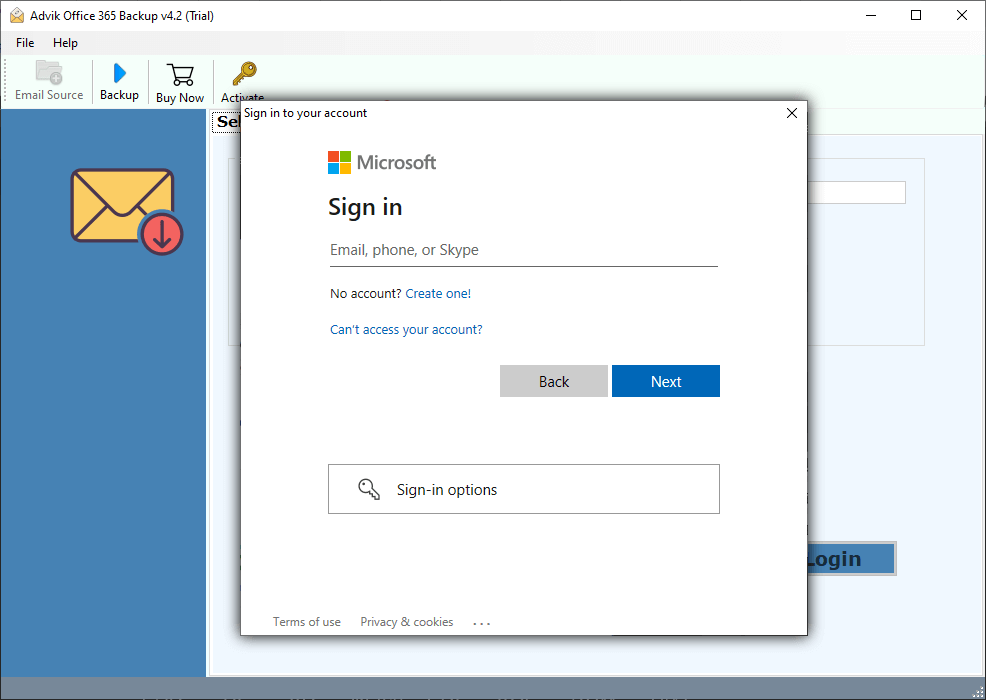
Step 1. Launch the software and log in with your account credentials.
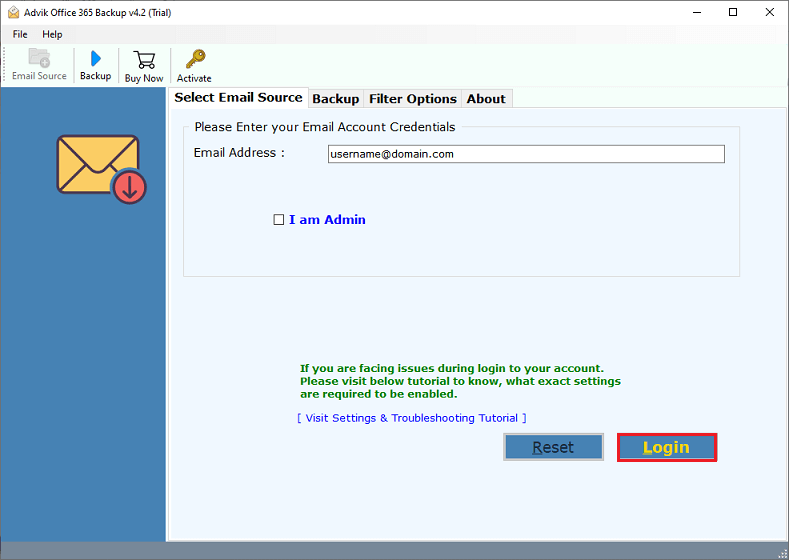
Step 3. Here, you will need to enter your Office 365 email and password to sign in.
Step 4. Choose the required folders and move on.
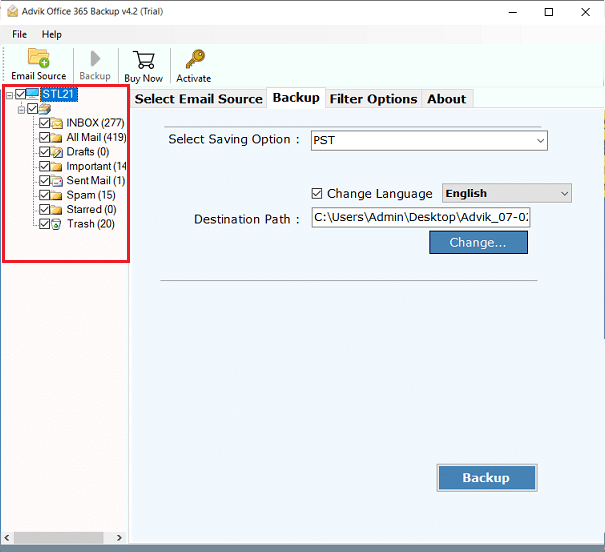
Step 5. Select the file format of your choice from 30+ options.
Step 6. Browse location and click on the tap on the “Backup” button to start.
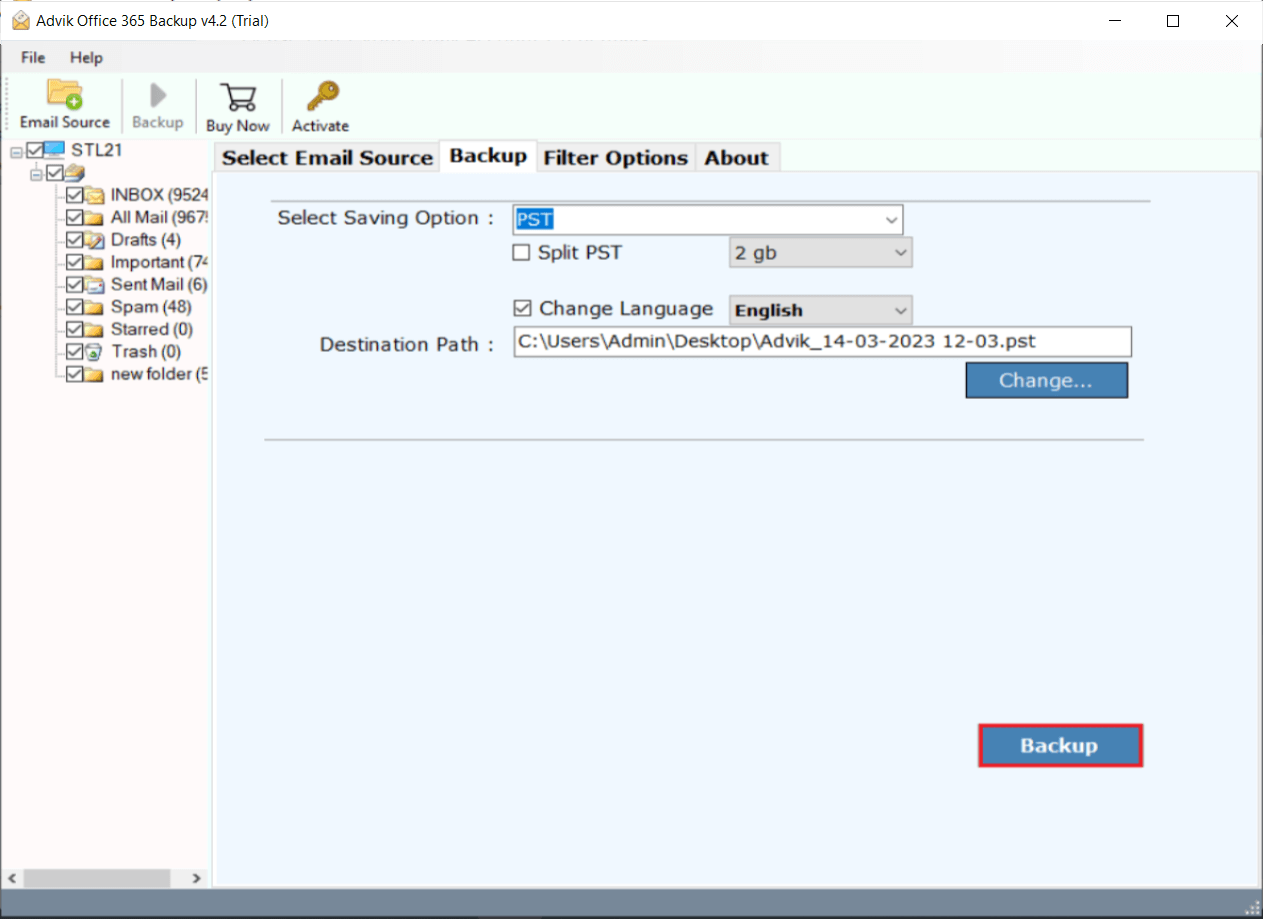
Done!! You have successfully exported all of your emails from your Office 365 account to your chosen file format.
Watch How to Download All Emails from Office 365 Account
Benefits of Using an Automated Tool
- Save emails in different formats like Office 365 to PST, EML, PDF, MSG, etc.
- Preserve the original folder hierarchy and keep all attachments intact without any data loss.
- No need to install Microsoft Outlook or perform complex manual steps.
- Apply advanced filters to export emails selectively by date range, sender, subject, or keywords.
- Support for exporting shared mailboxes and public folders, not just personal inboxes.
- Maintain email metadata including To, From, Cc, Bcc, timestamps, and read/unread status.
- Securely connect to your Office 365 account using official Microsoft APIs.
- Compatible with all Windows versions and easy to use with a simple interface.
- Generate detailed export reports and logs for tracking and auditing purposes.
- Batch export emails from multiple Office 365 accounts simultaneously (for admins and IT teams).
- Free trial/demo version available to test the tool before purchasing.
- Dedicated customer support to assist with any issues during the export process.
Conclusion
So, you must have understood the right way to export all emails from Office 365 webmail. For small email numbers, the built-in export option or using Outlook is good. But if you have many emails or want a quick and reliable solution, automated tools are the best choice. Choose the method that fits your needs and keep your emails safe and accessible!
Frequently Asked Questions
Q 1. How long does it take to export all Office 365 emails?
Ans. The duration depends on the size of your mailbox and your internet speed. However, the automated tools generally complete the process faster than manual methods.
Q 2. Does exporting emails delete them from my Office 365 account?
Ans. No, exporting emails only creates a copy of your mailbox data. Your original emails remain safe in your account.
Q 3. Can I export only specific email folders from Office 365 webmail?
Ans. Yes, the Advik Software allows you to choose specific folders or apply filters to export only the emails you need.