How to Import MBOX to Zimbra Mail? Two Easy Ways
Summary: An MBOX file can be imported into Zimbra Mail account using Thunderbird. To do this, configure Zimbra Mail in Thunderbird and install the ImportExportTools NG add-ons, then right-click the mailbox panel and select Import MBOX file. Alternatively, you can use a professional migration utility to import MBOX to Zimbra Mail without Thunderbird.
By the end of this guide, you’ll know how to upload MBOX file to Zimbra Mail safely without losing attachments, folder structure, or metadata.
MBOX is a widely used format for storing emails in desktop email clients such as Thunderbird, Apple Mail, Eudora, and Gmail Takeout. Sometimes, users need to import MBOX file into Zimbra Mail when:
- Switching from Thunderbird, Apple Mail, or Gmail Takeout to Zimbra.
- Migrating emails to a corporate Zimbra server.
- Wanting centralized access to emails in Zimbra Webmail or Desktop.
What to Prepare before Importing MBOX to Zimbra Mail?
Before you start migrating MBOX files into Zimbra Mail, make sure your system and mailbox are ready for the migration. Having these requirements in place can help avoid interruptions during the import process.
- Keep the MBOX files you want to import readily available on your computer.
- Make sure you have valid credentials for the Zimba mailbox where the emails will be transferred.
- Confirm that you can access the destination mailbox and have sufficient permission to add or receive emails.
- Install Mozilla Thunderbird if you plan to use the free manual solution.
- Check that your Zimbra account has enough storage for the emails and attachments you need to import.
- A stable internet connection is recommended, especially when transferring large MBOX files.
Let’s get started!
How to Import MBOX to Zimbra via Thunderbird?
Use Mozilla Thunderbird as a bridge to copy emails from MBOX to Zimbra Mail. This is a free method to complete the import process.
Step 1. Launch Mozilla Thunderbird on your system.
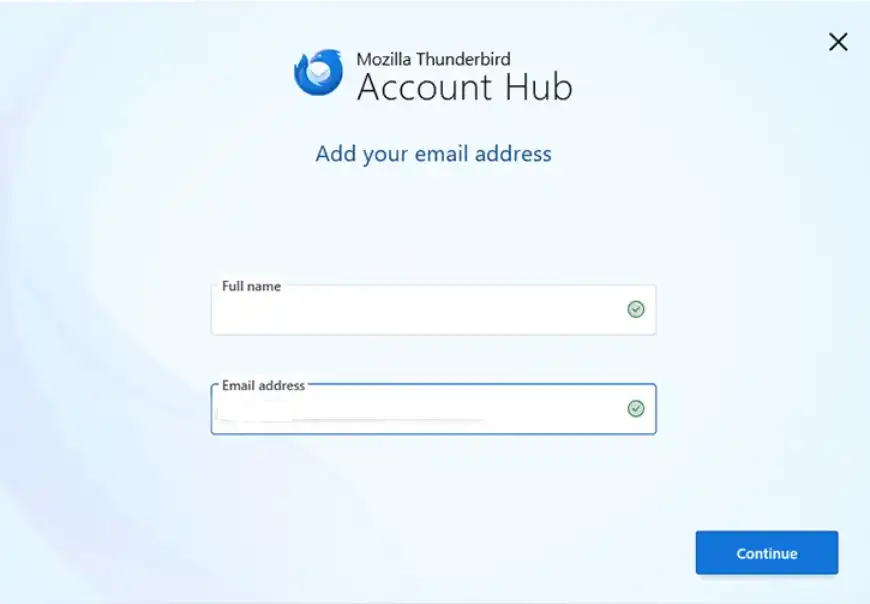
Step 2. Add Zimbra Mail account in Thunderbird.
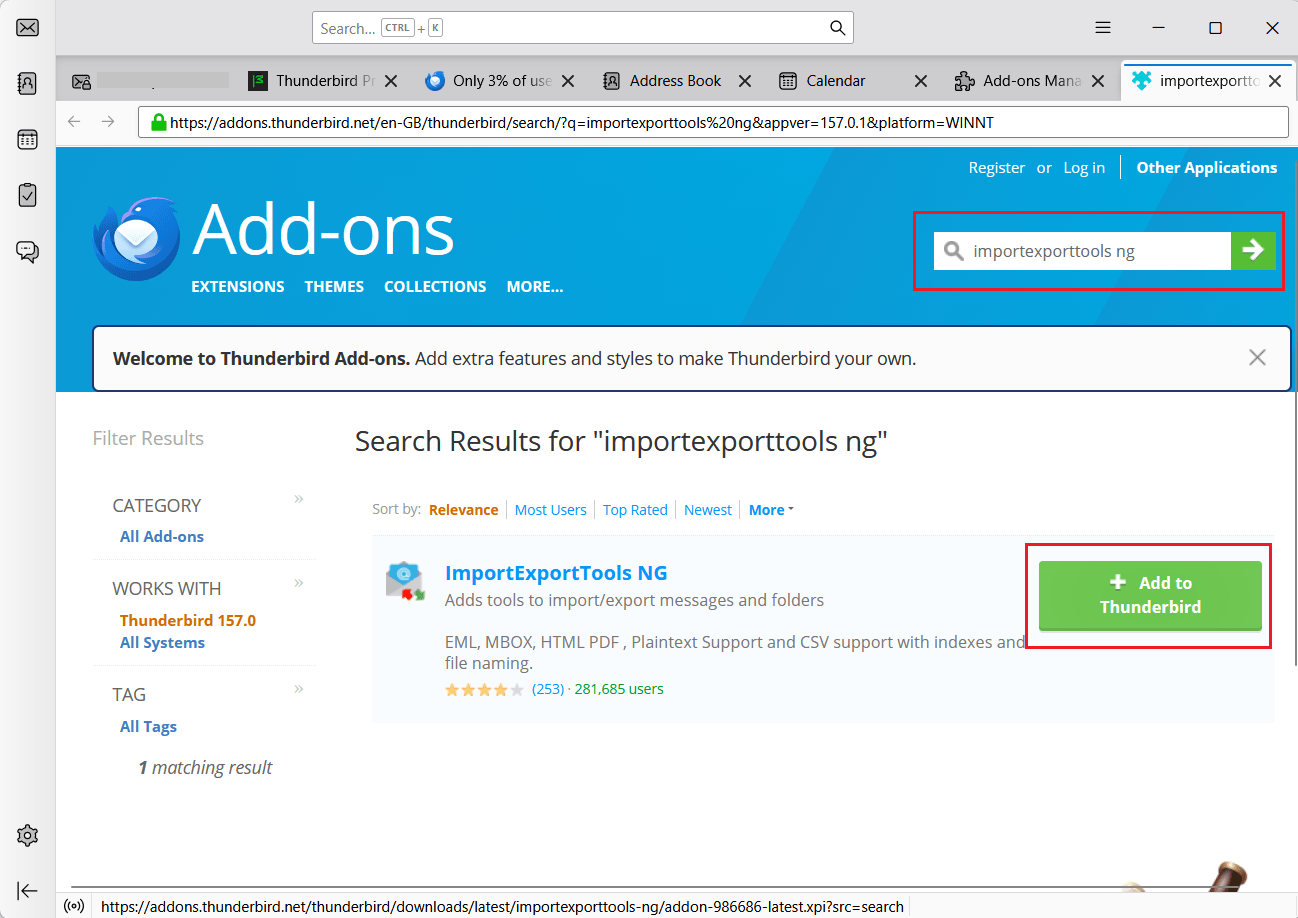
Step 3. Once added, install ImportExportTools NG in Thunderbird.
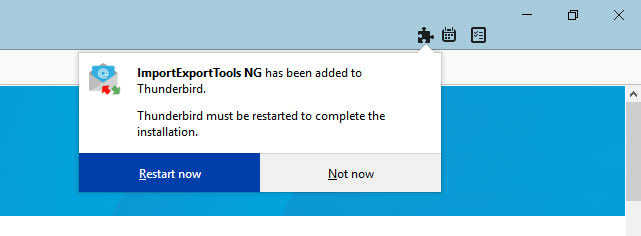
Step 4. Now, restart the Thunderbird application.
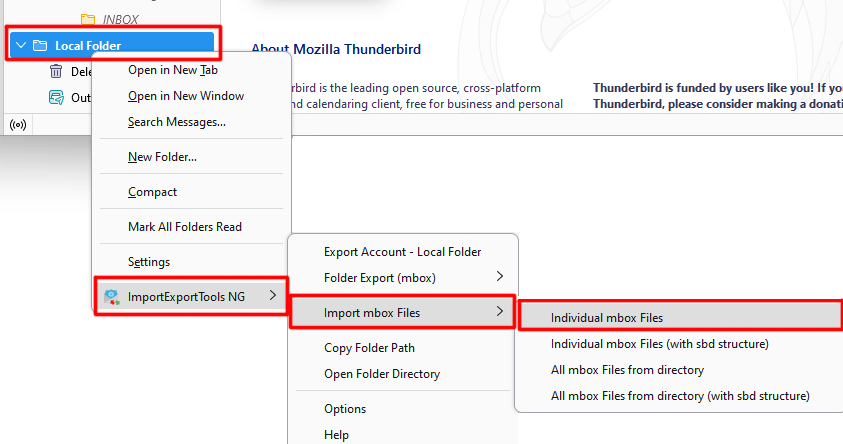
Step 5. After that, right-click on Local Folder in Thunderbird.
Step 6. Choose ImportExportTools NG >> Import mbox file >> Individual mbox file.
Step 7. Select the. mbox file from your system to import.
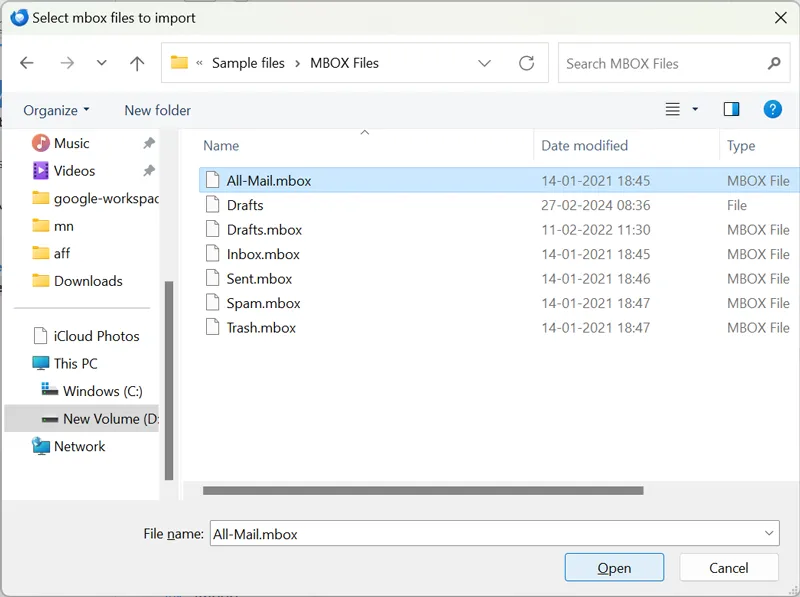
Step 8. Next, select all imported emails.
Step 9. Right-click on them and choose Copy To >> Zimbra Mail >> Folder.
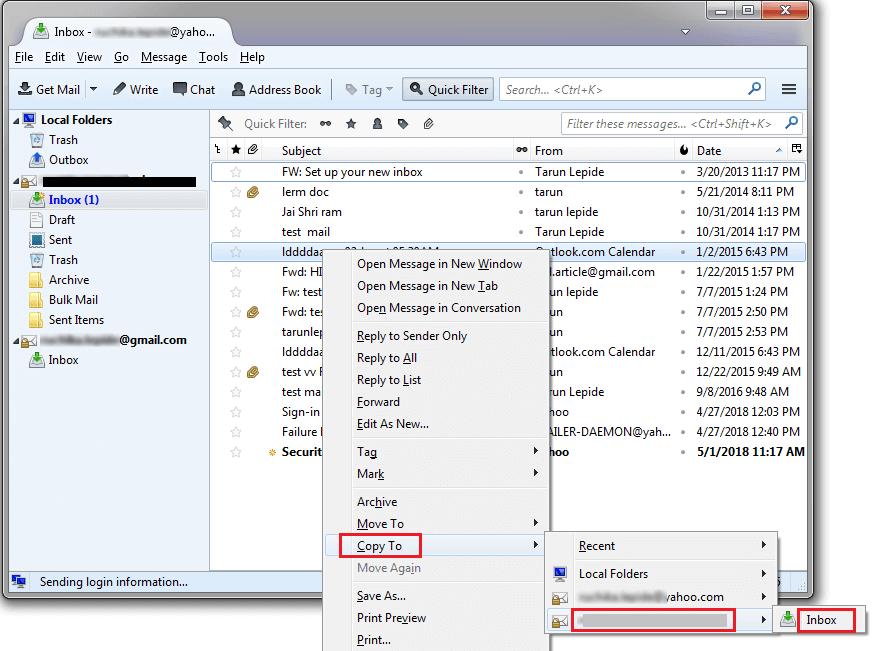
Note: Time-consuming, one MBOX at a time, manual effort.
Limitations of the Manual Method
While the Thunderbird method works, it has several drawbacks:
- Time-consuming and requires multiple steps.
- Can only import one MBOX file at a time.
- May require technical knowledge to avoid errors.
- Folder hierarchy may not be preserved.
- Does not work well with corrupted or very large MBOX files.
These limitations make manual migration suitable only for small or occasional imports.
How to Open MBOX File in Zimbra Without Thunderbird?
For faster, secure, and reliable migration, using an automated tool like Advik MBOX Converter is a smart choice.
This solution allows you to:
- Import MBOX to Zimbra Webmail and Desktop effortlessly.
- Migrate multiple MBOX files to Zimbra at once.
- Preserve original folder structure and metadata.
- Import large MBOX files without data loss.
- Advnaced email filter options for selective email importing.
- Convert MBOX files from various email clients (Thunderbird, Apple Mail, Gmail Takeout, etc.).
Click on the download button below and give it a free try now! The trial version allows you to copy first 25 emails from each MBOX folder to Zimbra without any cost.


Let’s see how this tool works and why it’s a better option.
Steps to Import MBOX to Zimbra Desktop
Step 1. Launch the software & add your MBOX file to the software.
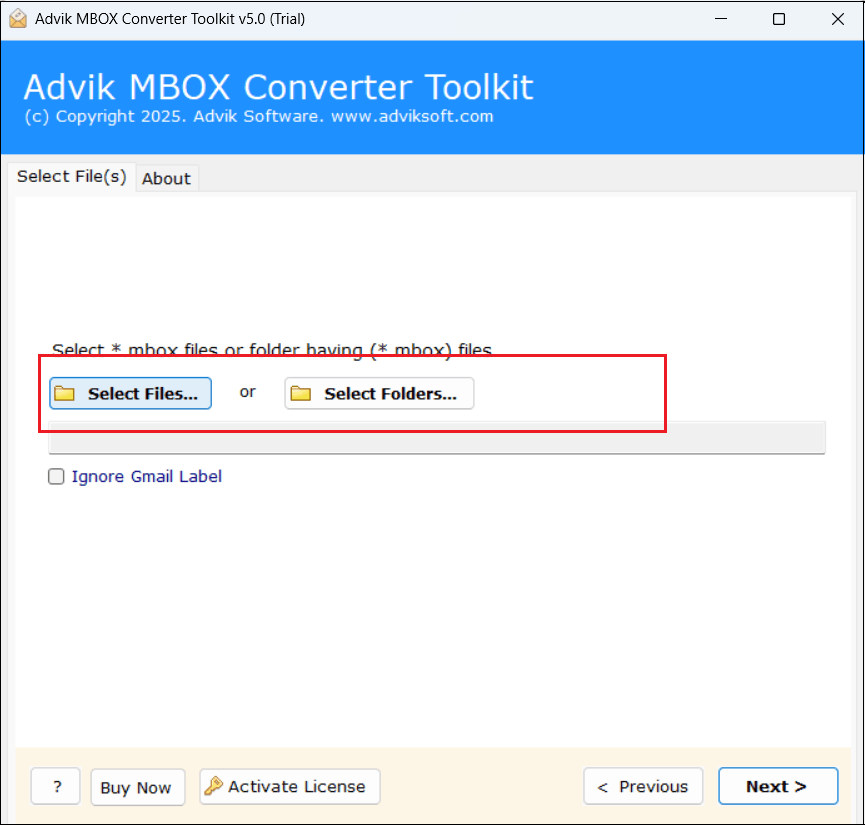
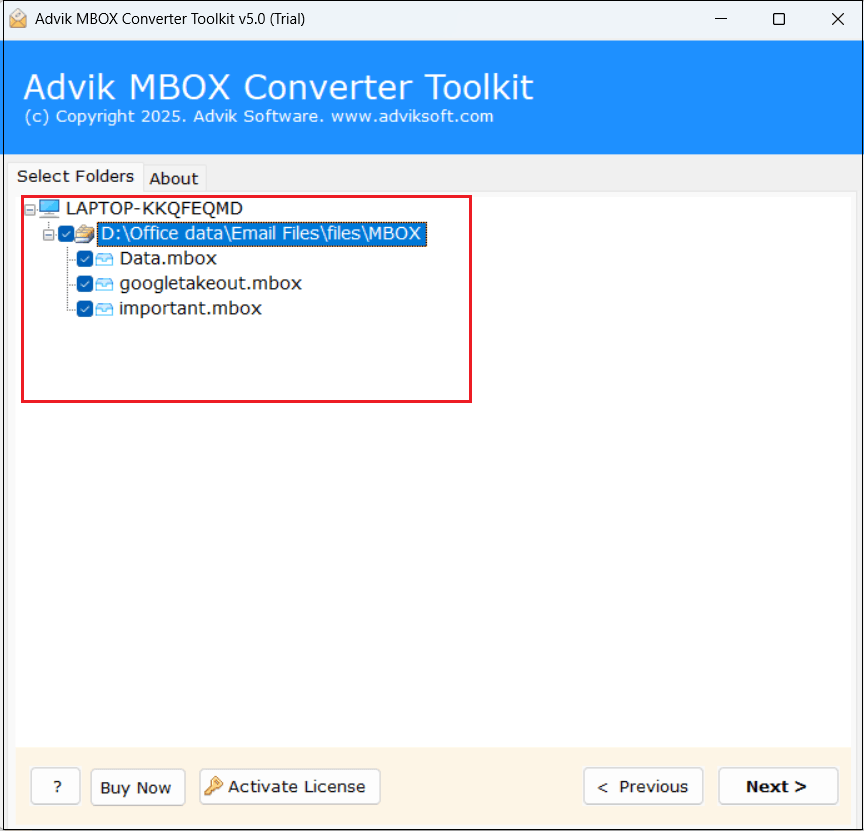
Step 2. Choose mailbox folders to import and click Next.
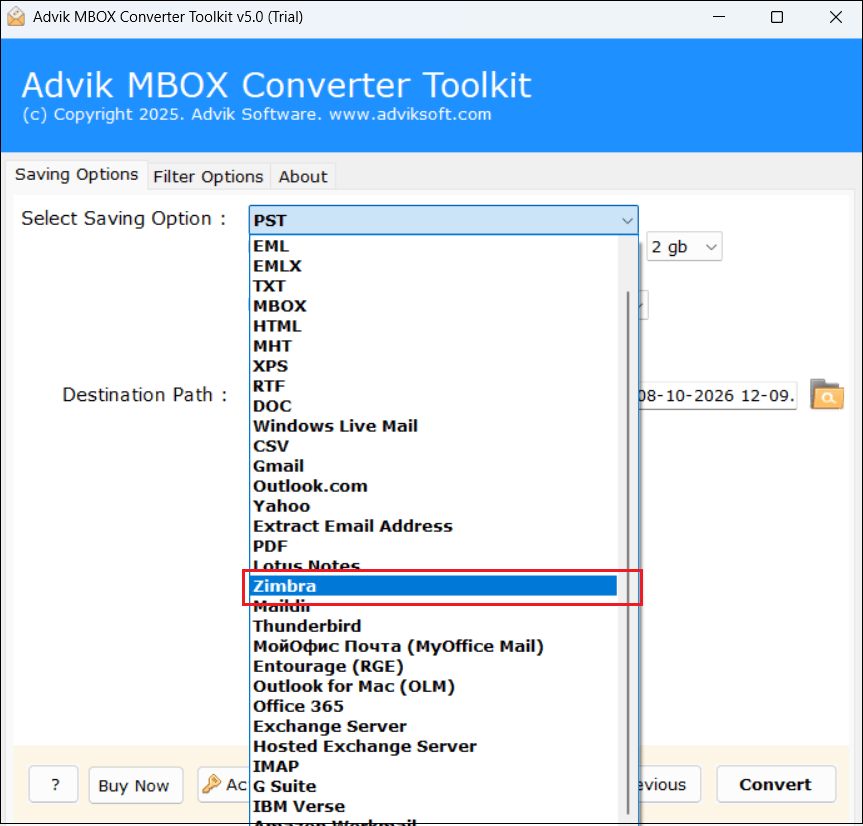
Step 3. Select Zimbra as a saving option from the list.
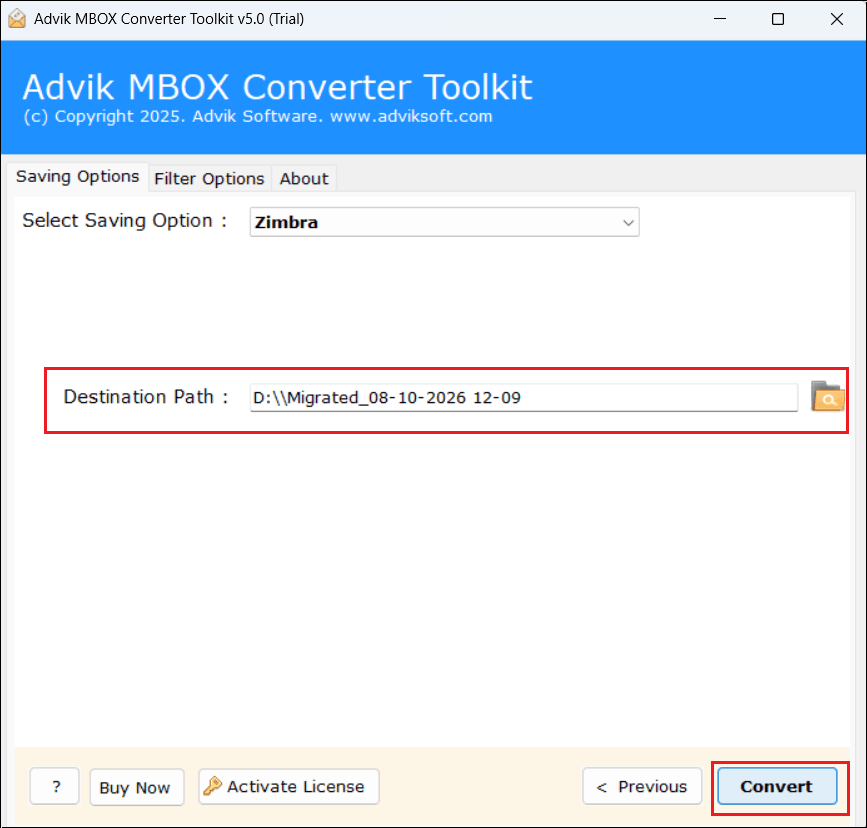
Step 4. Click the Convert button and analyze MBOX to TGZ Conversion process.
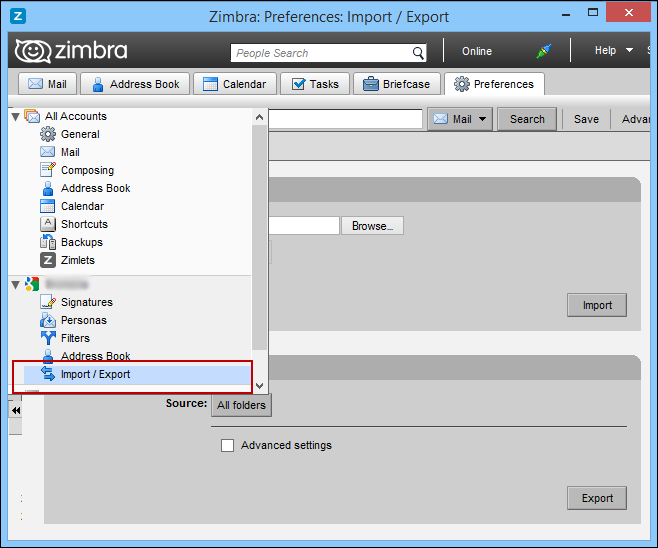
Step 5. After completion, open Zimbra Client and click the Import/Export option.
All emails, along with attachments, will be imported safely, keeping the folder structure intact.
Steps to Import MBOX to Zimbra Cloud
Step 1. Launch the software & add your MBOX file to the software.
Step 2. Choose mailbox folders to import and click Next.
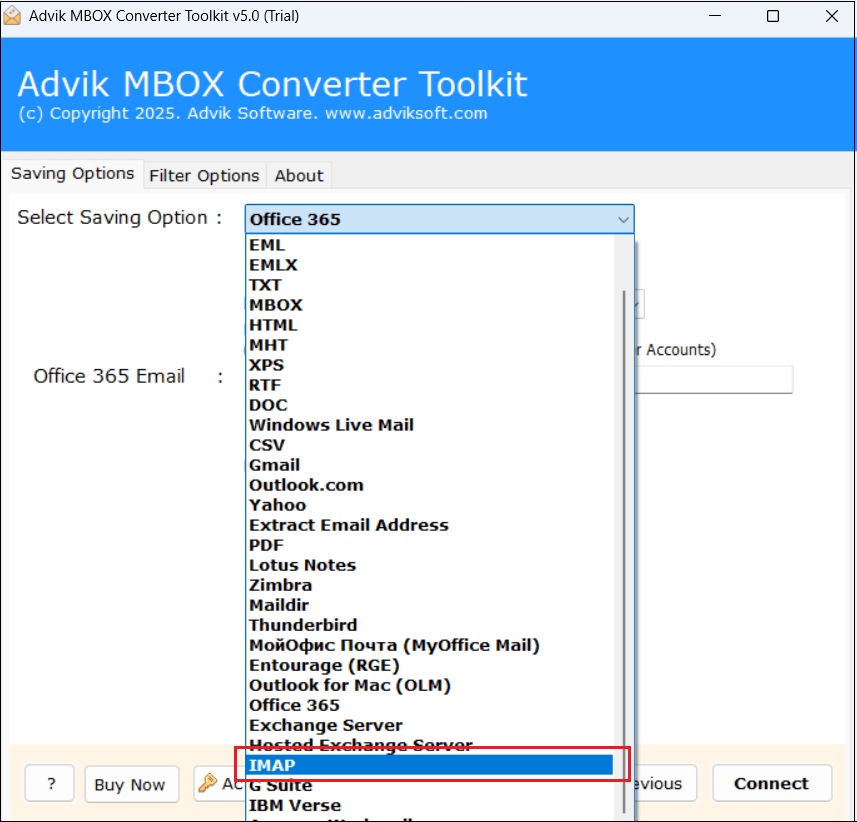
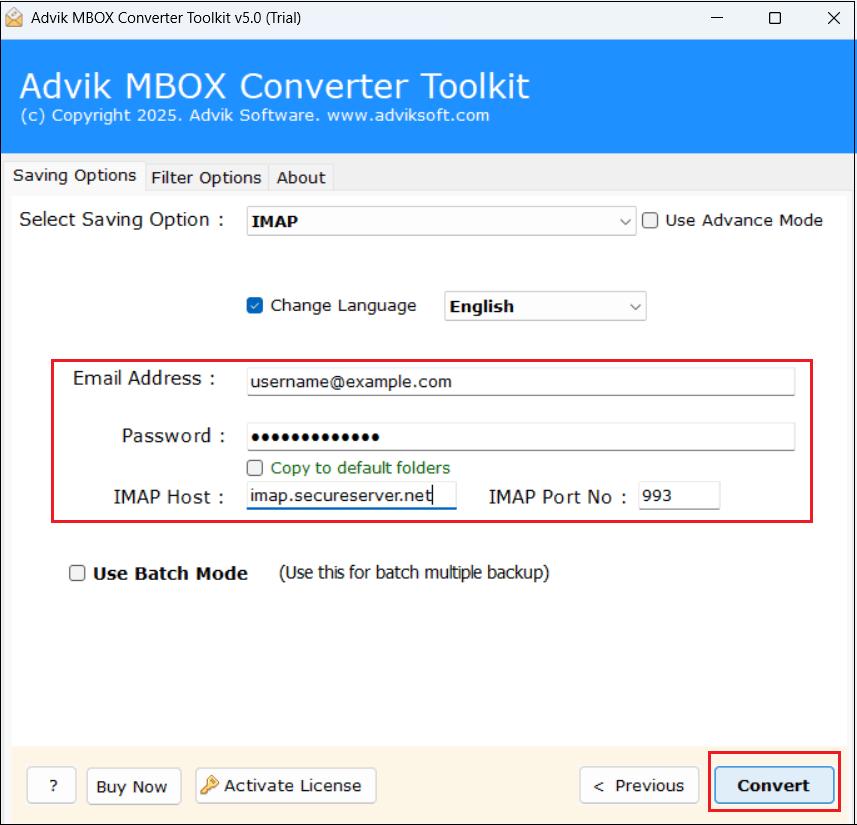
Step 3. Select IMAP as a saving option from the list.
Step 4. Enter your Zimbra Webmail login details and click Convert.
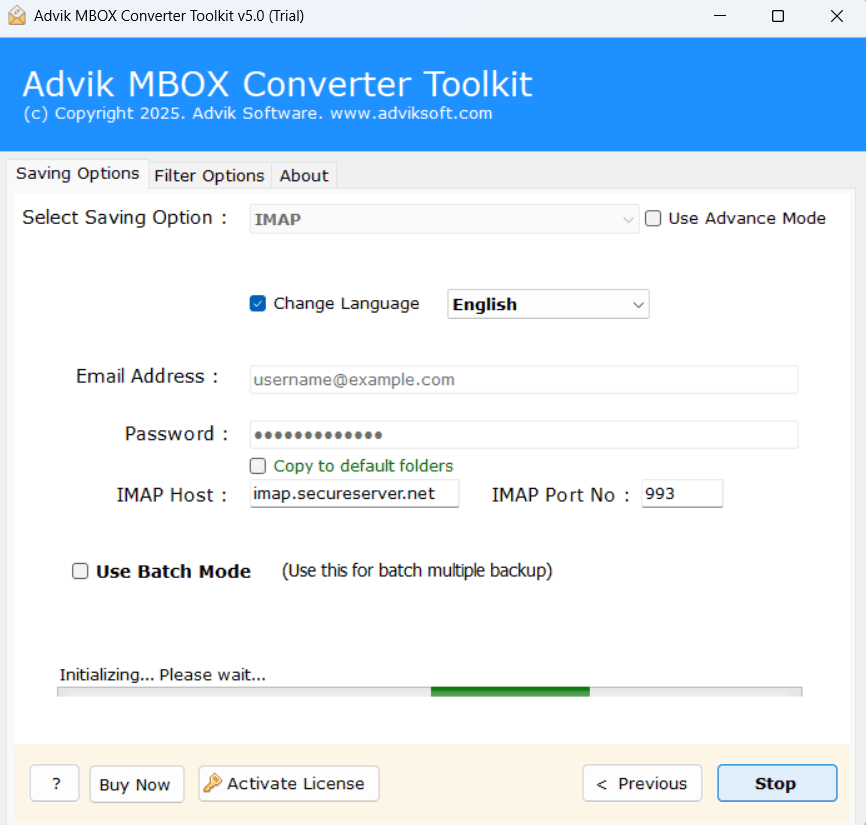
Step 5. The software will start importing MBOX emails into Zimbra webmail.
Watch How to Import Emails from MBOX to Zimbra Mail
Watch the video tutorial to learn the exact step-by-step procedure through a video guide, which will help you complete the process more effectively, or you may also make mistakes if you commit while going through the process.
How to Verify Imported Emails After Migration
After importing your MBOX files into Zimbra Mail, it is important to verify that all emails and their associated data have been transferred correctly. Before removing the original MBOX files, check the following:
- Compare the number of emails in the original MBOX file with the messages available in the corresponding Zimbra folder. This helps identify any missing emails.
- Open both older and recent messages to confirm that emails from different time periods have been imported successfully.
- Open several emails containing attachments and make sure the attached files can be viewed or downloaded without errors.
- Review the sender, recipient, subject, date and message body to ensure the email content remains intact.
- If your MBOX files contain emails from different folders, verify that the imported messages are organized correctly in Zimbra.
Final Words
Importing MBOX to Zimbra can be done manually using Thunderbird, but it is slow, complex, and prone to errors. If you want a fast, reliable, and error-free migration, using an automated tool like Advik MBOX Converter is highly recommended.
Automated migration is ideal if you:
- Have multiple or large MBOX files.
- Need a simple, beginner-friendly process.
- Want to preserve folder structure and attachments.
- Prefer batch migration with advanced filtering options.
With an automated approach, you can safely import all emails from MBOX to Zimbra without worrying about technical hurdles or data loss.
FAQs – MBOX to Zimbra Migration
Q1. Can I import MBOX to Zimbra without third-party software?
Ans. No. Zimbra does not provide a built-in option for MBOX files. You need either a manual workaround or an automated tool.
Q2. Will my email attachments be preserved?
Ans. Yes. Tools like Advik MBOX Converter ensure that attachments remain intact during migration.
Q3. Can I import multiple MBOX files at once?
Ans. Yes, batch migration is supported with automated tools.
Q4. How long does the import process take?
Ans. It depends on the size of your MBOX files and your system performance. Large files may take longer.
Q5. Can I try the tool before buying?
Ans. Yes, the free demo version allows you to test importing a limited number of emails per folder.
