How to Export Office 365 Mailbox to CSV Format?
Do you want to export Office 365 mailbox to CSV format so you can conveniently save, access, and review your email information whenever needed? In this tutorial, we will explore different ways to export Office 365 emails to CSV file. Keep reading to know more.
Comma-Separated Values (CSV) file format is a very popular way to store tabular information, including email lists, logs, and reports. CSV files are easy to open and work with in applications like Microsoft Excel, Google Sheets, OpenOffice Calc, and many others. Because CSV is a universal format, it is often used to export email data for analysis, sharing, or record-keeping.
What is a CSV File?
A CSV (Comma-Separated Values) file is a plain text file that lists data in columns. For email, it usually includes:
- Sender
- Recipient
- Subject
- Date
- Other metadata
Note: CSV files do not keep:
- Email bodies in their original format
- Attachments
- Rich formatting
In the sections below, we will look at manual and automated methods to export Microsoft 365 mailbox to CSV file.
How to Export Office 365 Mailbox to CSV File Manually?
This method is suitable if you’re familiar with PowerShell and have admin rights in Office 365.
Step 1. Open PowerShell as Administrator.
Step 2. Connect to Exchange Online with this command:
Connect-ExchangeOnline -UserPrincipalName your-email@domain.com
Step 3. Run this command to export mailbox metadata to CSV:
Search-Mailbox -Identity your-email@domain.com -TargetMailbox your-email@domain.com -TargetFolder “Export” -LogLevel Full -StartDate “01/01/2023” -EndDate “12/31/2023” -ResultSize Unlimited -SearchDumpster -Force | Export-Csv -Path “C:\Path\to\output.csv” -NoTypeInformation
Step 4. Replace placeholders (your-email@domain.com and file path) with your actual info.
Step 5. Wait for the command to complete; the CSV file will be saved at the specified location.
Important: This method exports email metadata and search results but does not export full email bodies or attachments.
How to Export All Users from Office 365 to CSV Automatically?
If you don’t want to deal with complicated steps or PowerShell scripts, try using the Advik Office 365 Backup Tool. With this tool, you can quickly export multiple user mailboxes from Office 365 to CSV format without any technical trouble. This software is designed to make the export process simple and hassle-free, even if you’re not a tech expert.
After installing the tool on your Windows PC, just log in with your Office 365 admin credentials. You can then select multiple user mailboxes or specific folders to export. Choose CSV as your output format, pick a location to save the file, and click the Backup button. The software will start exporting all selected emails to a CSV file while keeping the original folder structure and data intact—no email content will be changed or lost.
Try it now to export your Office 365 emails with ease!


Steps to Export Office 365 Mailbox to CSV File
Step 1. Launch the software on your Windows PC and sign in.
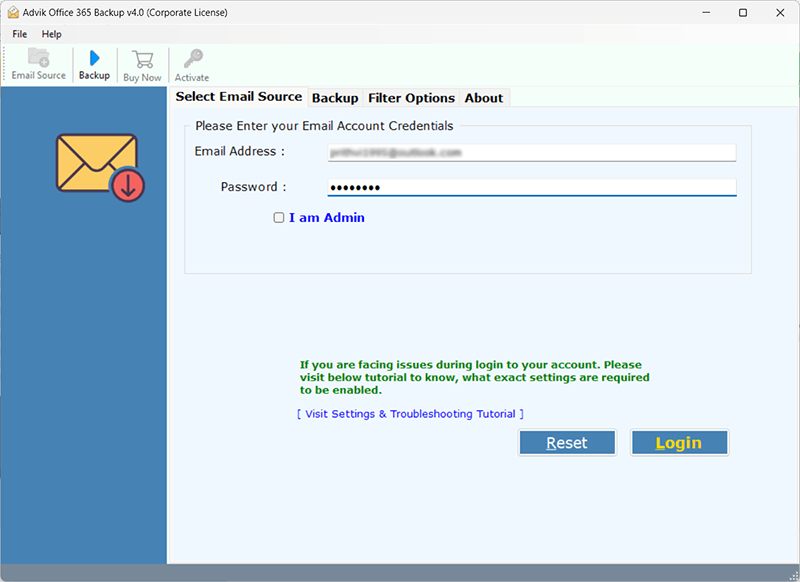
Step 2. Select mailbox or email folders to convert into CSV file.
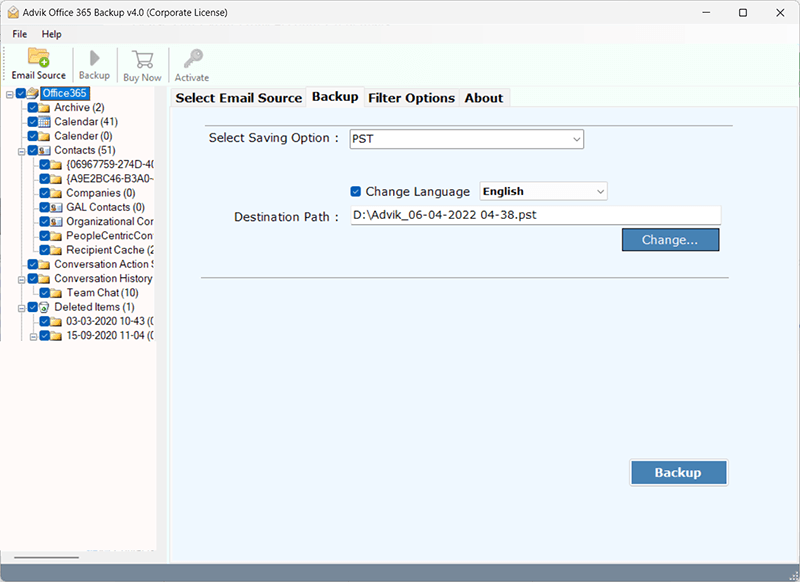
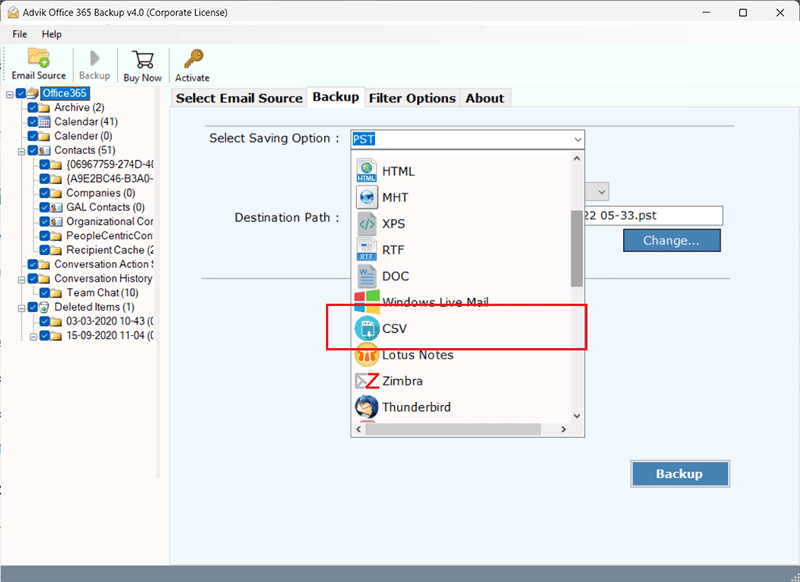
Step 3. Choose CSV as a saving option from the software.
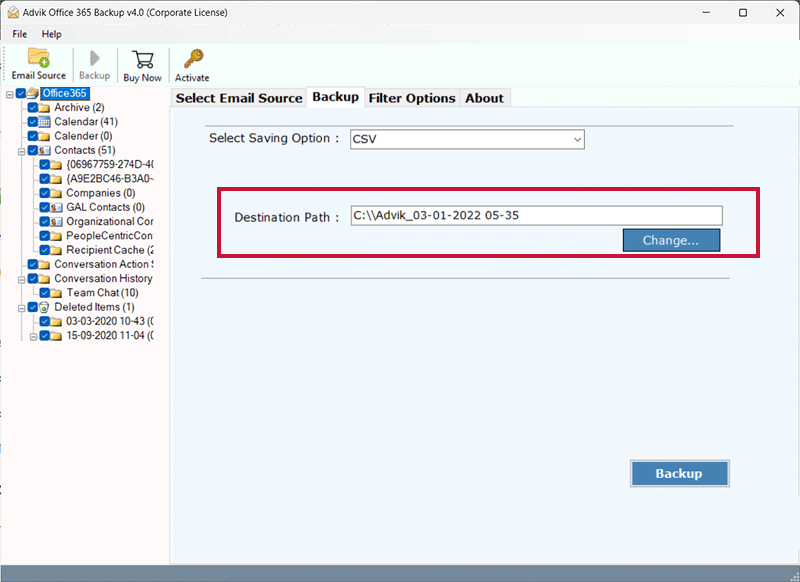
Step 4. Set a target location where you want to export Microsoft 365 mailbox.
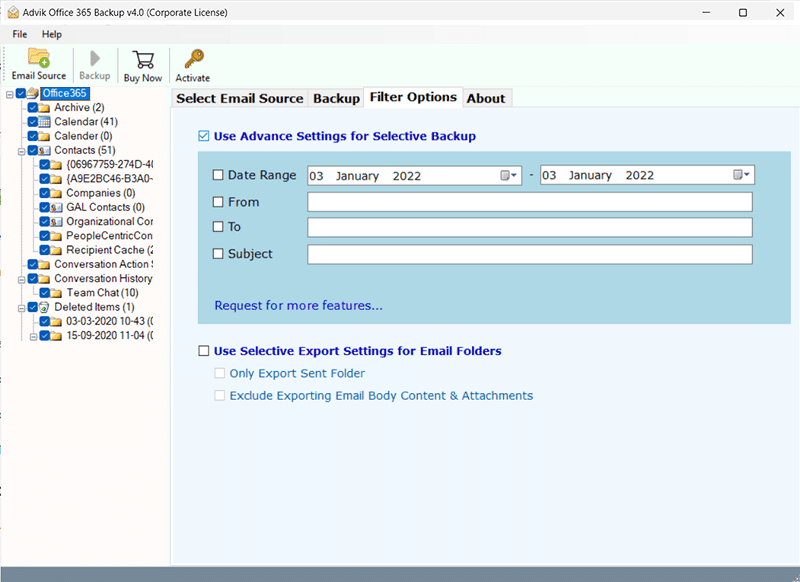
Step 5. Use the Advance Email Filter Option to export selective emails only. (Optional)
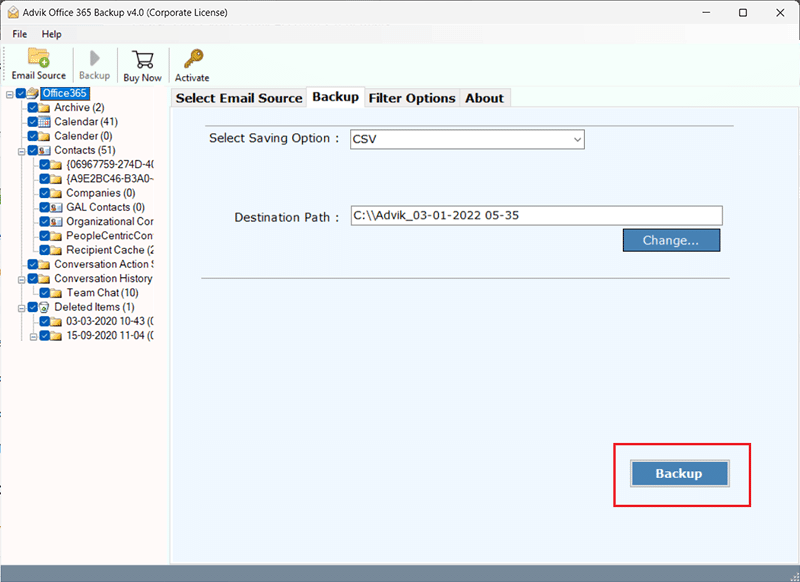
Step 5. Click the Backup button to start converting Office 365 emails to CSV file.
This is one of the prominent solutions to export Office 365 mailbox to CSV file for Excel. You can import Office 365 emails to Excel sheet without losing a single bit of information.
When to Use a Specialized Tool?
If you:
- Need to export multiple mailboxes at once
- Want to save email content and attachments
- Prefer one-click export without technical steps
Note: Only use a paid tool if manual methods don’t meet your needs.
Conclusion
You have two main options to export Office 365 mailbox to CSV:
- PowerShell – Advanced and suitable for admins.
- Automated Tool – An easy-to-use tool for all types of users.
If you need full emails or attachments or want to avoid complex steps, you can look into an export tool as a last resort.
Frequently Asked Questions
Q1. Can I export my Office 365 mailbox to CSV using Outlook?
Ans. Yes, using Microsoft Outlook’s Import/Export feature, you can export your mailbox folders to CSV file, which includes your emails and other relevant data.
Q2. Is it possible to export Office 365 mailbox data to CSV using PowerShell?
Ans. Yes, you can use PowerShell to export mailbox details such as display names, email addresses, and login times to a CSV file. However, exporting the full content of the emails (such as the body and attachments) requires more complex commands or third-party tools.
Q3. What data can I export to CSV from my Office 365 mailbox?
Ans. You can export key email information like sender, subject, recipient, date, and more. However, exporting email content and attachments may require different formats.
Related Articles