How to Import MBOX to GoDaddy Email Account?
MBOX is a file format used to store email messages in a single mailbox. It is supported by several email clients like Thunderbird, Apple Mail, Opera Mail, etc. Many users struggle to access their old emails stored in MBOX files after switching to GoDaddy emails. Since GoDaddy doesn’t support direct MBOX import, which makes the process bit tricky. In this article, we will explain two different ways to accomplish this task.
By the end of this tutorial, you will be able to migrate your MBOX files to GoDaddy Business Email with ease. Let’s get started!
How to Import MBOX to GoDaddy Business Email Account Manually?
Users can manually transfer MBOX file to GoDaddy via Thunderbird. Follow the steps below:
1. Open Thunderbird on your system.
2. Click on the 3 horizontal lines and choose Add-Ons and Themes.
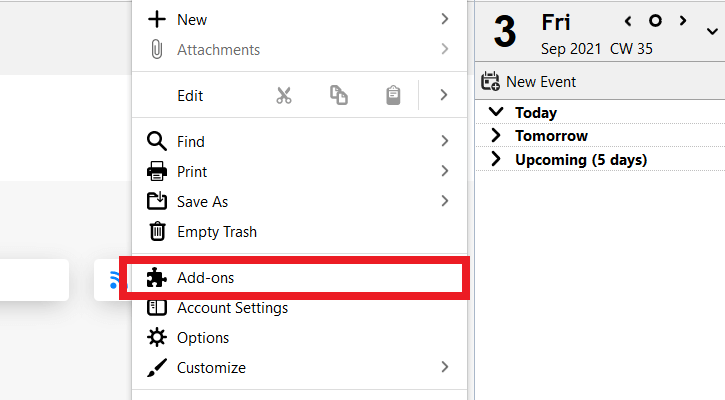
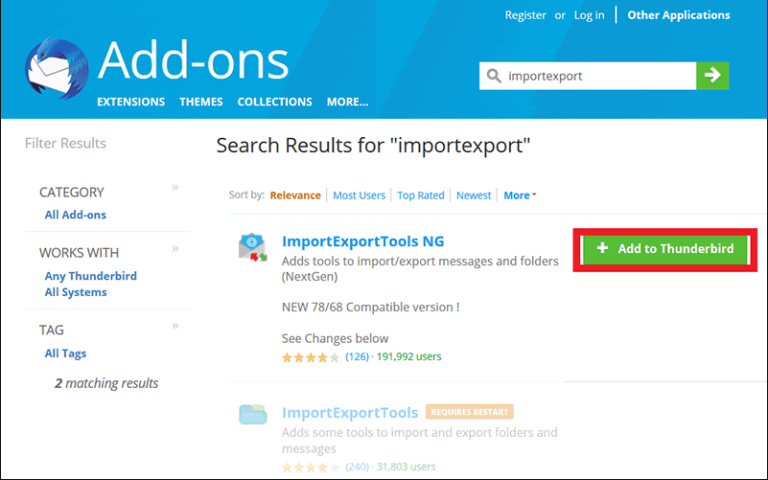
3. Install ImportExportTools NG in Thunderbird.
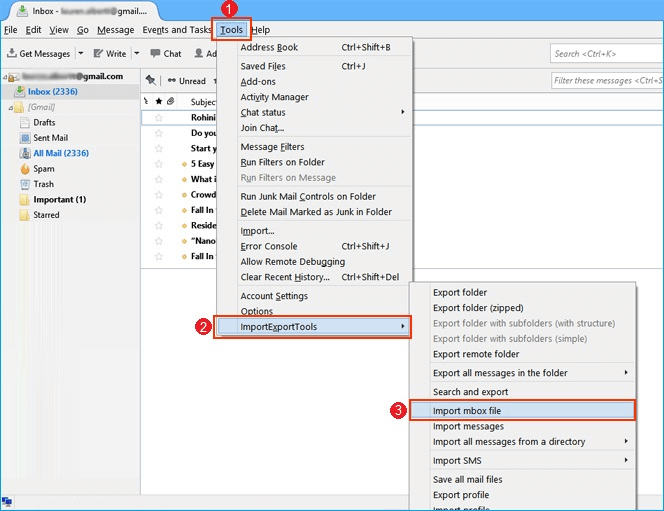
4. Now, click on Tools >> ImportExportTools >> Import MBOX File.
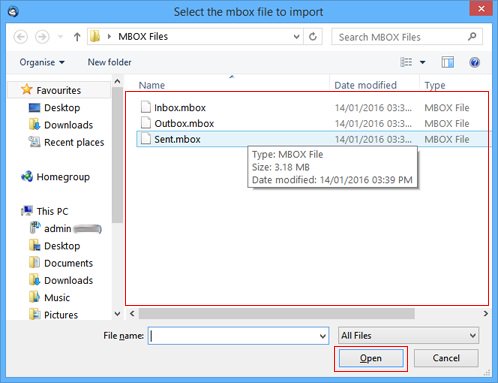
5. Select the MBOX file and click Open.
6. Next, go to Tools >> Account Settings.
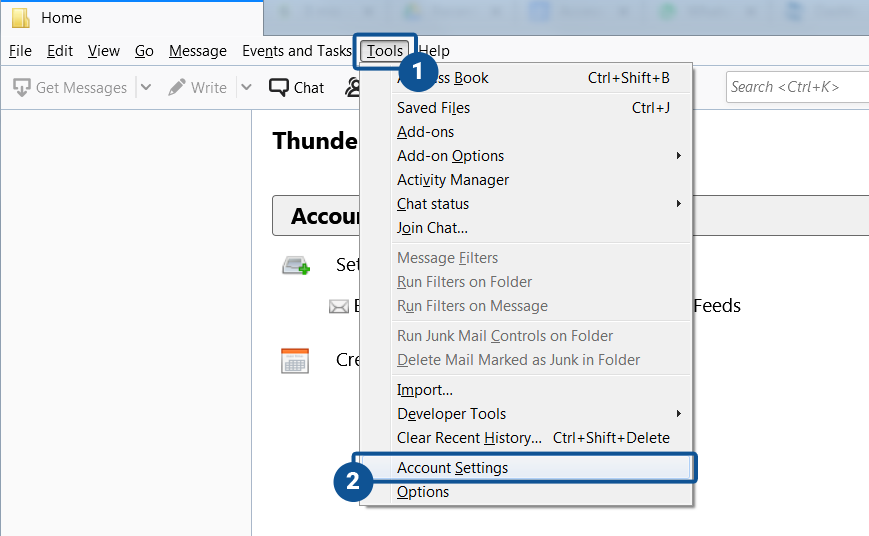
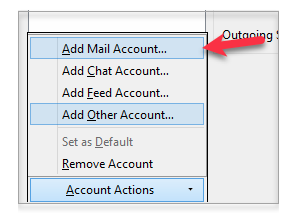
7. Navigate to Account Actions >> Add Mail Account.
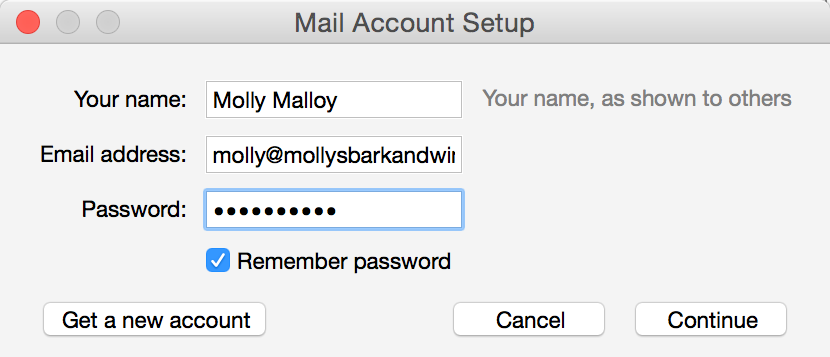
8. Enter the GoDaddy email account details to set up with Thunderbird.
9. After configuration, go to the folder where you import MBOX file.
10. Right-click on it and move this file into GoDaddy mailbox folder.
This is how you can manually import MBOX emails into GoDaddy Business email account.
How to Open MBOX File in GoDaddy Email Account Automatically?
Download and Install the Advik MBOX Converter on your Windows PC. This powerful tool ensures a direct and secure migration while maintaining email formatting, attachments, and folder hierarchy. It supports bulk conversion which allows you to import multiple MBOX files to GoDaddy at once without data loss.
With advanced email filters, you can selectively transfer emails based on date, subject, or sender. The software is easy to use, even for beginners, thanks to its simple interface. Just add your MBOX file, choose IMAP as the saving option, enter your GoDaddy email login details, and start the migration with a single click.
Try the FREE Demo: Import 25 emails per folder to GoDaddy Email for free!
Download Now & Get Started!

Steps to Import MBOX File to GoDaddy Mail
Step 1. Launch the software on your Windows PC.
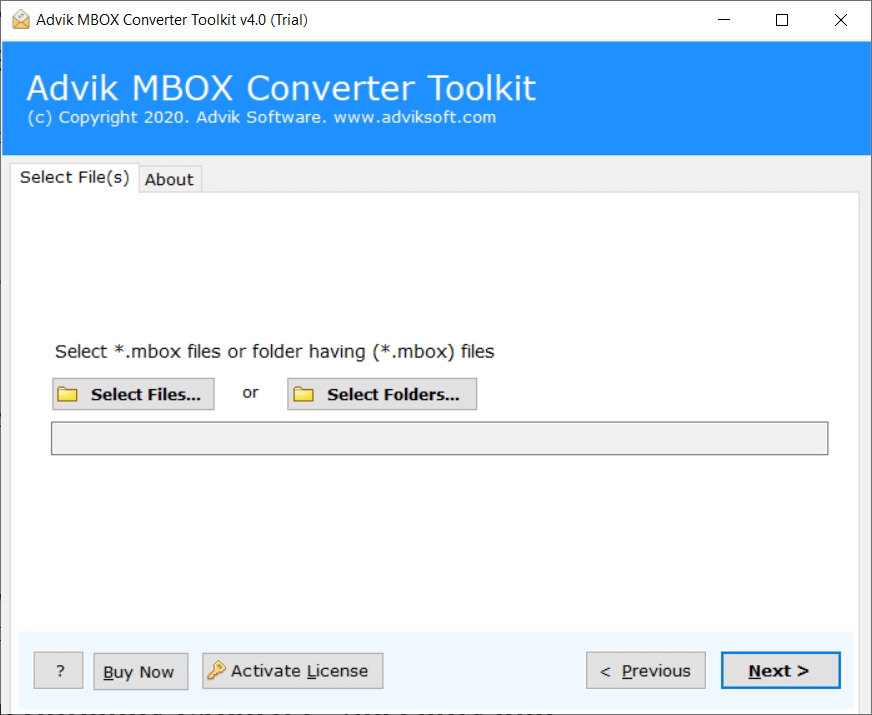
Step 2. Click “Select File” and locate .mbox file into panel.
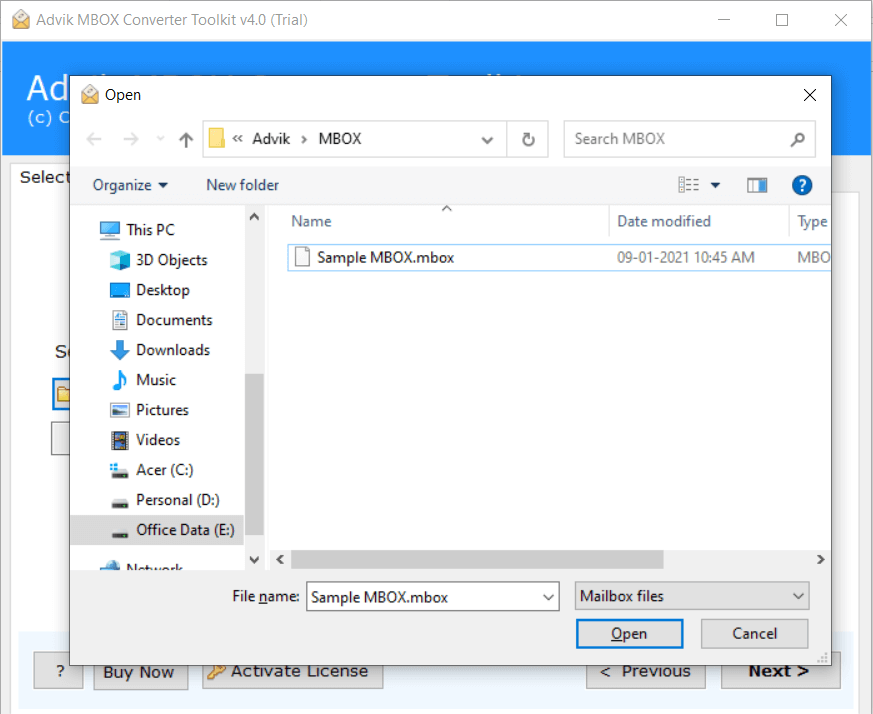
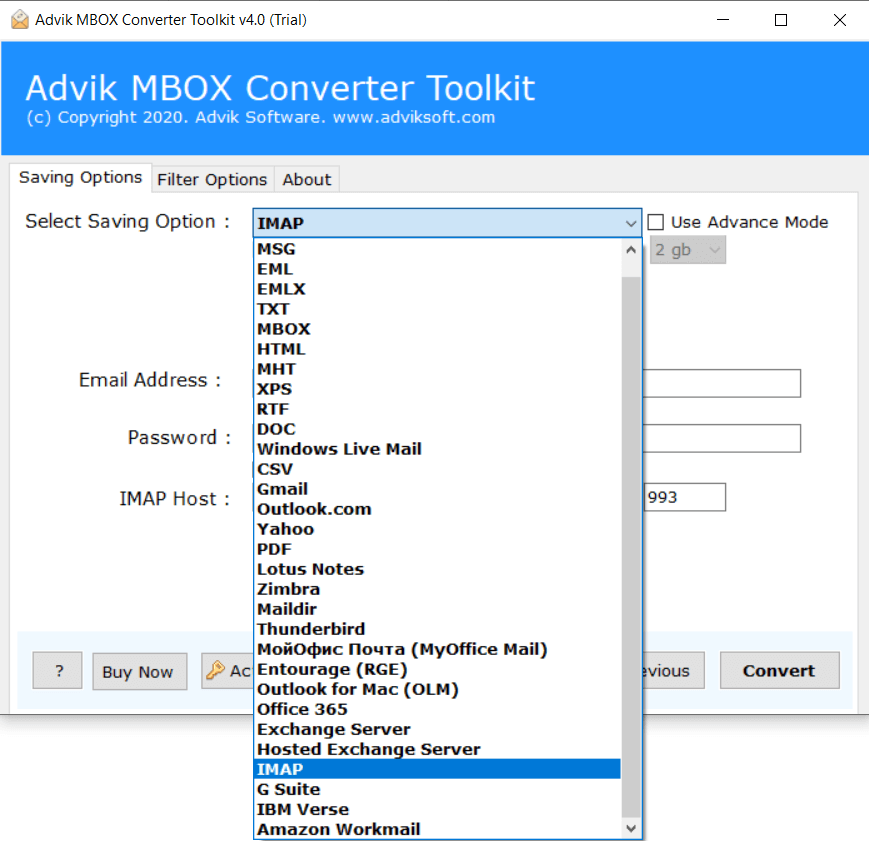
Step 3. Choose IMAP as Saving Option from the list.
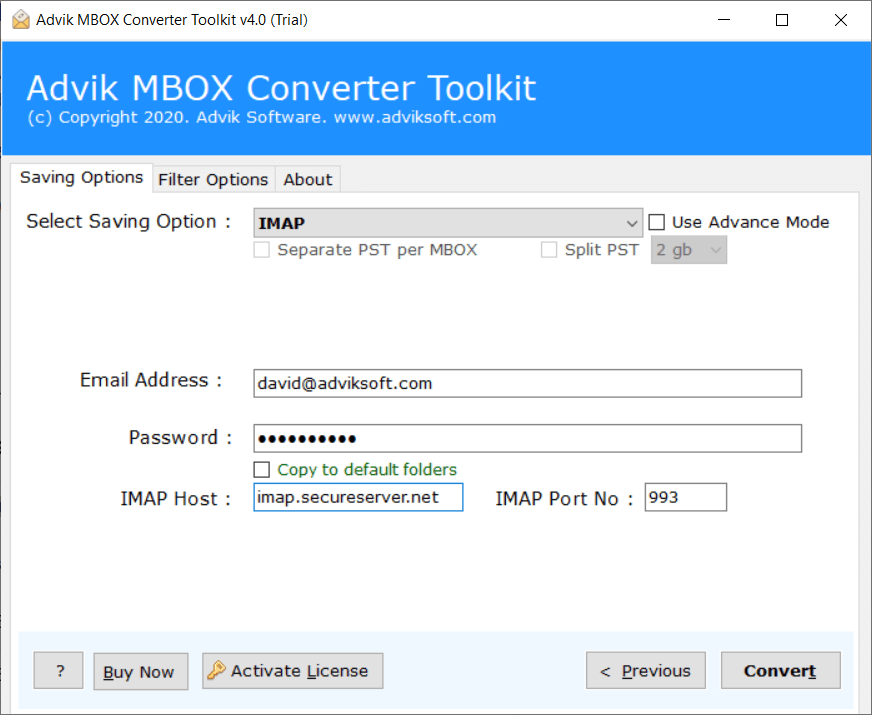
Step 4. Enter your GoDaddy Email account credentials.
Step 5. Click Next button to start migration process.
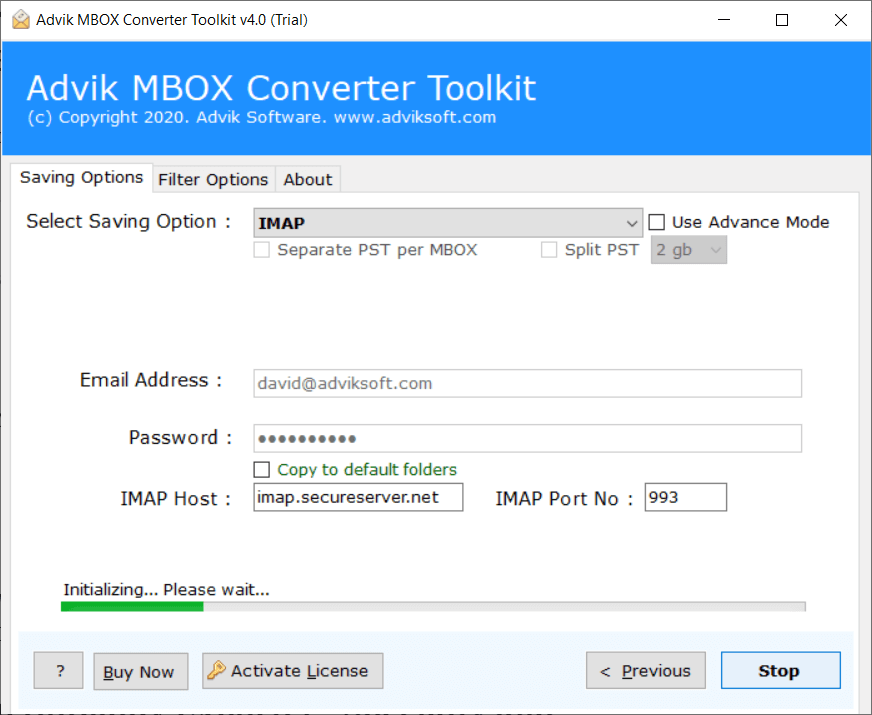
Note: Enable IMAP option from GoDaddy Business Account Security Setting for Sign in.
Finished! Now sit back and relax the software will start converting MBOX emails to GoDaddy account.
Watch How to Transfer MBOX File to GoDaddy Email Account
Benefits of Using an Automated Software
This utility is very simple and easy to operate. Anyone with little to no technical knowledge can easily import .mbox file to GoDaddy. Below are a few key highlights of the software that make it unique from the rest.
- Convert MBOX to CSV, EML, MSG, PST, PDF, 15+ file formats.
- Upload MBOX file into almost any email service provider.
- Retain email properties such as attachments, hyperlinks, etc during migration.
- Transfer multiple MBOX files to GoDaddy business account in a single attempt.
- Also, migrate MBOX emails to iCloud, Office 365, Yahoo Mail, etc.
- Transfer .mbox emails to GoDaddy with Attachments.
- The tool ensures quick migration without compromising data security.
- Purchase once and enjoy free software updates for a lifetime.
- Fully compatible with Windows 11, 10, 8, 7, and previous versions.
Final Words
In this post, we have discussed how to import MBOX to GoDaddy Business email account. Here, we have explained both manual and automated solutions. The manual method is free but it is a lengthy and time-consuming process. If you want a simple and quick solution then choosing the automated tool is the best option. Now, you can decide which method is most suitable for you.

Related Articles