How to Transfer Emails from One Office 365 Account to Another?
Jim Backus | June 11th, 2025 | Email Migration, Office 365
If you’re planning to transfer emails from one Office 365 account to another, maybe due to employee offboarding, restructuring, or mailbox cleanup, this guide is for you.
We’ll walk you through two practical options:
- A manual method using PowerShell
- An automated solution (for users who find PowerShell complex)
Let’s begin with the manual approach first.
#1. Transfer Emails from One Office 365 Account to Another (PowerShell)
This method requires Office 365 admin rights and some technical know-how. If you’re comfortable with PowerShell, follow the steps below:
Before You Start:
Make sure you have:
- Admin access to Office 365
- PowerShell installed
- Exchange Online Management Module installed
Follow the steps explained below to transfer emails from one Office 365 account to another using PowerShell.
Step 1. Run PowerShell as an Administrator.
Step 2. Install the Exchange Online Management Module.
Install-Module -Name ExchangeOnlineManagement
Step 3. Connect to Exchange Online.
Connect-ExchangeOnline -UserPrincipalName your-admin@domain.com -ShowProgress $true
Step 4. Export Emails from Source Mailbox:
Create a content search to find emails in the source mailbox:
New-ComplianceSearch -Name “ExportEmails” -ExchangeLocation “source@domain.com” -ContentMatchQuery “received>=01/01/2022 AND received<=12/31/2022”
Start the content search:
Start-ComplianceSearch -Identity “ExportEmails”
Export the search results to a PST file:
New-ComplianceSearchAction -SearchName “ExportEmails” -Export -Format “PST”
Step 5. Download the PST File:
Follow the provided link from the export job notification email to download the PST file to your local machine.
Step 6. Import Emails to Target Mailbox:
Use the New-MailboxImportRequest cmdlet to import the PST file into the target mailbox:
New-MailboxImportRequest -Mailbox target@domain.com -FilePath “\\path\to\exportedfile.pst”
Step 7. Monitor the Import Request:
Check the status of the import request:
Get-MailboxImportRequest
View detailed information if needed:
Get-MailboxImportRequestStatistics -Identity target@domain.com\MailboxImport
Step 8. Disconnect from Exchange Online:
Disconnect-ExchangeOnline
These steps outline the process to move emails from one Office 365 account to another using PowerShell.
Manual Method Limitations
While the manual process is secure and official, it comes with challenges:
- Requires PowerShell knowledge
- Cannot transfer large mailboxes easily
- Does not support selective folders or filters unless scripted
- Time-consuming for bulk migrations
#2. Move Emails from One Account to Another Office 365 (When Manual Doesn’t Fit)
If the manual method seems too complex or you need to transfer multiple mailboxes, you can consider a trusted migration tool.
For example, Advik Office 365 Migration Tool offers:
- Selective or full mailbox transfer
- Preserves folder structure and metadata
- No need for complex scripting
- Bulk mailbox support
- This is ideal for non-technical users or IT teams managing large migrations.
This is ideal for non-technical users or IT teams managing large migrations.
Note: Use software only if manual PowerShell is too complex or doesn’t meet your use case (like bulk or selective folder migration).
Download the software and try it for free.


Steps to Transfer Emails from One Office 365 Account to Another
Step 1. Run this, Office 365 Backup Tool, on your Windows System.
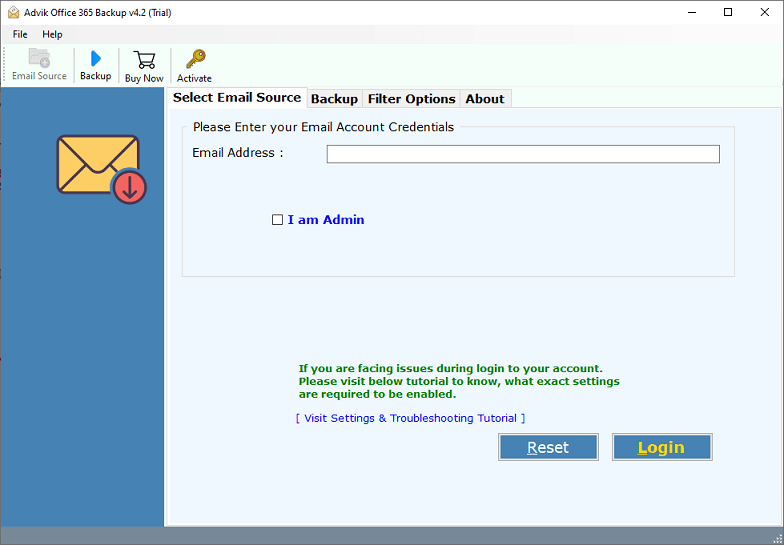
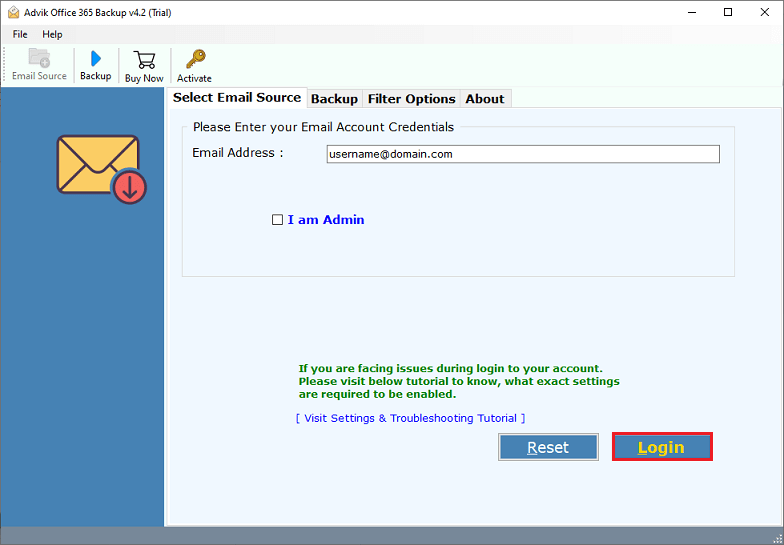
Step 2. After that, enter your Office 365 email address and log in to the software panel.
Step 3. Choose mailbox folder(s) to transfer/migrate.
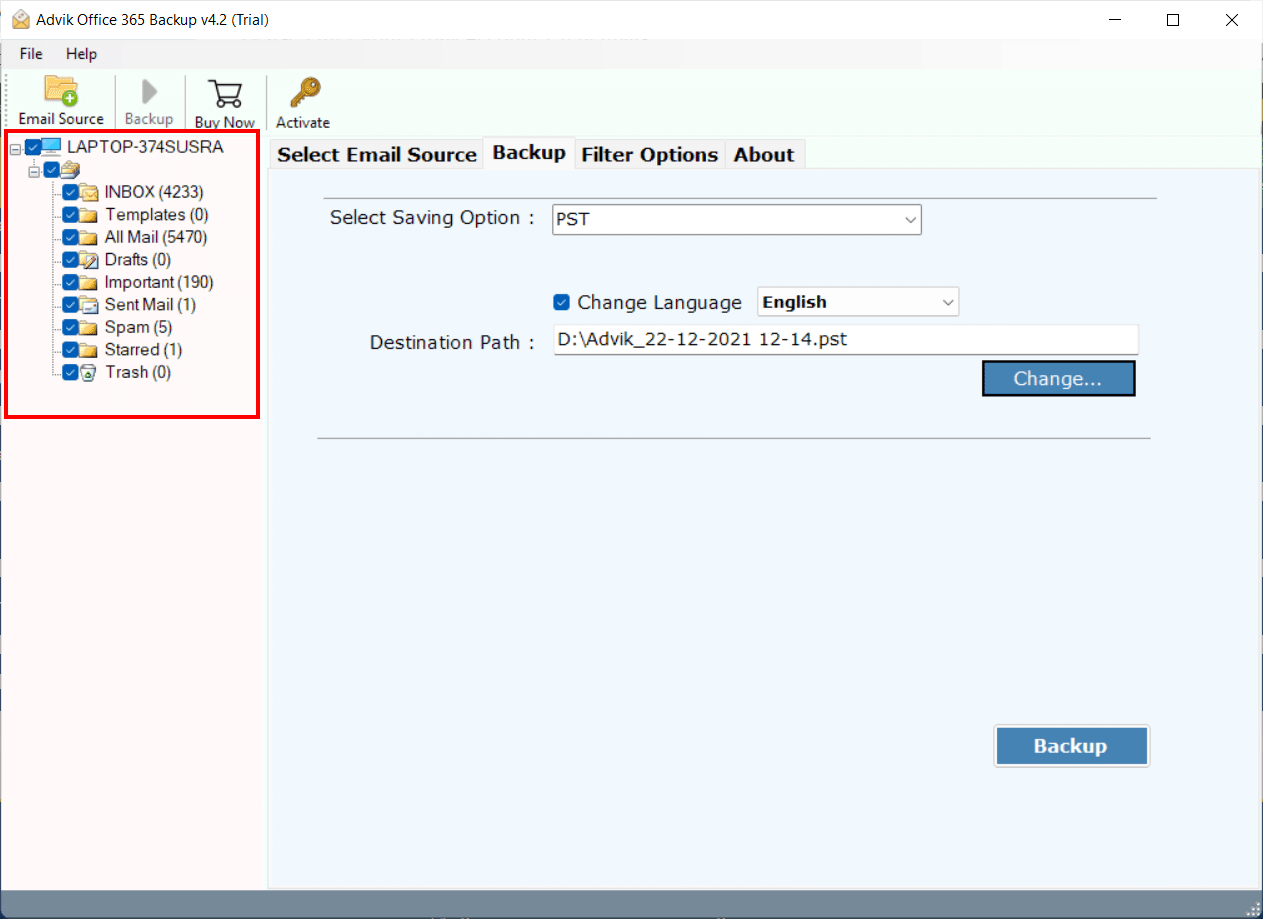
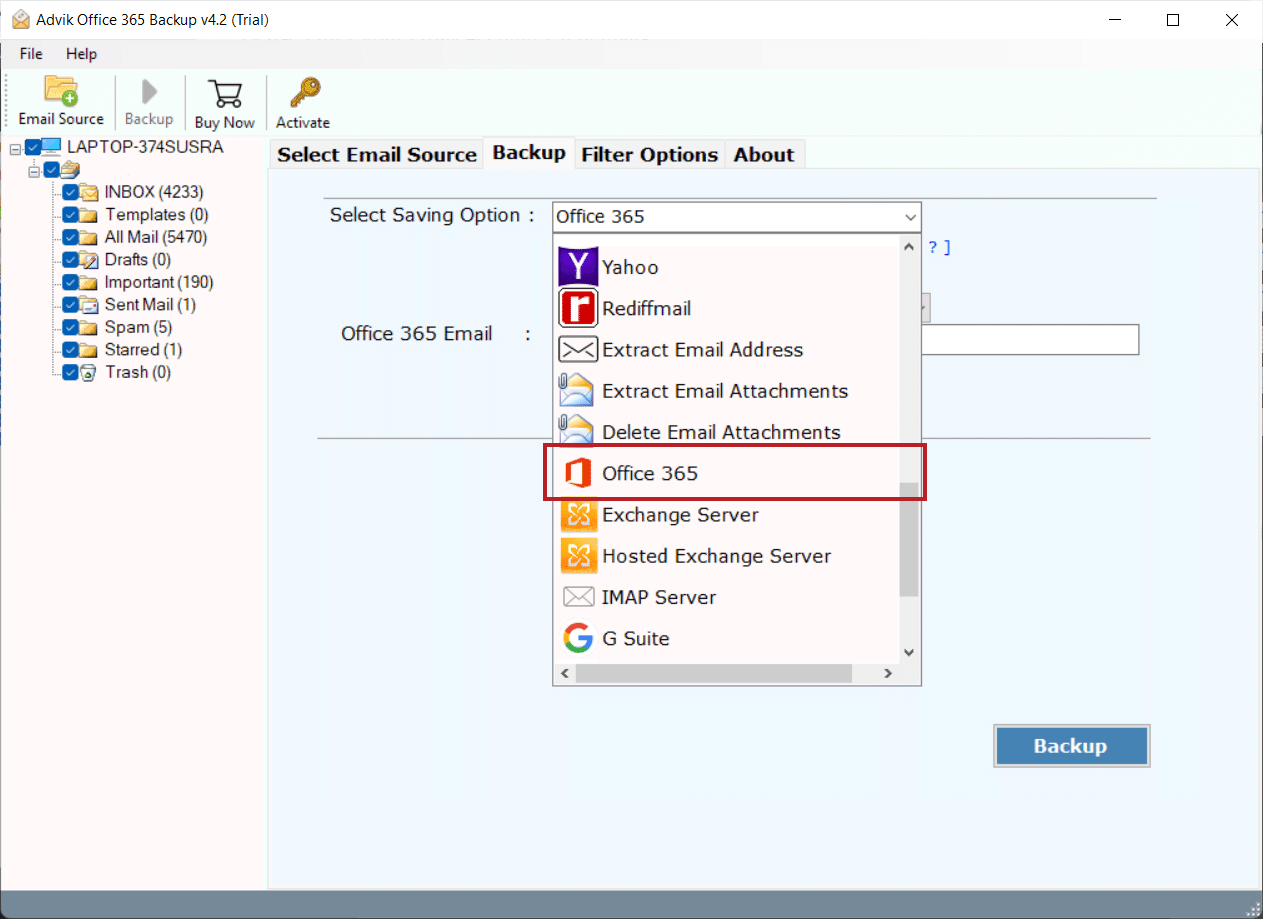
Step 4. Choose Office 365 as a savings option.
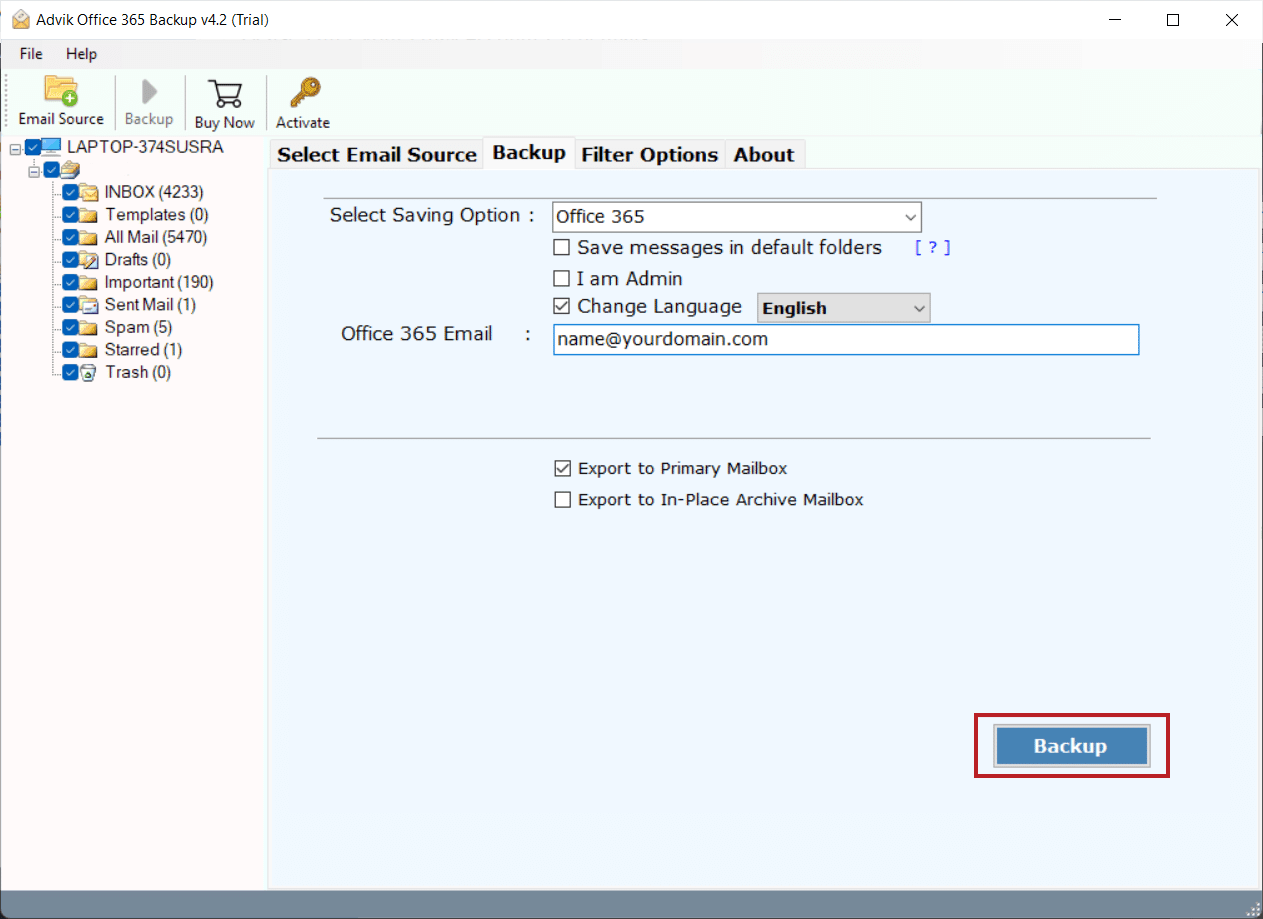
Step 5. Enter another Office 365 login credentials and press the Backup button.
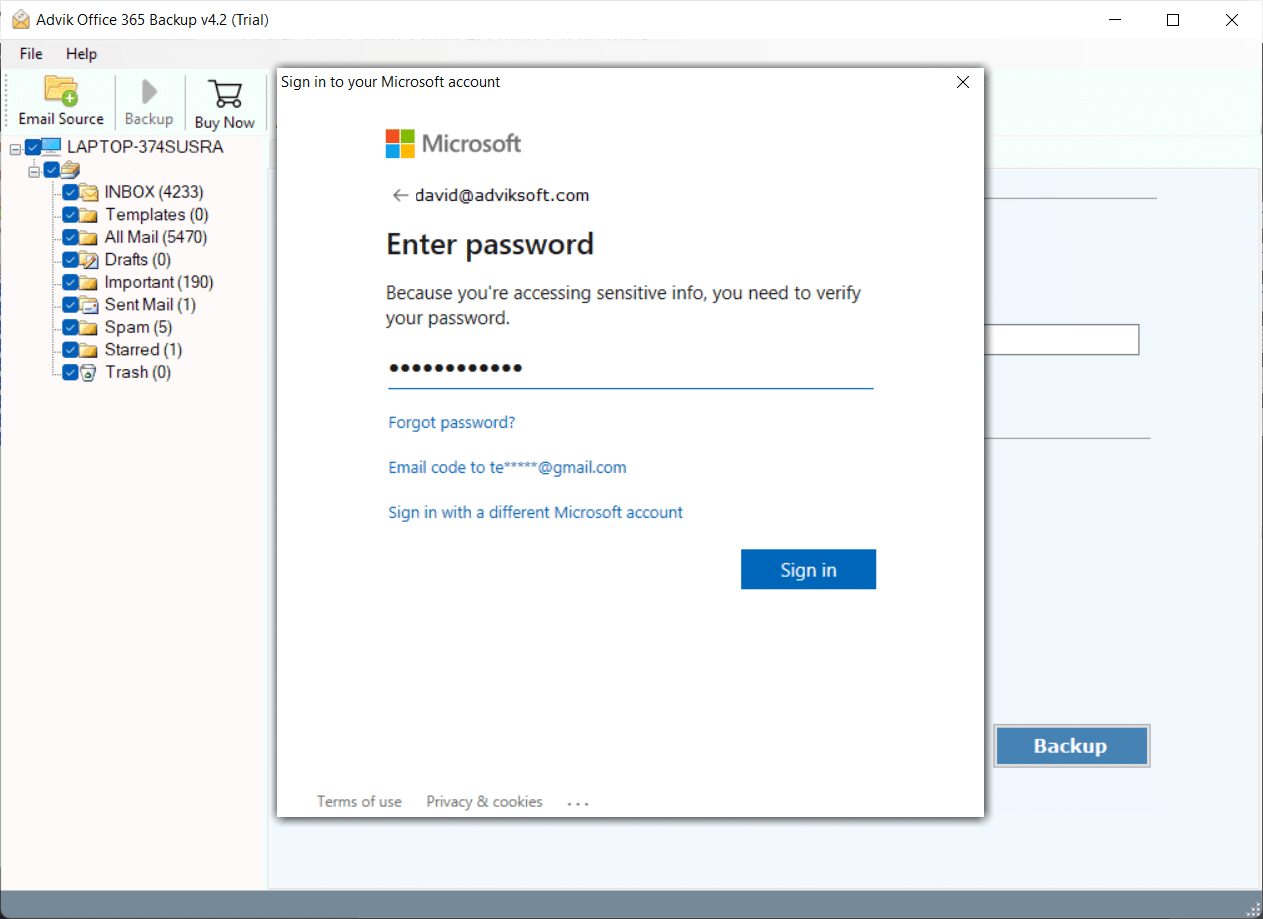
Step 6. Lastly, sign in to your Microsoft account.
Soon, the Office 365 to Office 365 migration process will start automatically.
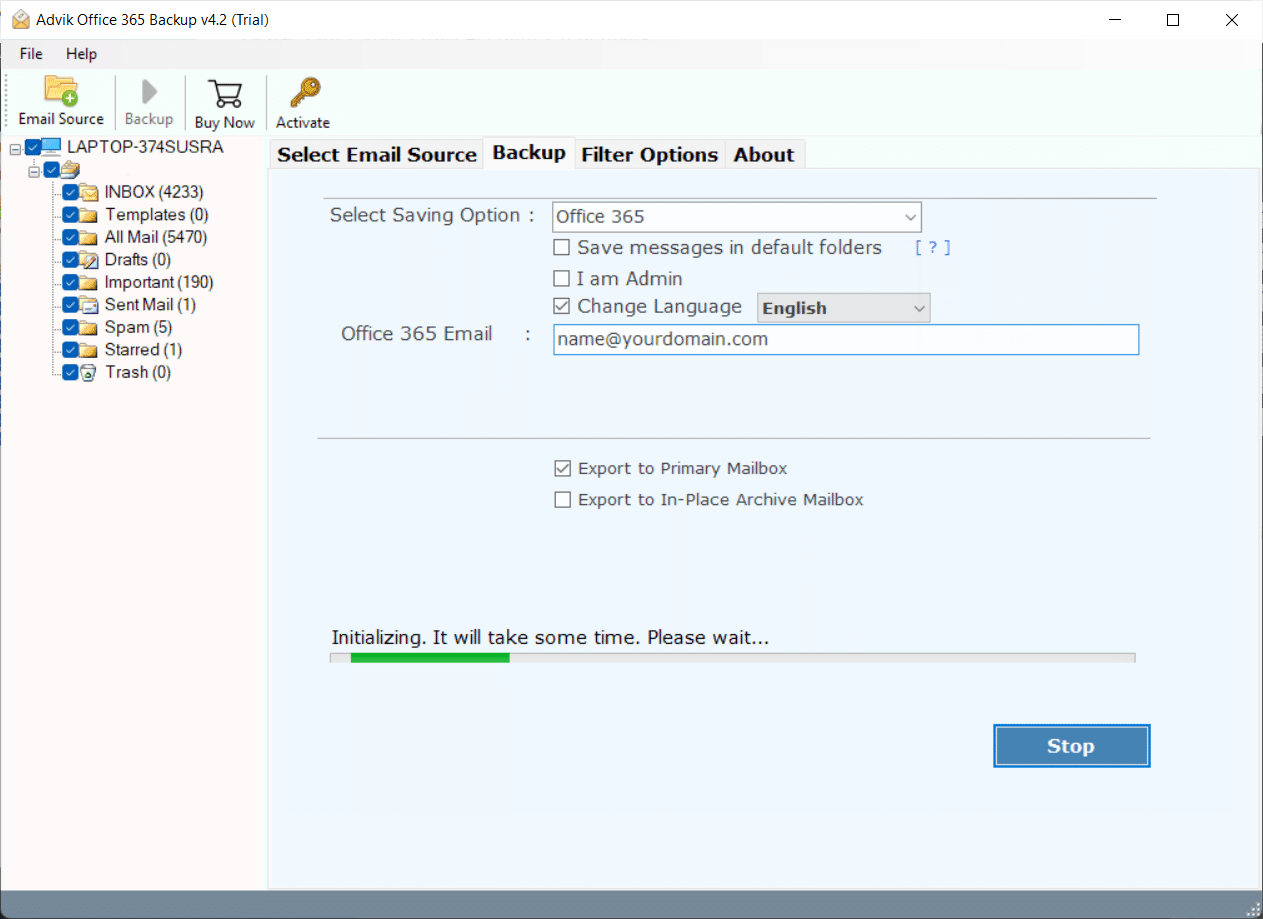
Now, sit back and relax. Let the software do the rest.
This magical wizard will transfer emails from one Office 365 account to another in no time.
Once the process is completed, log in to your Office 365 email account and check all the transferred emails there.
Watch How to Migrate Emails from One Account to Another in Office 365
Why Choose This Automated Software?
- Bulk email transfer support for moving multiple mailboxes at once.
- Export PST from Office 365 Admin in one click.
- Download all attachments from Office 365 to local drive in one attempt.
- Save Office 365 Emails to Flash Drive as a mirror copy.
- Advanced Email Filter Option for Selective Office 365 data transfer.
- Easily move Office 365 mailbox to another user in just 5 simple steps.
- Freedom to store a resultant file on any safe destination in the computer.
- Export Office 365 emails to PDF, MBOX, EML, HTML, CSV, and many more.
- Secure OAuth authentication ensures 100% data privacy and protection.
- Compatible with all Office 365 Plans, including Business, Enterprise, and Exchange Online.
- No Outlook dependency; Export and migrate emails without needing Microsoft Outlook.
- Intuitive and user-friendly interface for hassle-free migration, even for beginners.
Final Verdict
Migrating emails between Office 365 accounts is possible both manually and automatically.
- Use PowerShell if you’re tech-savvy and only need to transfer a few mailboxes
- Use a tool if you’re managing multiple users, large mailboxes, or need a simpler process
Understanding your organization’s needs will help you pick the right method.
FAQs – Move Emails Between Office 365 Accounts
Q1. Can I migrate Office 365 emails manually without third-party tools?
Ans. Yes, by using PowerShell and Exchange Online modules.
Q2. Is PowerShell safe for email migration?
Ans. Yes, if commands are entered correctly. Always double-check syntax.
Q3. Can I export only certain emails (like specific dates)?
Ans. Yes, PowerShell supports filters using ContentMatchQuery.
Q4. Do I need Outlook installed?
Ans. No, both methods work without Outlook.
Q5. What if I don’t know PowerShell?
Ans. Use an automated tool that offers a GUI-based migration process.